EasyQA Tutorial – Learn EasyQA Test Management Tool In 10 Mins
Last week I have shared TestLodge Test Management Tool Tutorial and today I would like to share EasyQA Test Management Tool. I felt that it’s very easy to use this tool. Even novice users could understand this EasyQA test management tool without putting lot of efforts. I would like to share this basic tutorial with all my readers. We all know how important is to use a tool to manage our Test artifacts such as Test Plan, Test Scenarios, Test Cases, Bug Reports etc., In this post, I will present some of the features of EasyQA such as Planning tests, Running tests, Test reports, Bug Trackers, How we manage the project and How we track activity using EasyQA. EasyQA Software Development Kit allows to catch crashes, if they appear in Android or iOS mobile applications. This we will see in another post.
Introduction – EasyQA Tool:
EasyQA is a test management tool. Using this test management tool, you and your team could plan all stages right from test plan to reporting without putting a lot of effort. It provides an easy to use google chrome extension which allows you to create and send a detailed bug report with in no time. You will get 30 days free trial to get hands-on to evaluate it. Best thing from EasyQA is you could evaluate all the features without any restriction in the trial period. You could purchase any of the cloud or standalone version.
Features of EasyQA Test Management Tool:
- Bug Tracker – To record and manage
- Plan Testing – To create test plans and test cases
- Test Run – To select and execute test cases
- Test Reports – Aesthetic graphical reports
- Manage Project – To create organizations and projects
- Track Activity – To track activities of project progress and project members
- Crash Reports – Catches crashes on Android and iOS mobile application
- Build Distribution – Allows to upload iOS and Android builds up to 1 GB
- Integration with Major Bug Tracking Tools – GitHub, GitLab, YouTrack, JIRA, RedMine, Pivotal Tracker
Let’s get started with Easy QA Tool.
SIGN IN – EASYQA
Step 1: Open EasyQA Site
Step 2: Sign up using email or Facebook or Gmail
Step 3: Dashboard will be displayed once you did log in
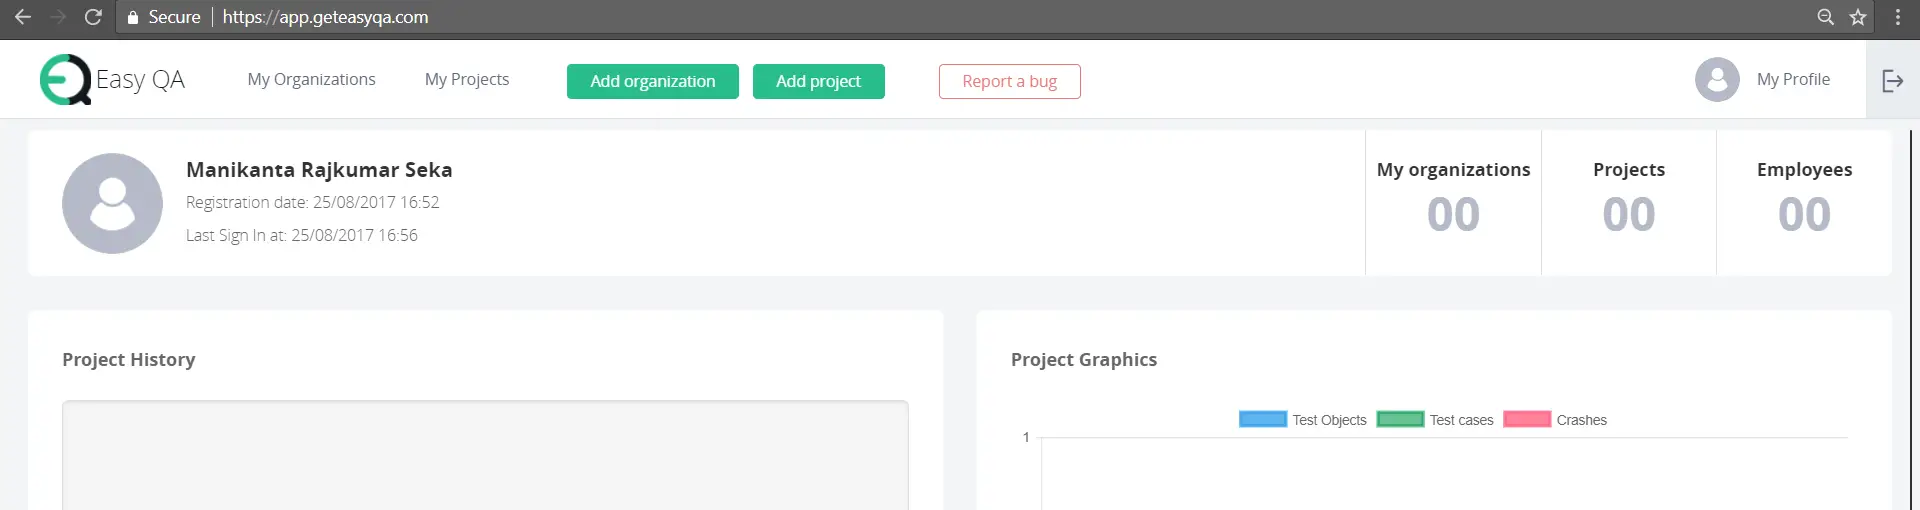
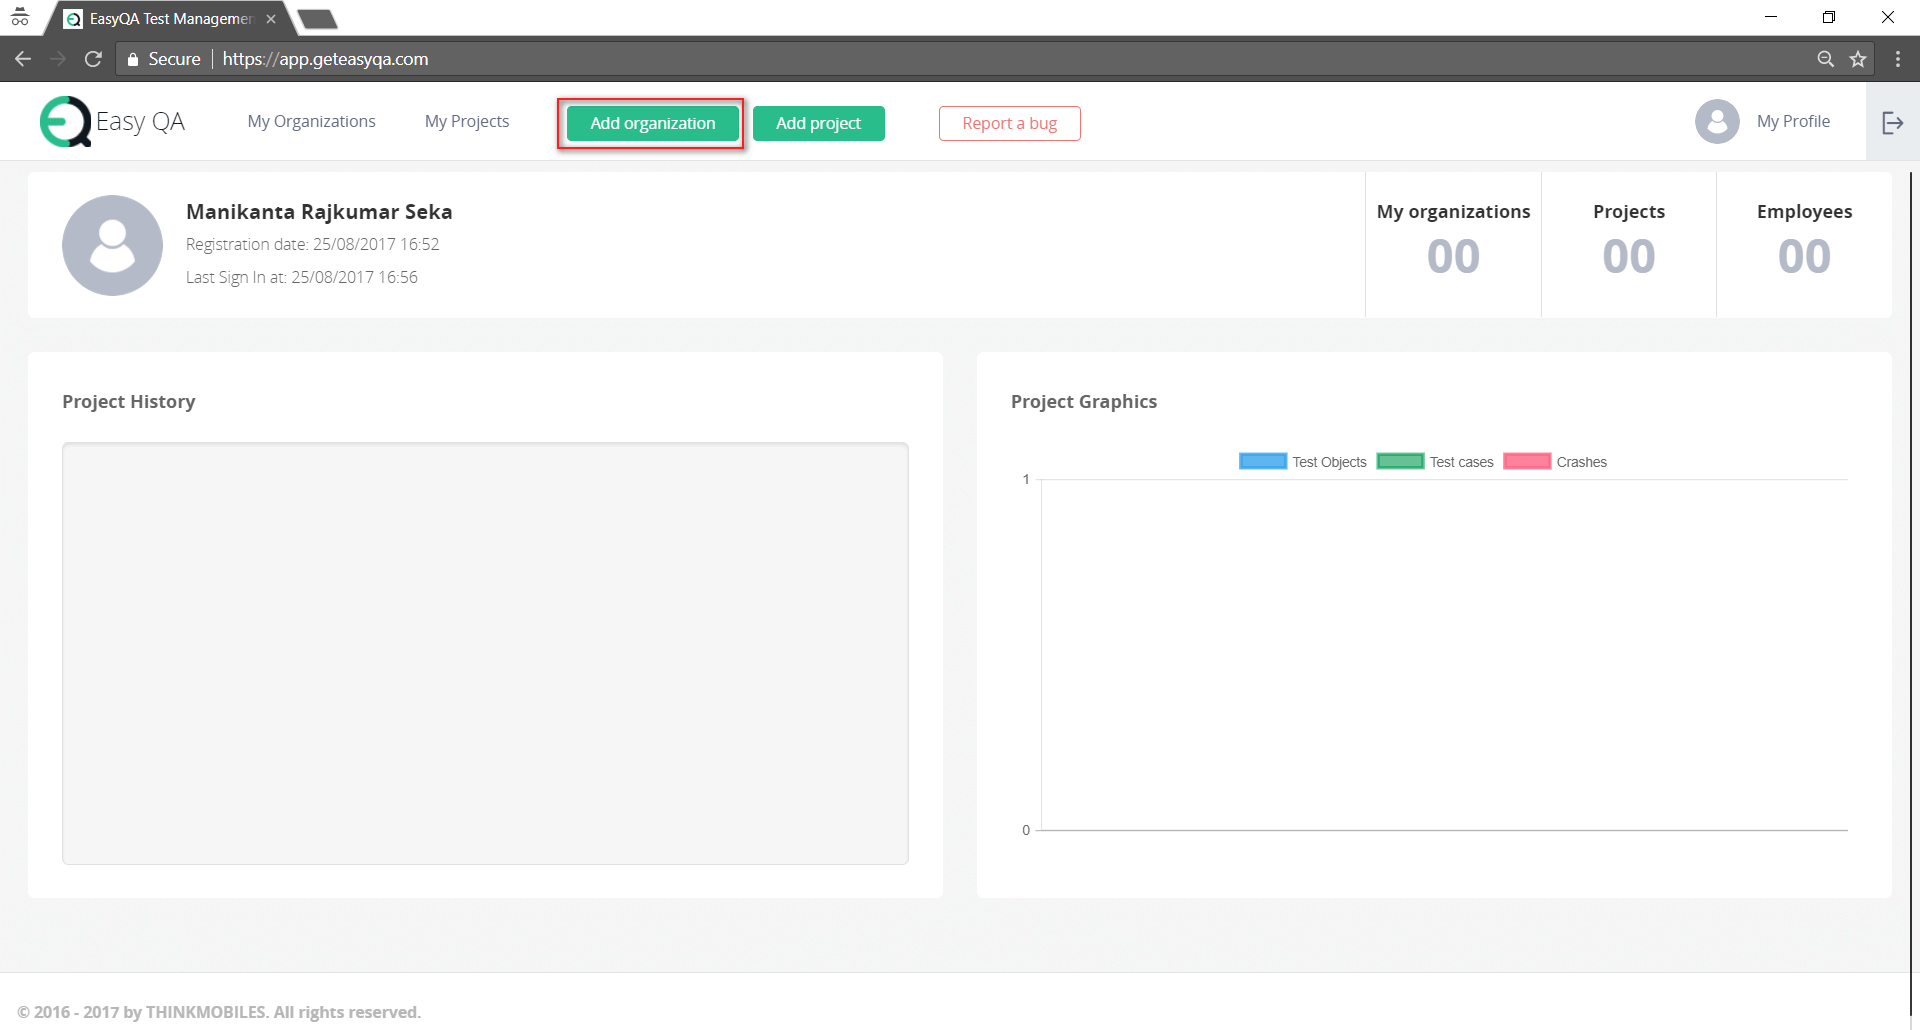
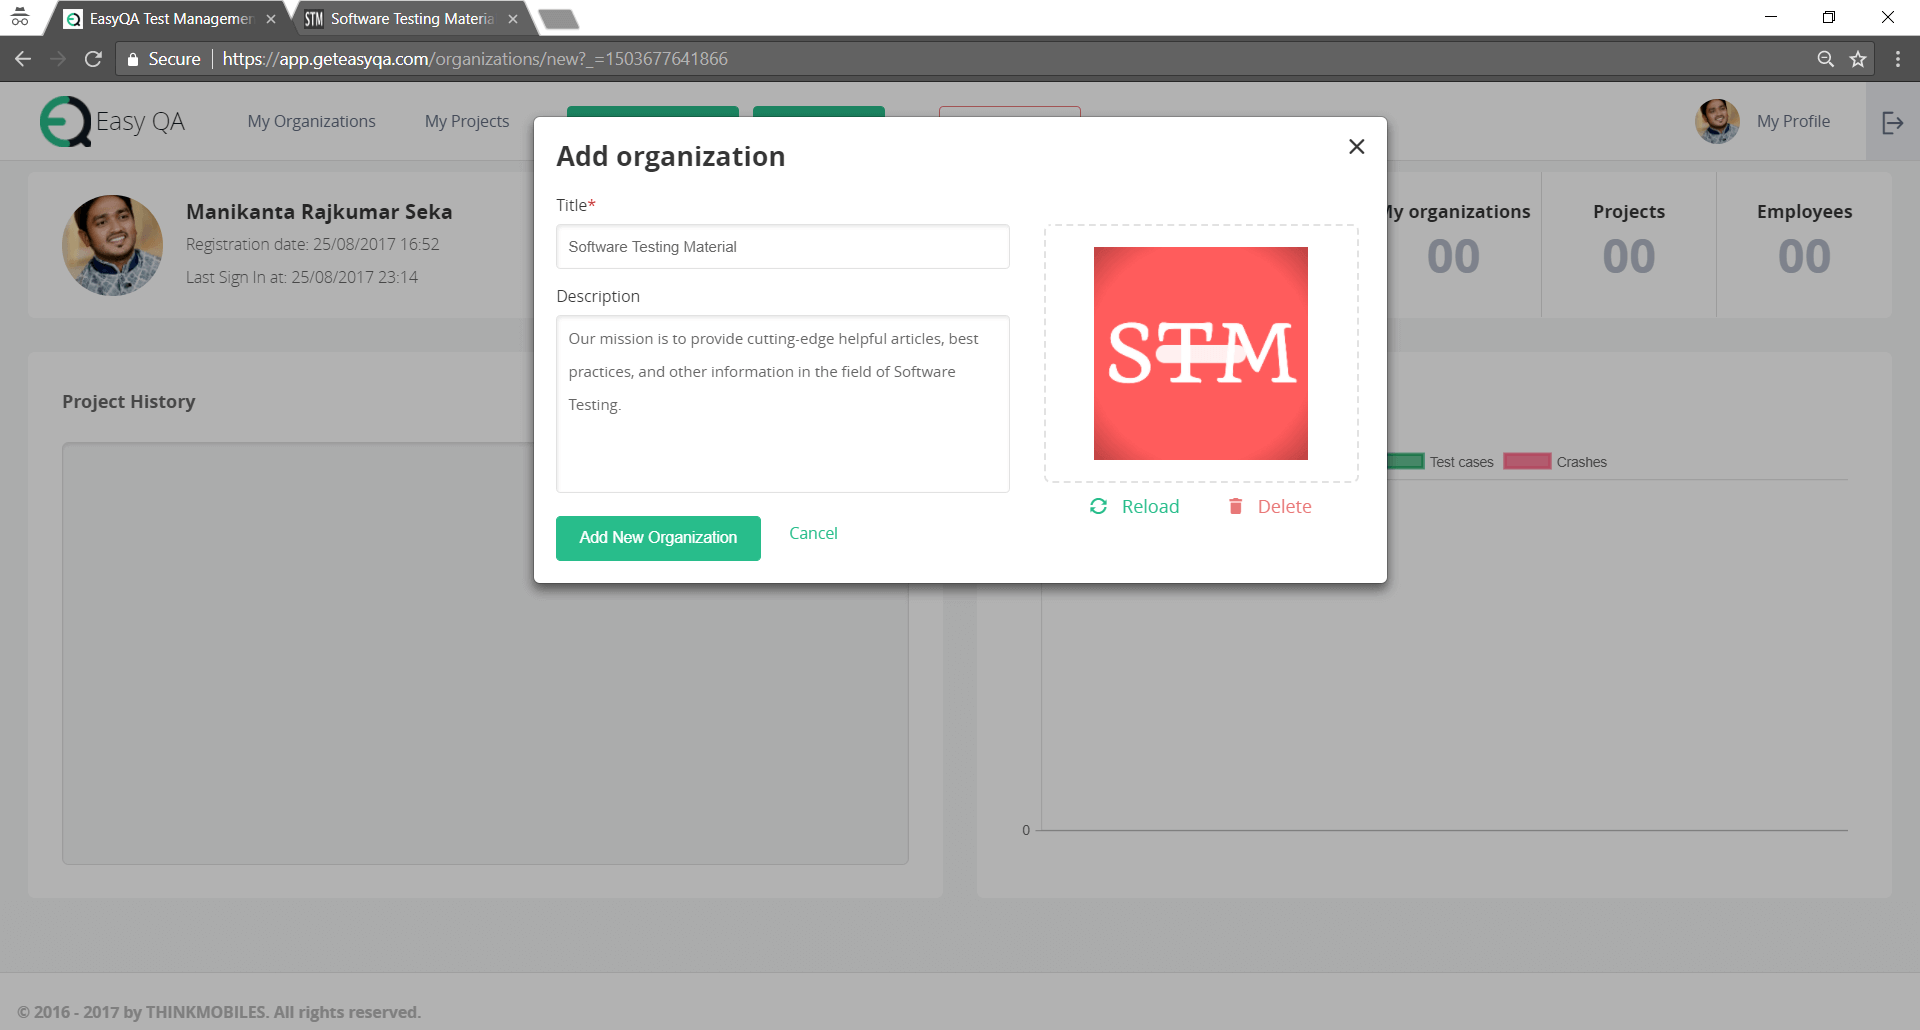
CREATE ORGANIZATION
You could create Unlimited Organizations and Project (Projects creation will come in the later steps). Once you have created an Organization, you could invite members to the Organization.
Step 1: Click on the ‘Add Organization’ tab
Step 2: Add the ‘Title of your organization’ and ‘Description’. You could also upload your organization logo here
INVITING MEMBERS
Members will receive an email. Once they approve then they could become a part of the project.
Step 1: Go to ‘My Organizations’ and Choose Organization (of your choice) and click on ‘Add Members’
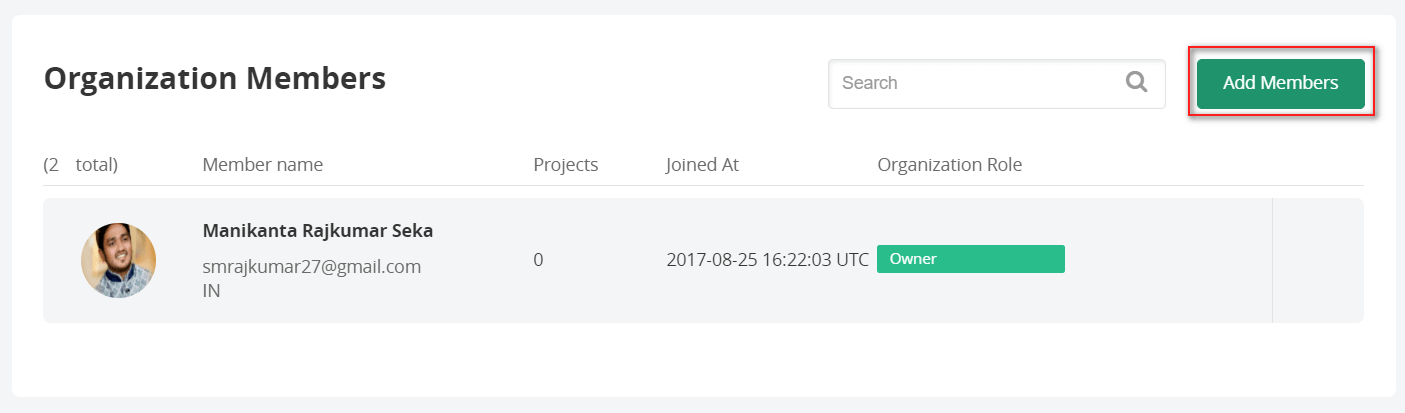
Step 2: Enter email(s) of the member whom you want to include in the project and click on ‘Add member’

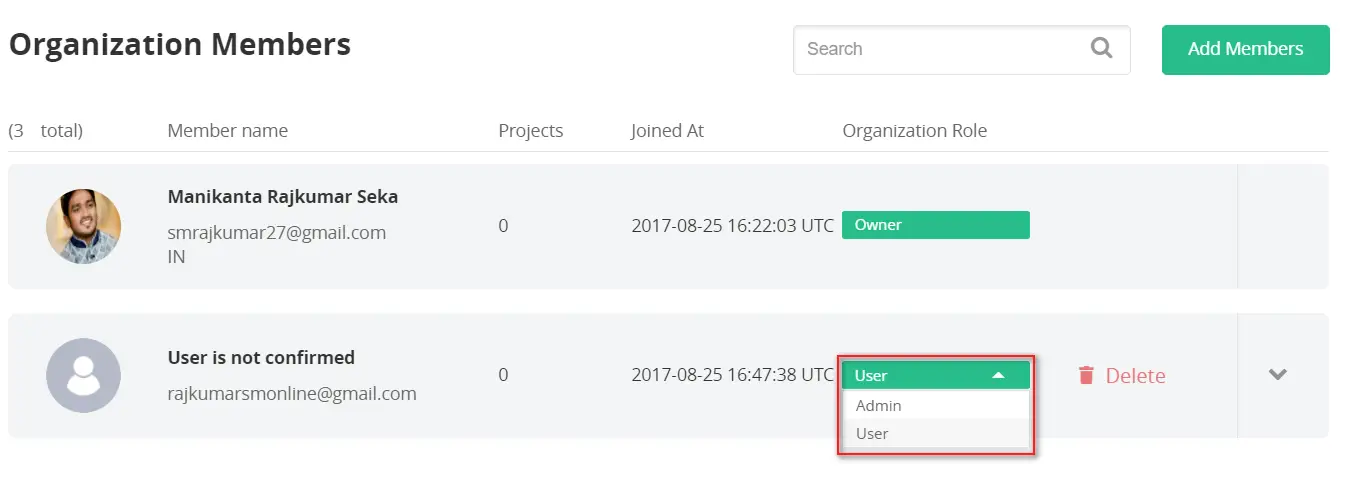
Step 3: You could assign role to the members as shown in the below image
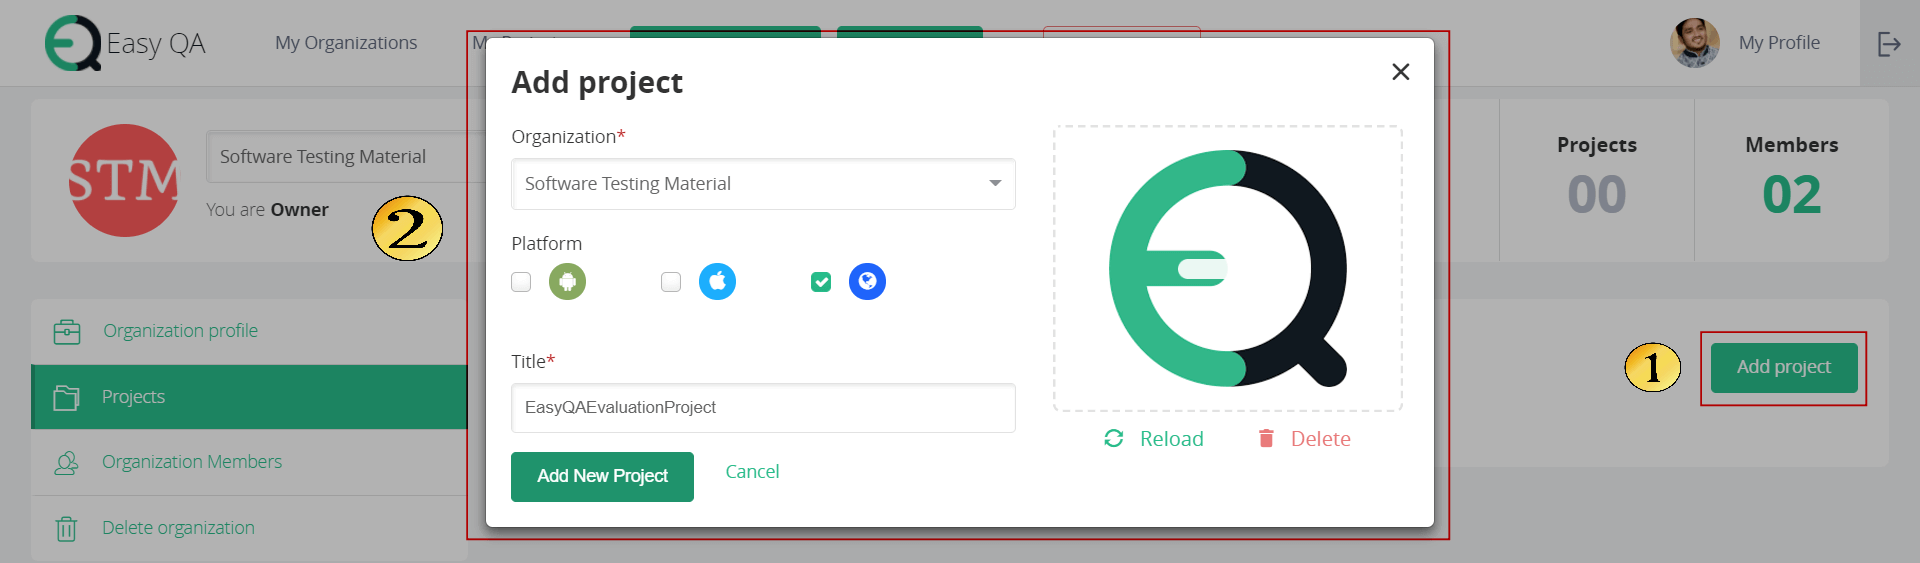
CREATING PROJECT
In the above screenshot, you could see that I have added one user. Now I have logged
You could add projects and assign members to the projects with specific roles.
Step 1: Click on ‘Add Project’
Step 2: Choose ‘Organization’, ‘Platform’, ‘Title’ and an ‘Image’
Note: I have added a member in the project. Below screenshot is captured from that members account.
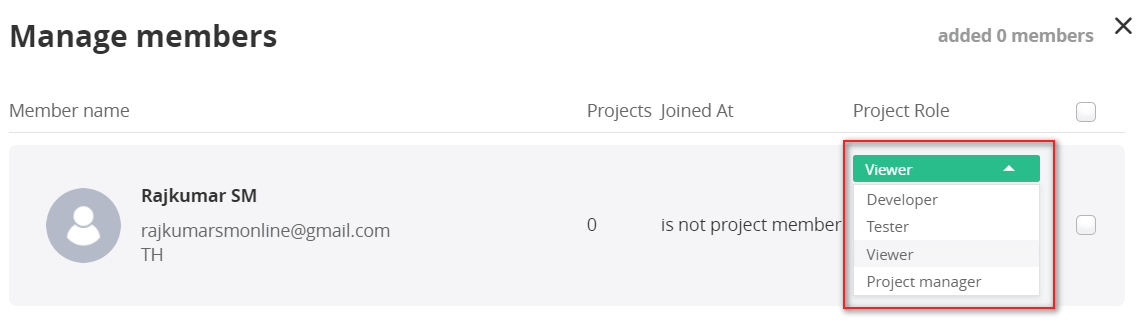
MANAGING MEMBERS IN THE TEST PLAN
You could assign roles to the members in the project.
Step 1: Go to ‘Manage Members’ and choose roles (Developer, Tester, Project Manager or Viewer)
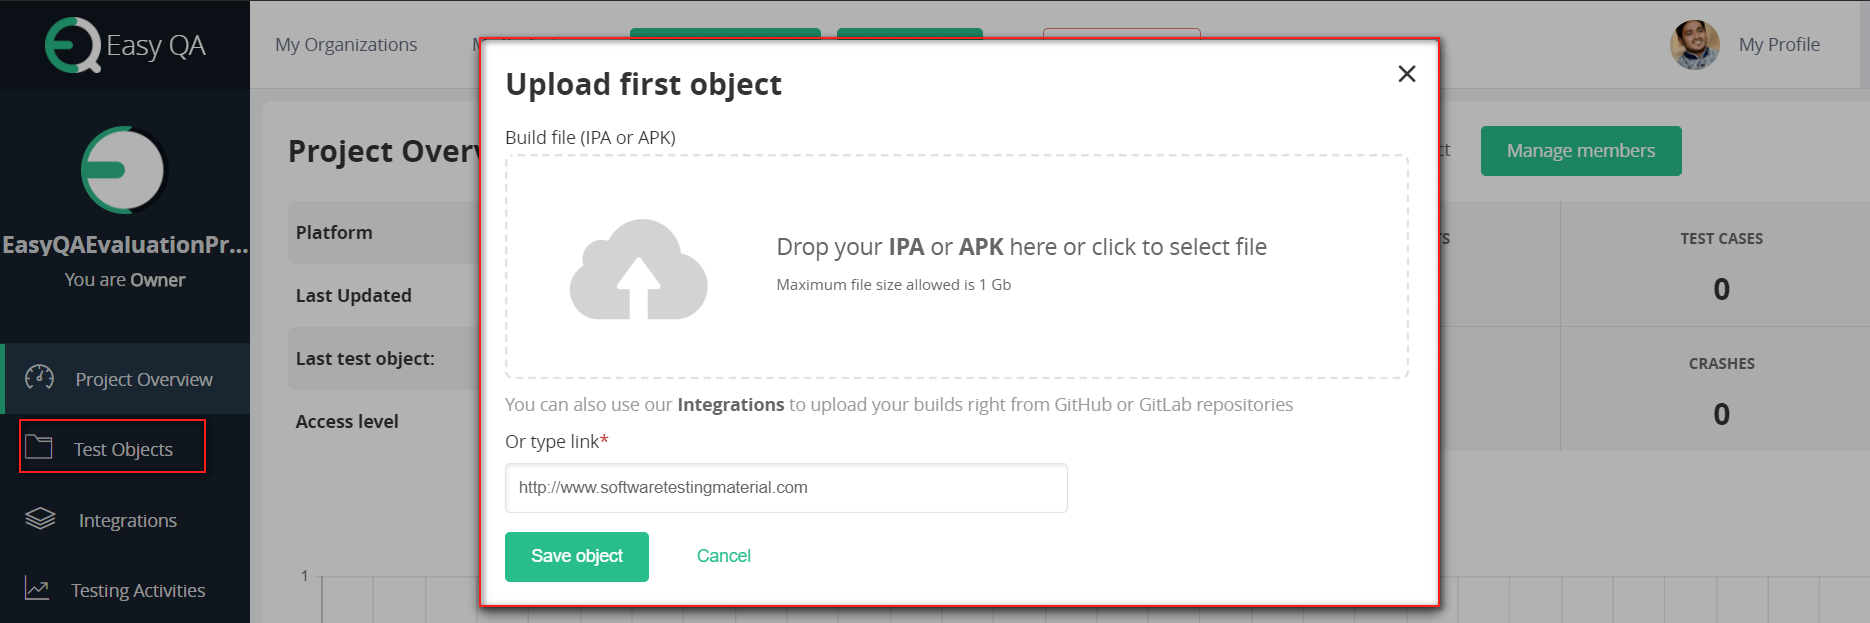
CREATING TEST OBJECTS
Let’s create Test Objects and then we could create Test Plan and Test Cases.
Step 1: Go to Test Objects in the Left panel and click on ‘Add Test Object’
Step 2: You could link URL or Drag & Drop your IPA or APK
Once you are done, you could send the link to members by email.
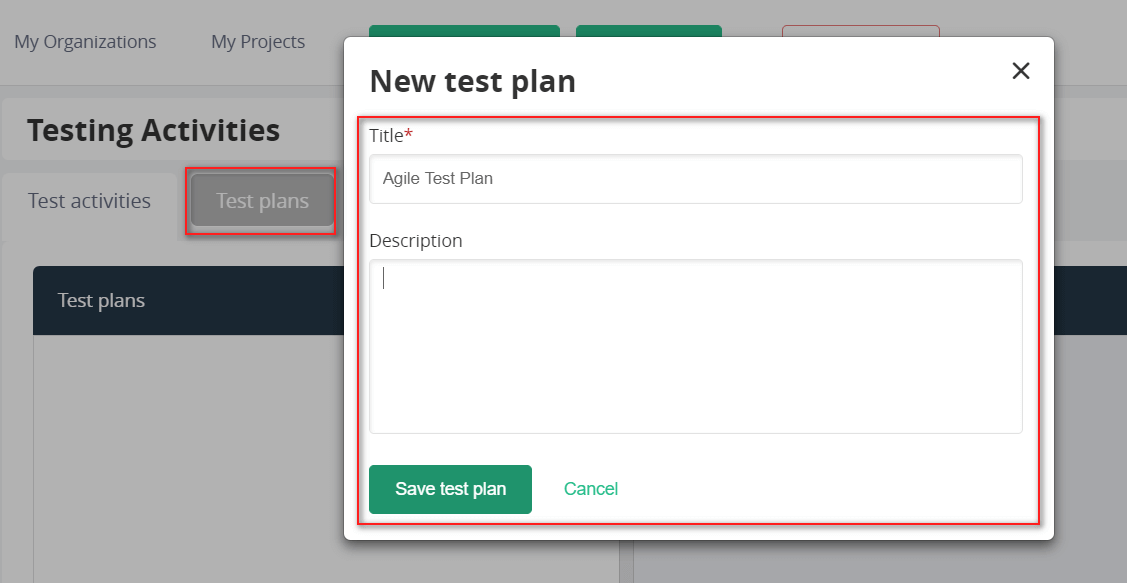
CREATING TEST PLANS
Step 1: To create a plan, click on ‘Test Plans’ tab and click on ‘New Test Plan’
Step 2: Enter ‘Title’ and ‘Description’ and click on ‘Save test plan’
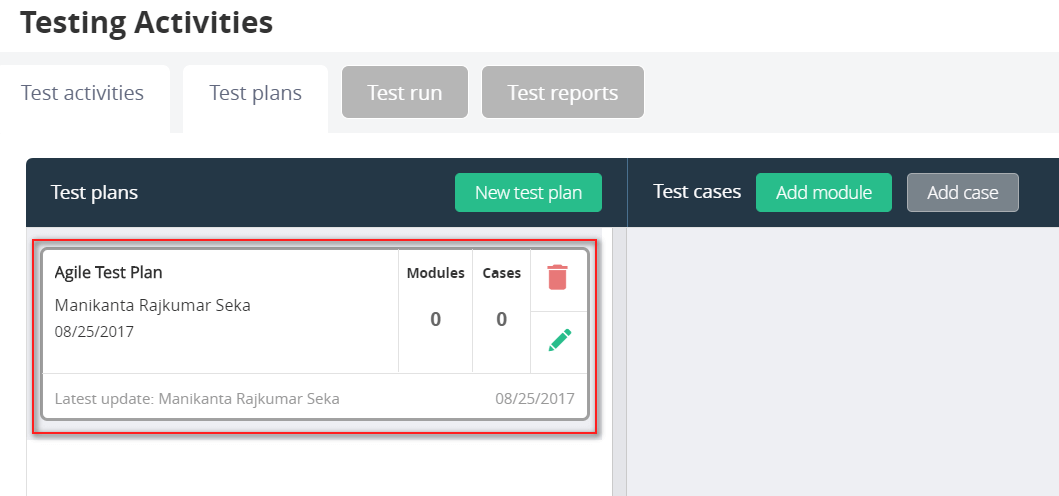
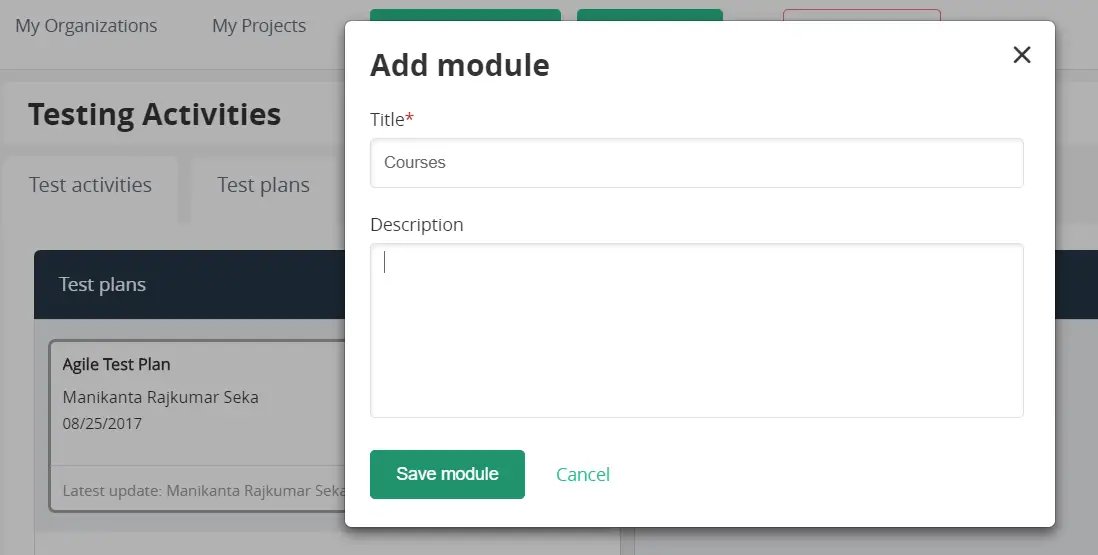
CREATING MODULES
Step 1: Click on ‘Add Modules’ next to ‘Test cases’ tab
Step 2: Enter ‘Title’, ‘Description’ and click on ‘Save’
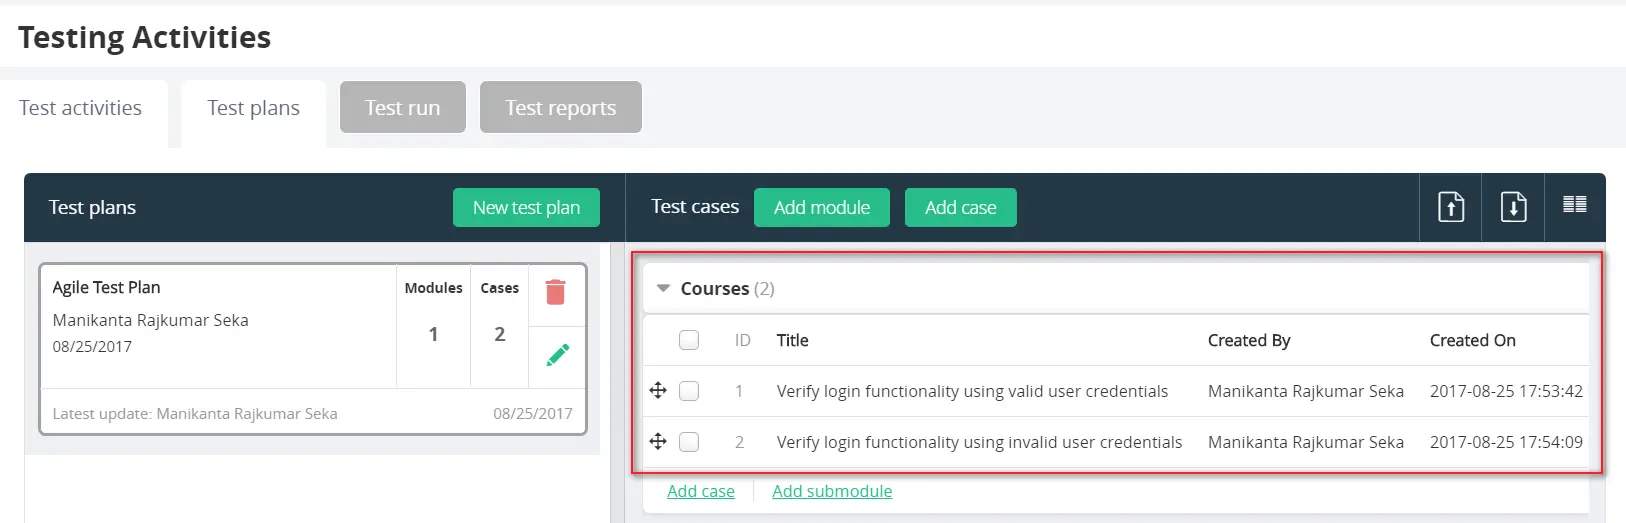
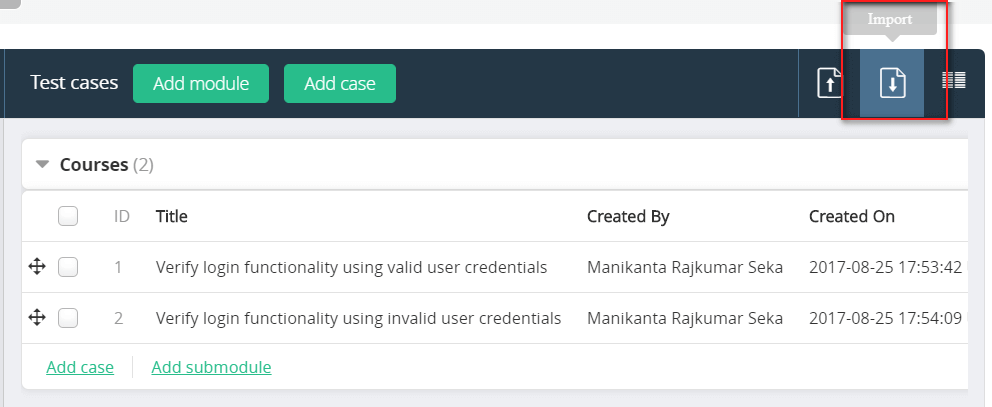
CREATING TEST CASES
You could add ‘Test Cases’ once you have added the ‘Module’
Add Test Cases: Click on ‘Add Case’ to add Test cases.
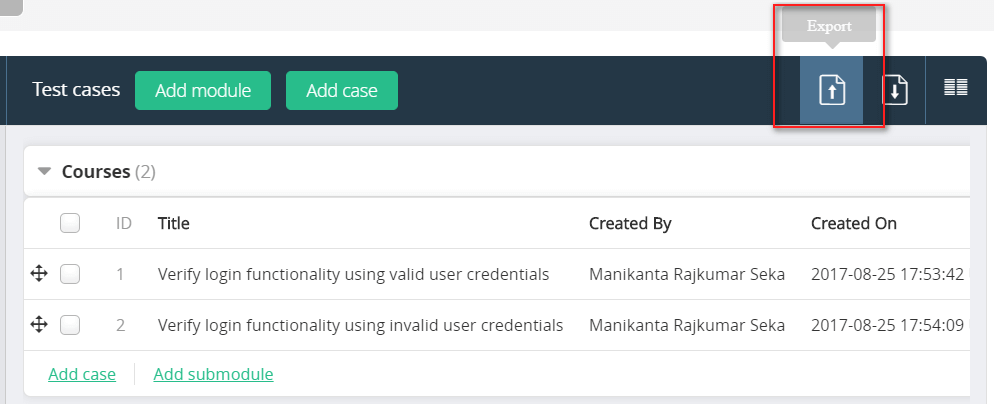
Export Test Cases: Click on ‘Export’ as shown in the below screenshot to export all the test cases
Import Test Cases: Click on ‘Import’ as shown in the below screenshot to import test cases
Choose ‘Test Plan’ from the drop down list
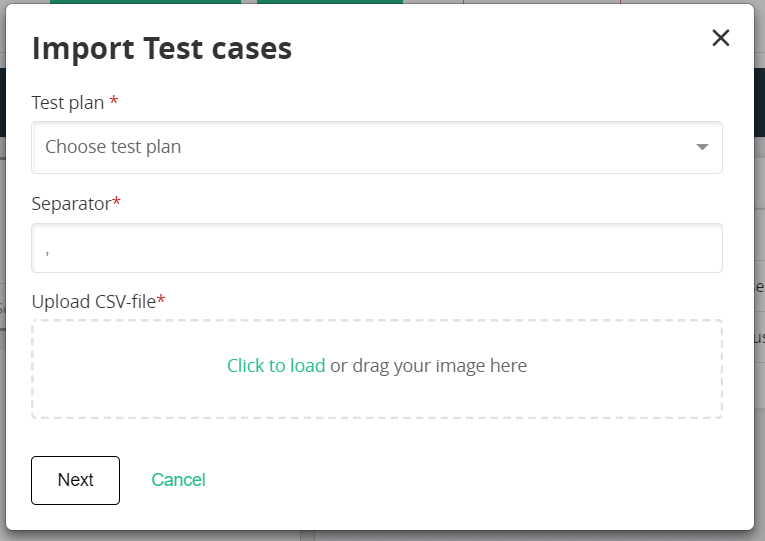
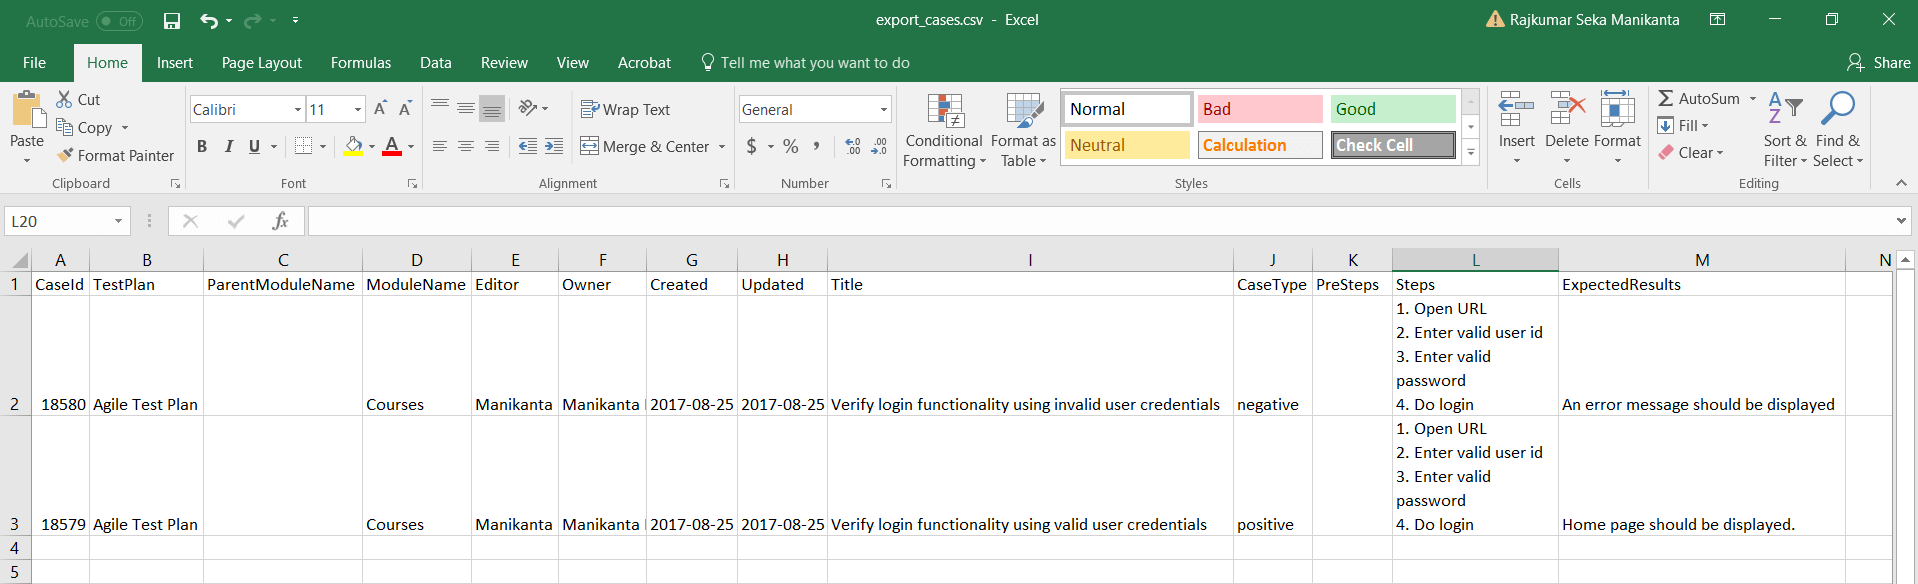
Upload ‘CSV’ file where you have stored test cases and click on Next to import test cases.
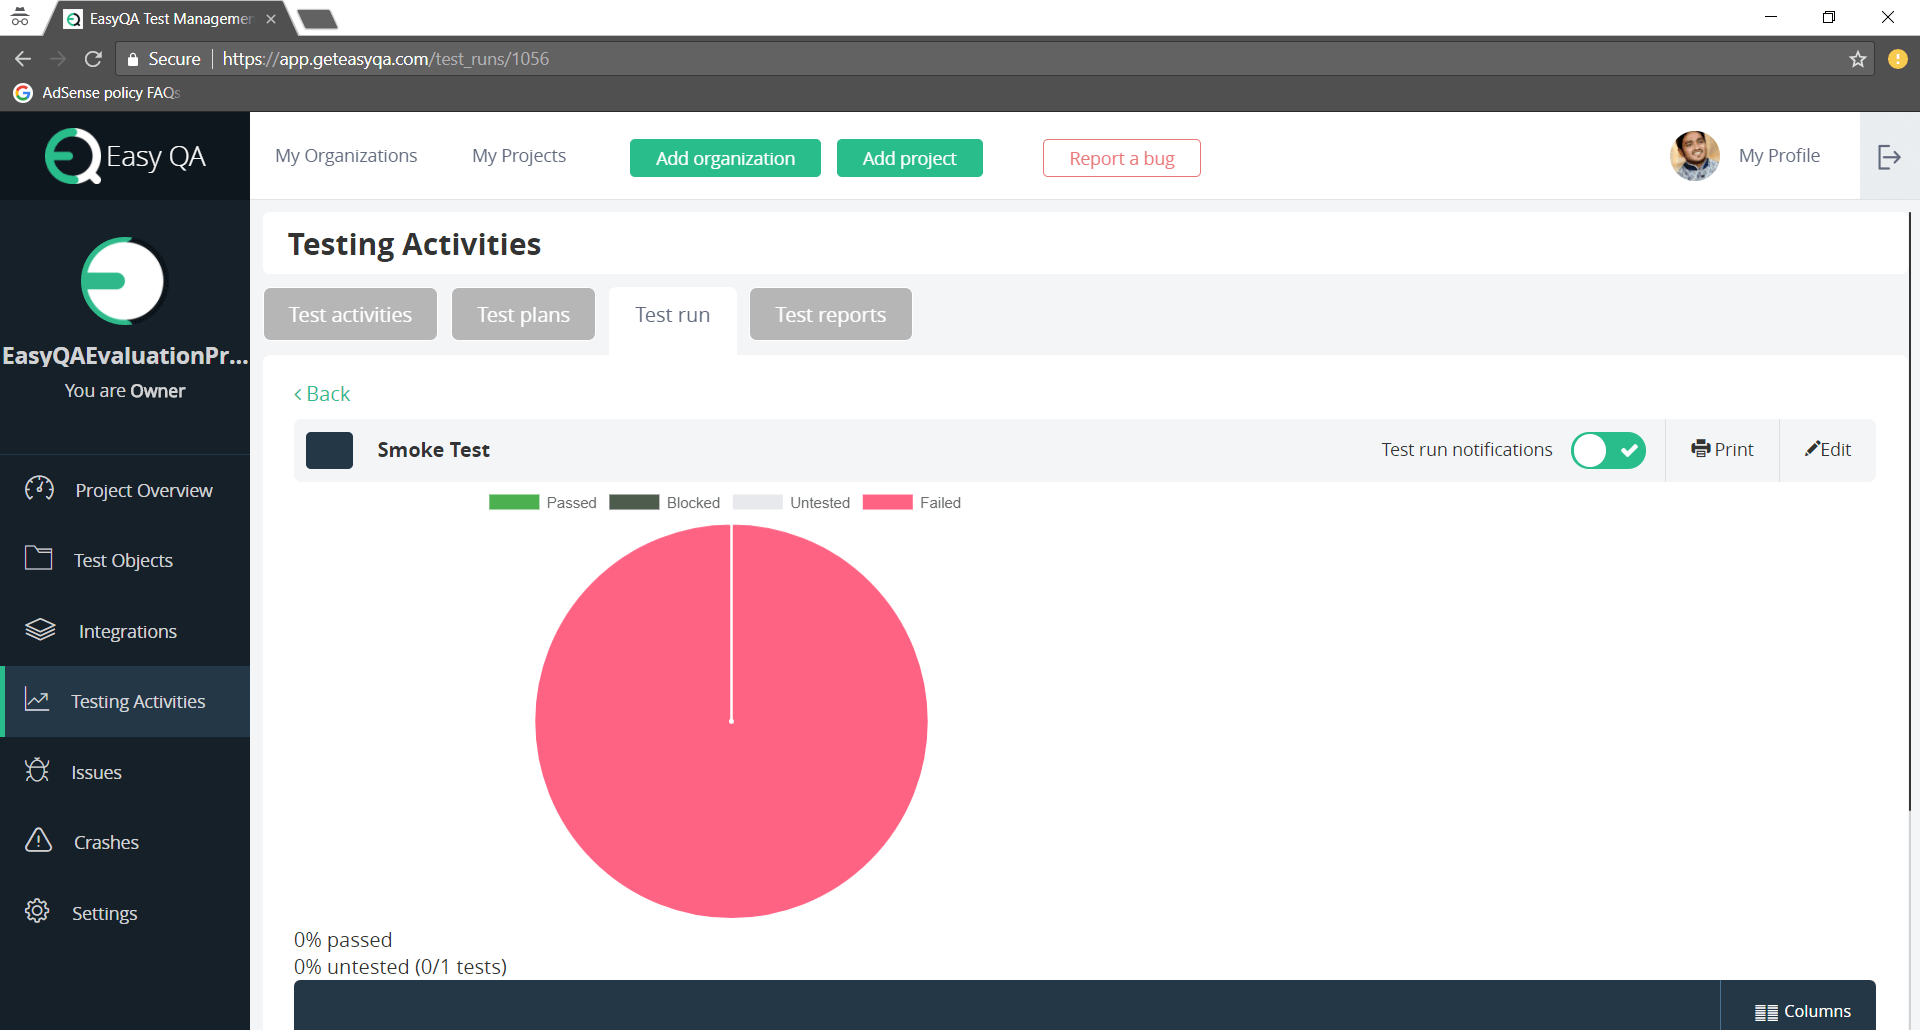
TEST RUN
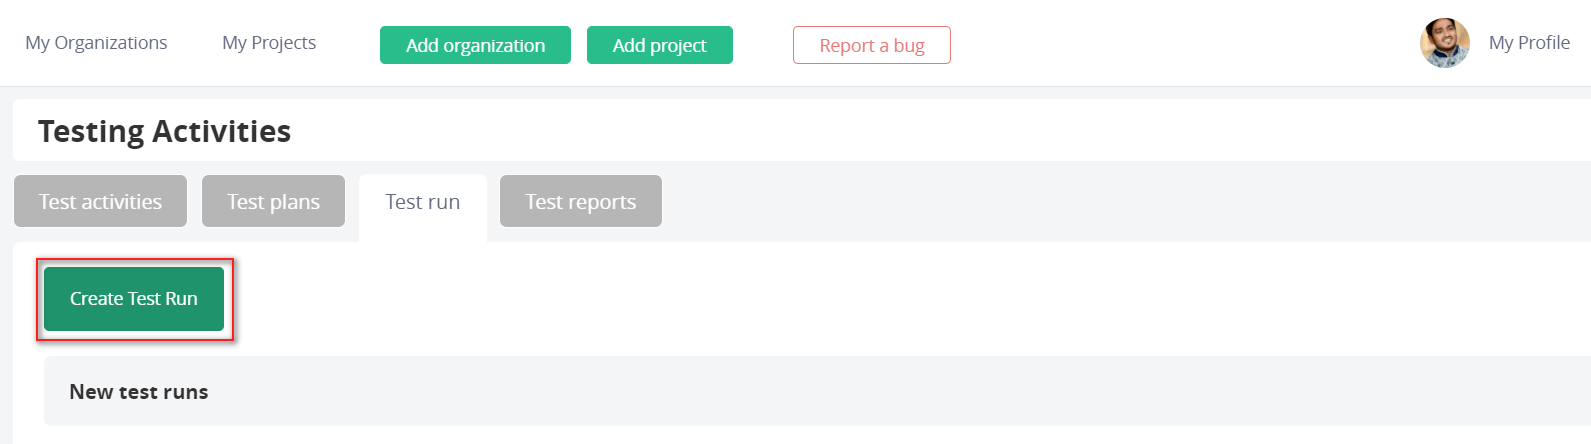
Step 1: Go to ‘Test run’ tab and click on ‘Create Test Run’
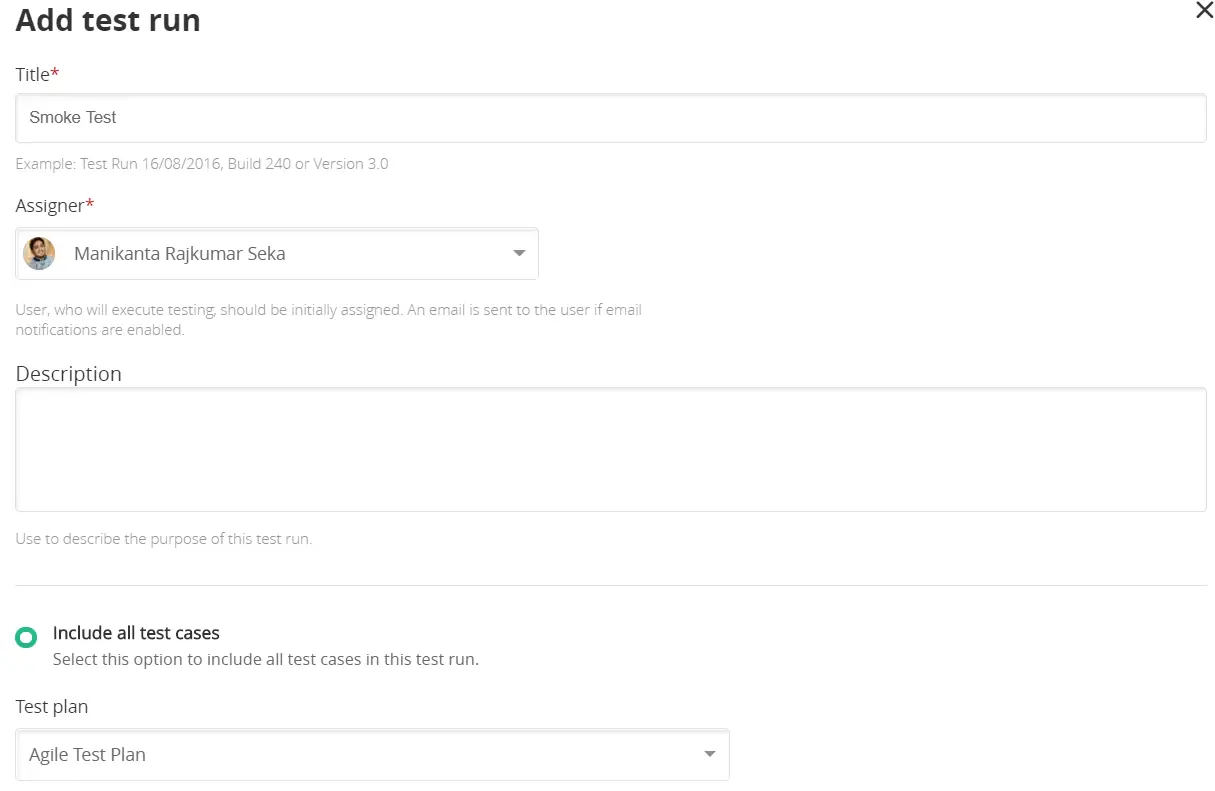
Step 2: Enter ‘Title’ and choose a member from the ‘Assigner’ drop down and choose ‘Test plan’
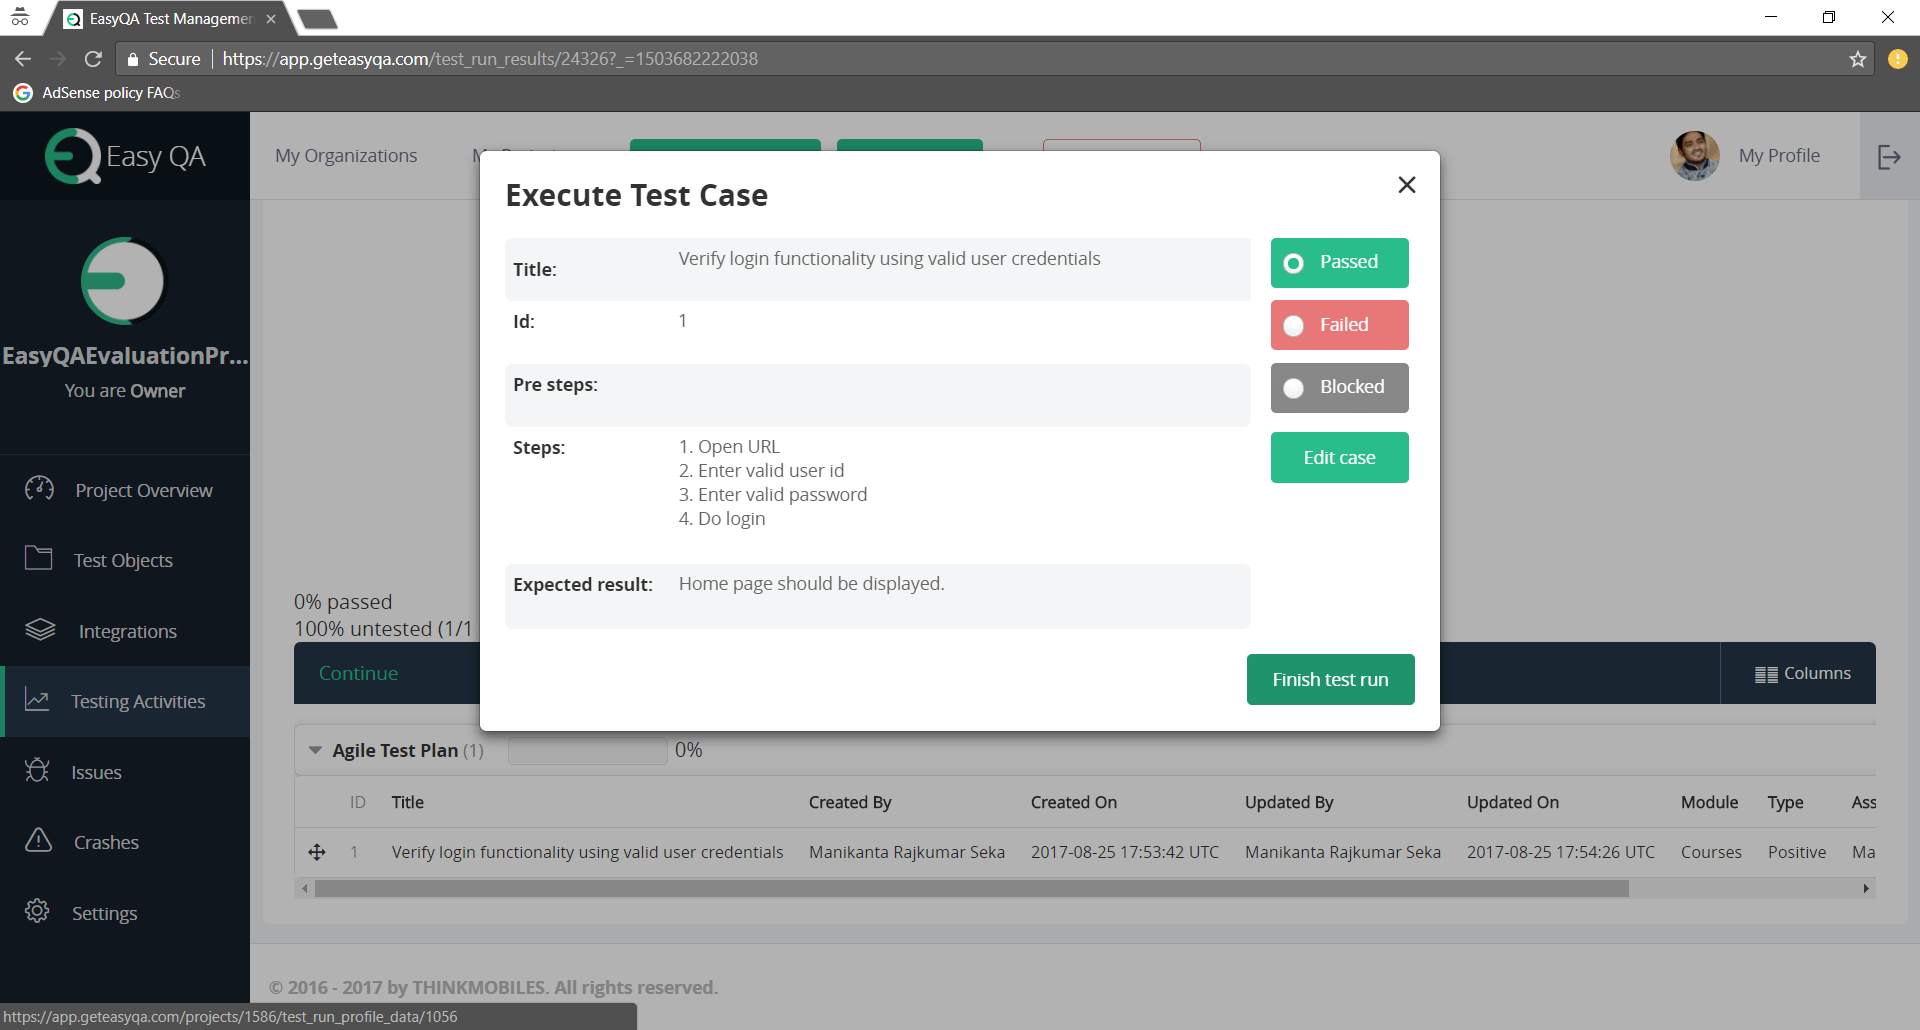
Step 3: In the ‘Execute Test Case’ tab, you could select ‘Passed’, ‘Failed’ or ‘Blocked’ based on your result and click on ‘Finish test run’
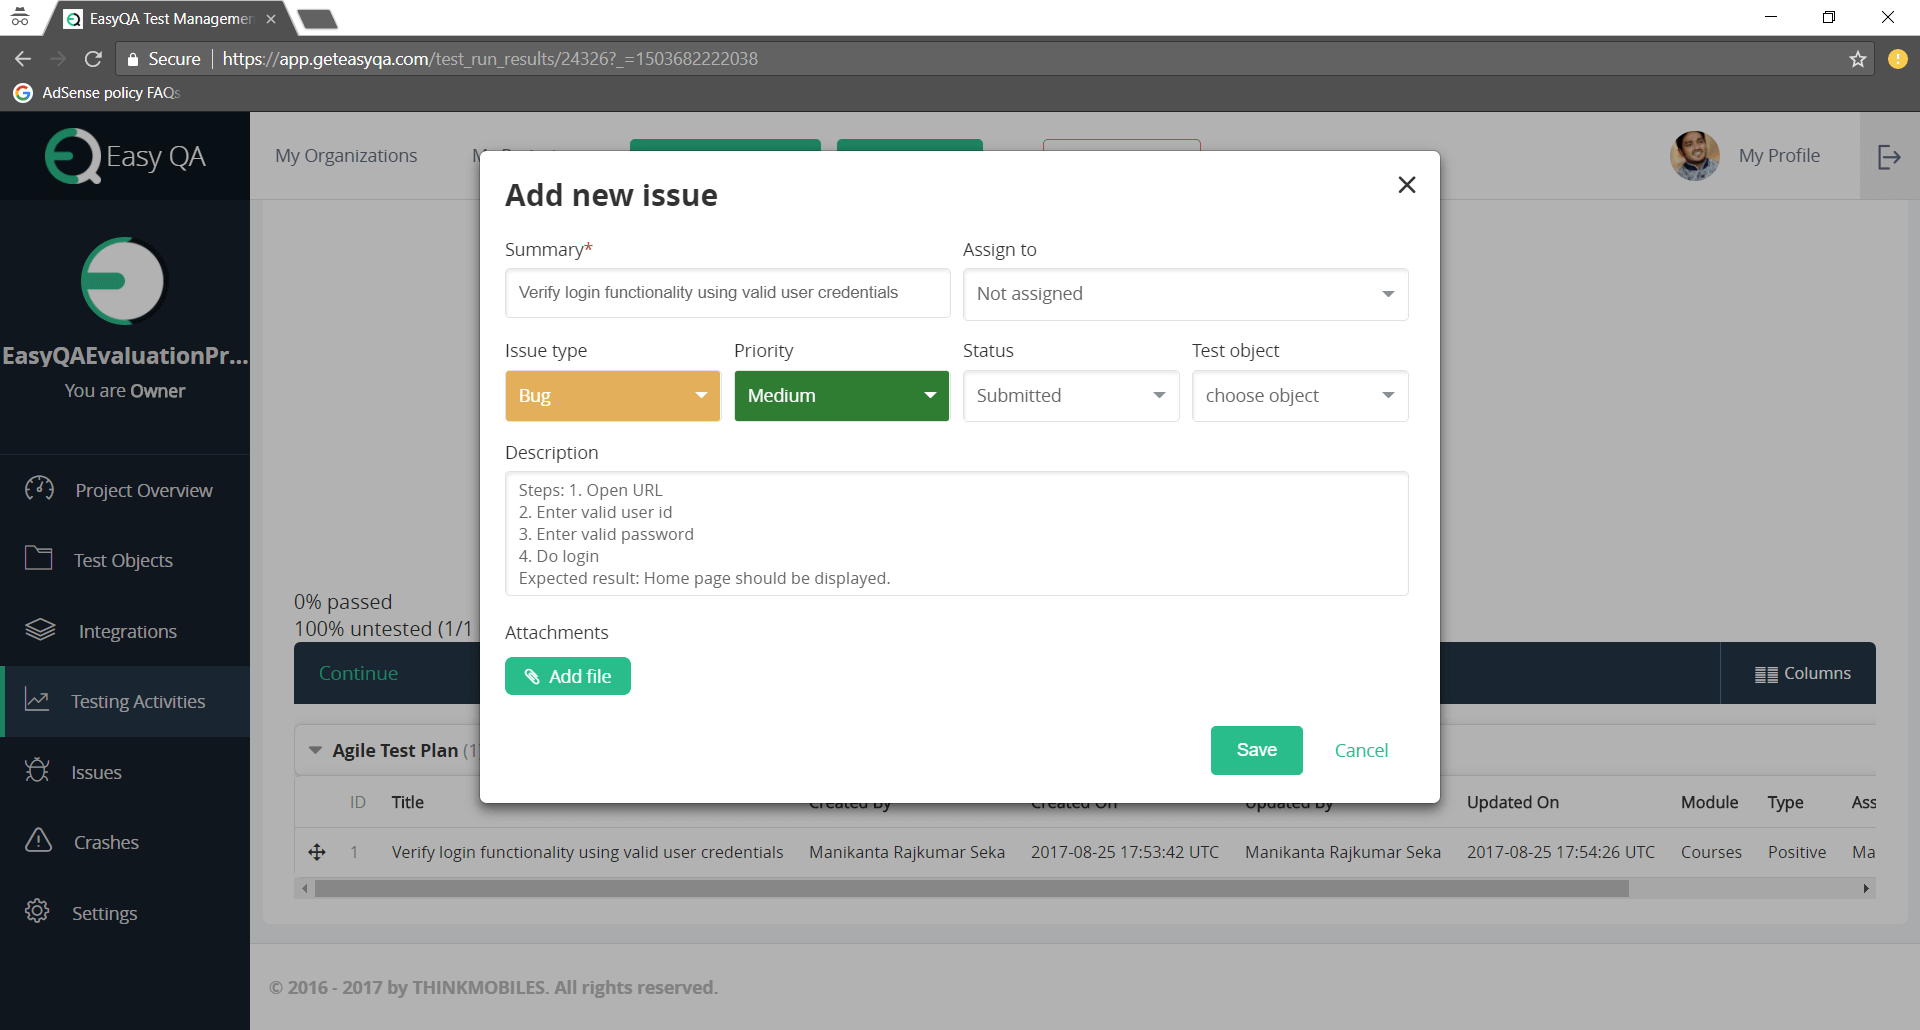
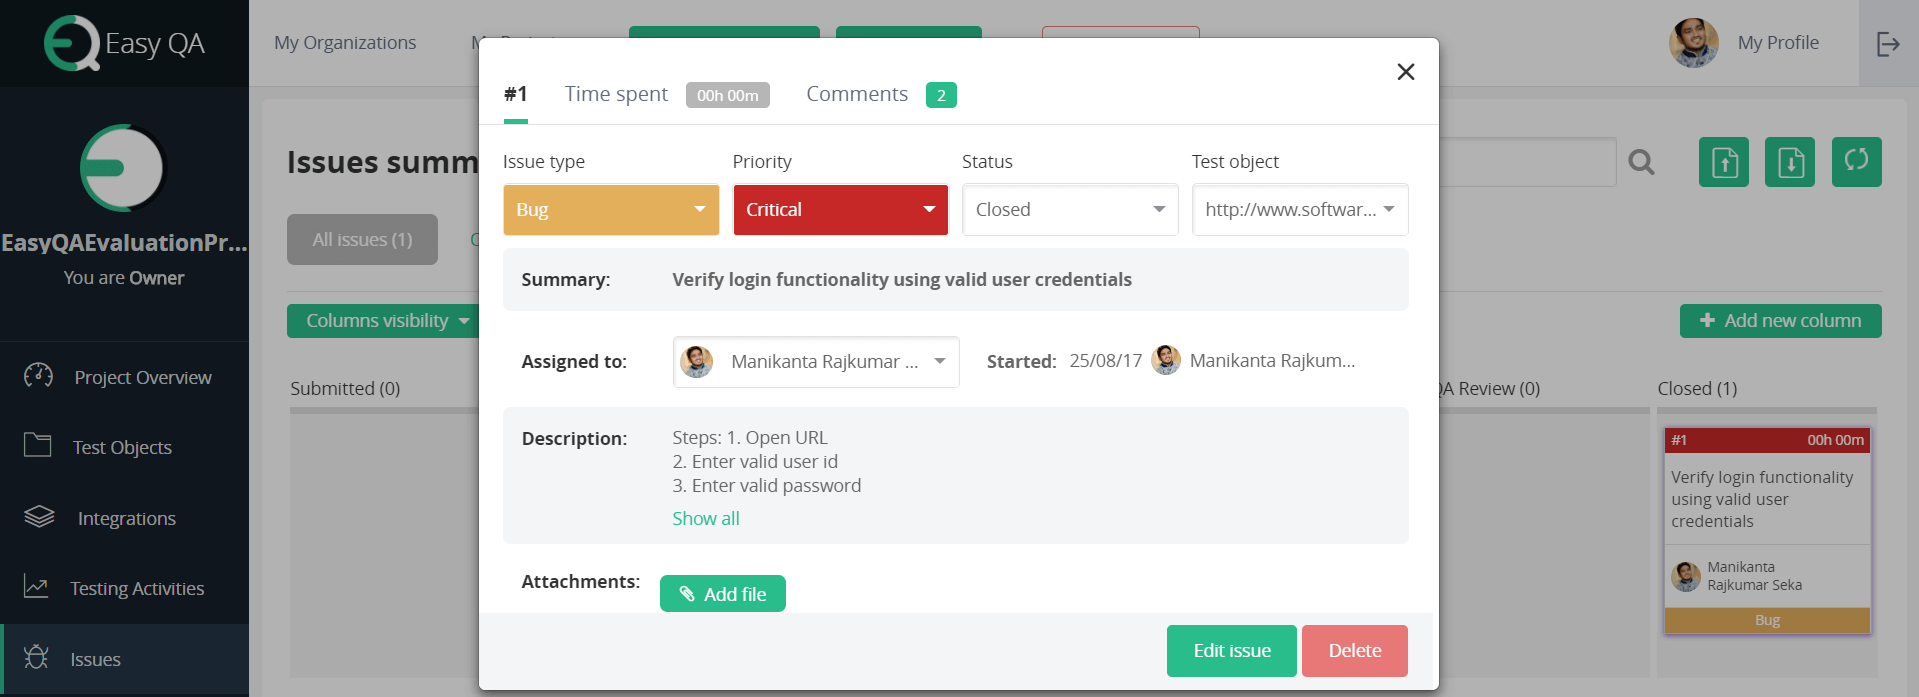
Step 4: If the test run is failed then you could record issue by clicking on ‘Add new issue’ button
Choose ‘issue type’, ‘priority’ status’ and other fields as shown in below screenshot and click on ‘Save’
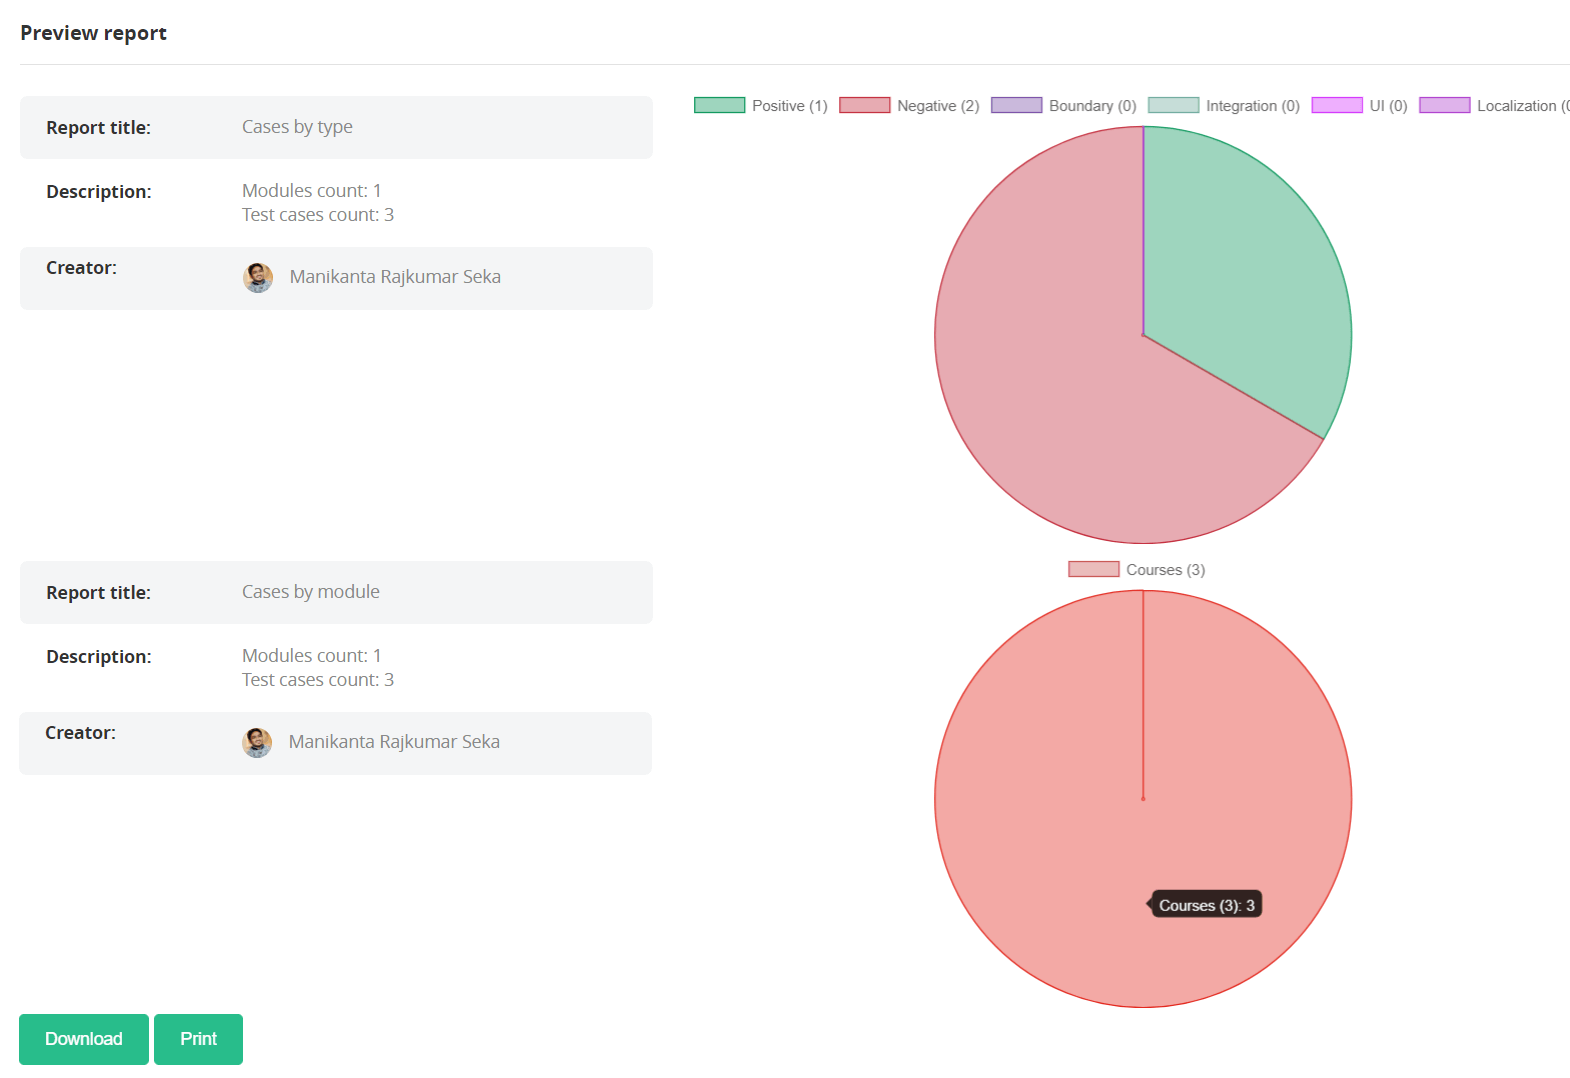
TEST REPORTS – GRAPHICAL HTML REPORTS
Graphical reports of EasyQA Test Management Tool looks like below.
You could also generate reports in PDF format.
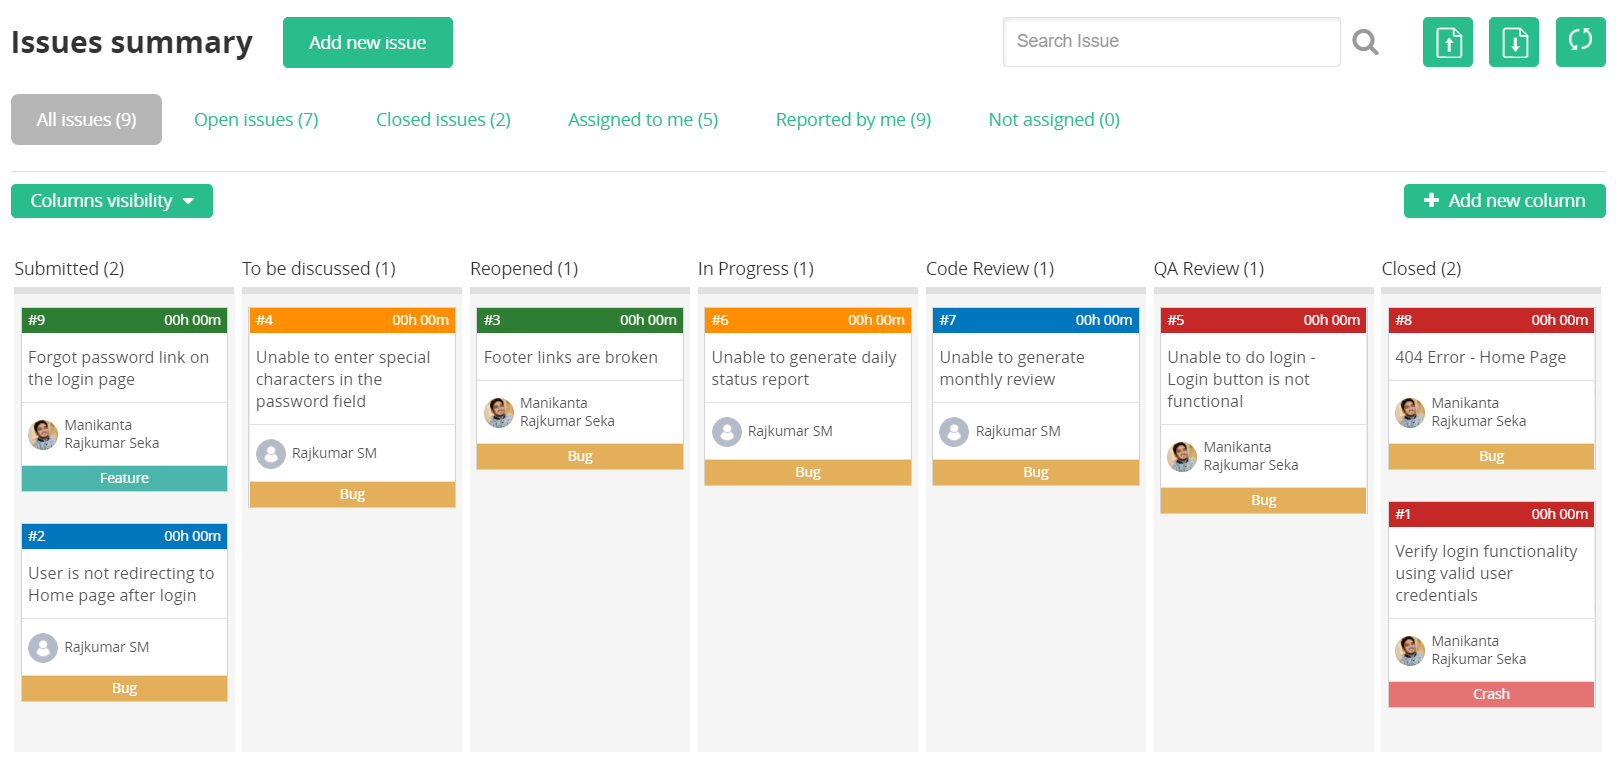
AGILE BOARD
EasyQA provides agile board and in the agile board you could easily identify the status of each issue. You could also drag and drop the issues from one column to another.
This is all about this Test Management Tool. It’s your turn now to try EasyQA Test Management Tool. Share you thoughts in the comments below about this tool.
Related Posts:
- Best Test Management Tools in 2023
- Popular Defect Tracking Tools in 2023
- Best Cross Browser Testing Tools in 2023
- Top Automation Testing Tools in 2023
- Best Penetration Testing Tools in 2023
- Web Application Testing Tools
- Regression Testing Tools
- Performance Testing Tools
- Open Source Security Testing Tools
- Kualitee – Your Next ALM Alternative!