TestLodge Test Case Management Tool Integration with JIRA
Earlier we have posted complete TestLodge Test Case Management Tutorial. Today, we are going to showcase how to integrate TestLodge Test Case Management Tool with JIRA.
If you are new to TestLodge or JIRA, here is a brief idea on both TestLodge & JIRA.
What is TestLodge?
TestLodge is a test case management tool which supports you to create test plans, test cases, test runss, defects and reporting. Learn more here
You can signup today for 30 days free trail here
What is JIRA?
JIRA is a project management and issue tracking tool. Learn more here.
Recently, TestLodge announced that they have updated the TestLodge integration with JIRA. TestLodge recommends test teams to write test cases on TestLodge and use JIRA as an issue tracker to achieve best results. With the latest development (by TestLodge), we could easily link JIRA Projects on TestLodge and If a test case fails in TestLodge, then the integration will creates an issue on JIRA (It will be taken care completely by TestLodge and there wont be any manual intervention). Read more here
Image Source: TestLodge.com
Are you using TestLodge for creating and managing your test cases and JIRA as a bug tracker then this tutorial is for you. Eventhough you are not using these tools, it will be helpful for you to know about these two tools and their integration.
Let’s get started with integration process.
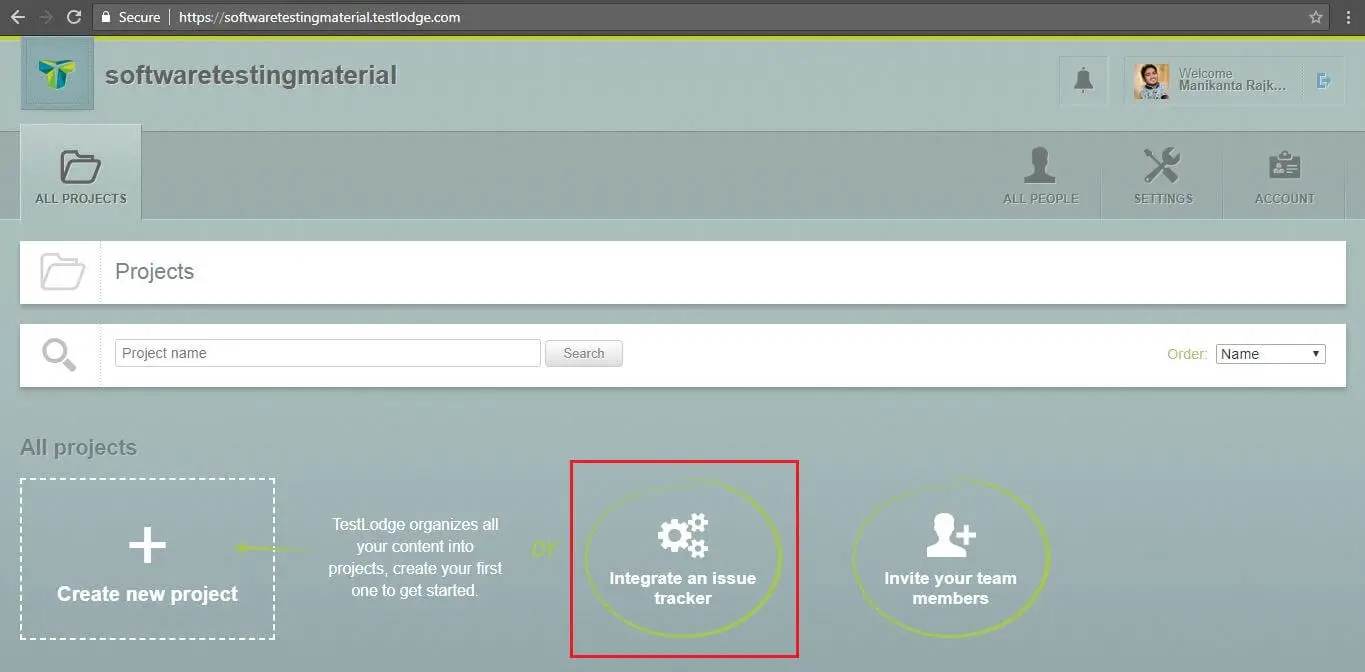
Once you are logged in, you will be redirected to your dashboard of TestLodge. To integrate TestLodge with Jira, click on “Integrate an issue tracker”
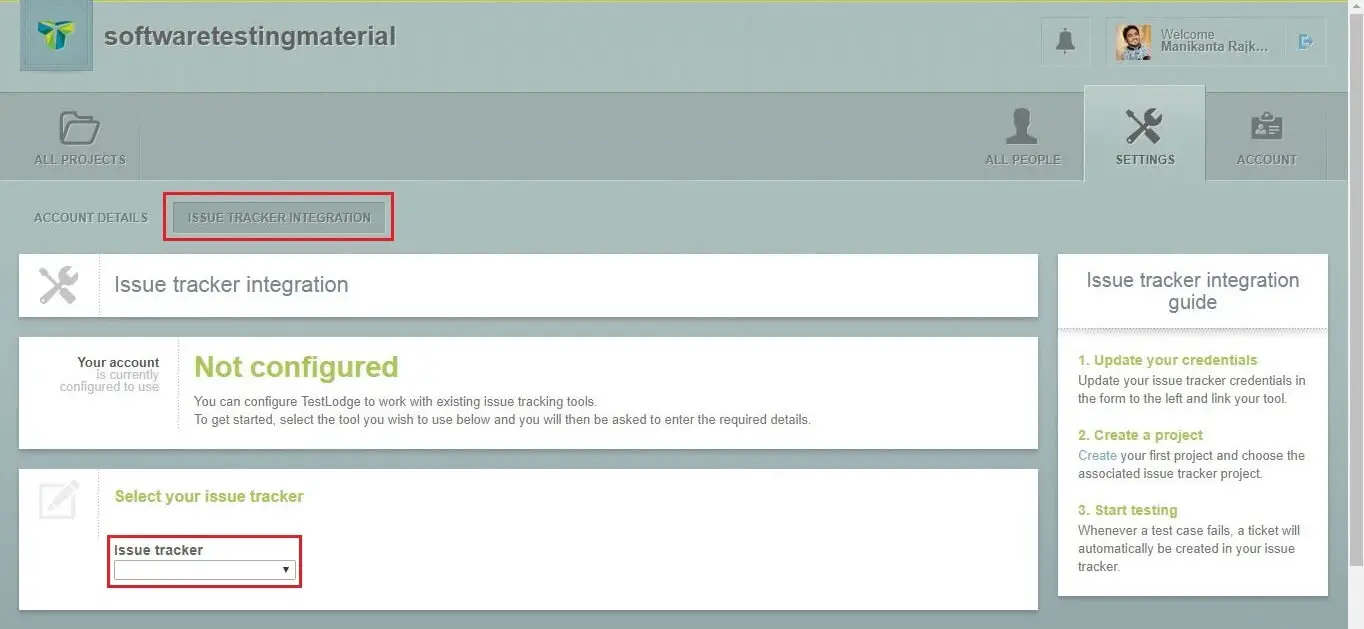
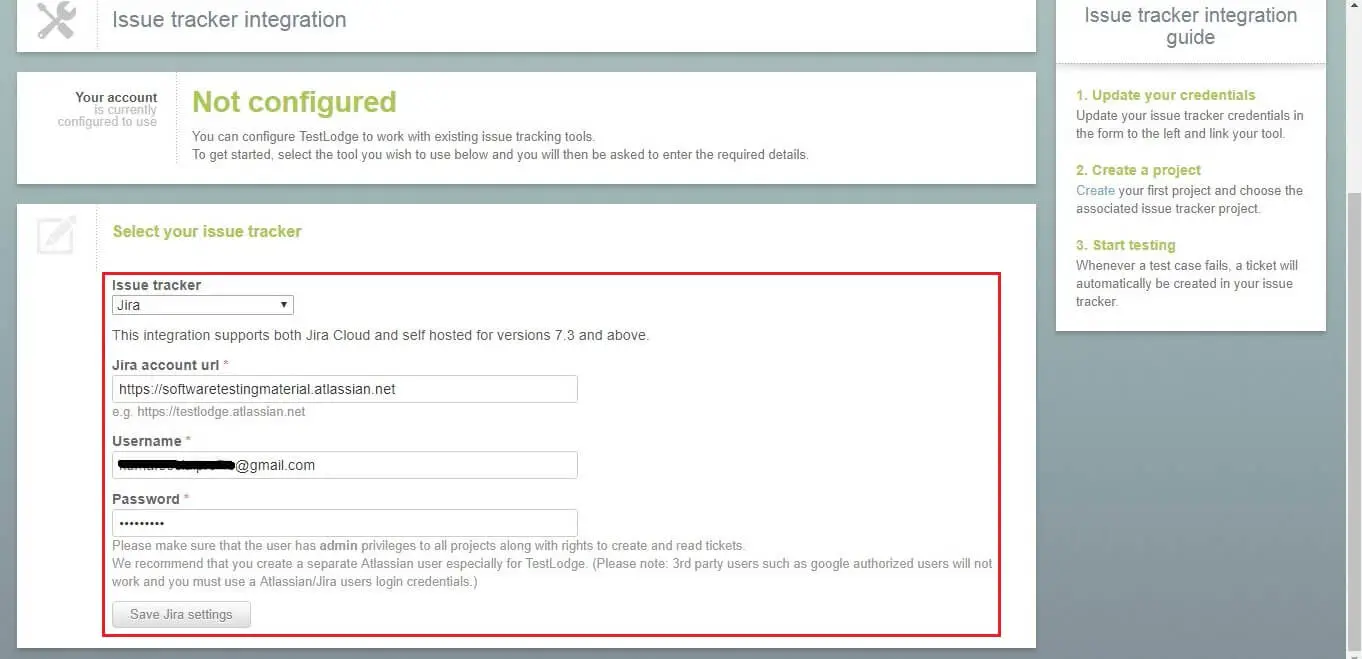
Select the issue tracker from the “Issue tracker” drop down list
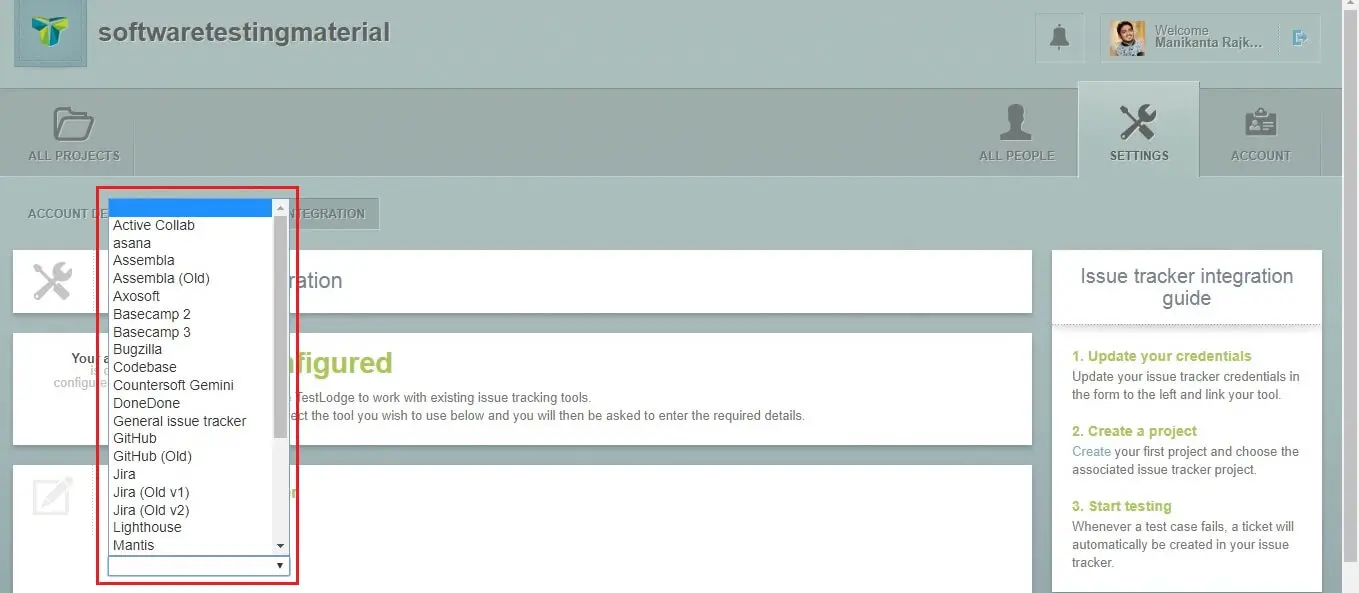
Here our intention is to integrate Testlodge with JIRA. So, choose JIRA from the drop down list.
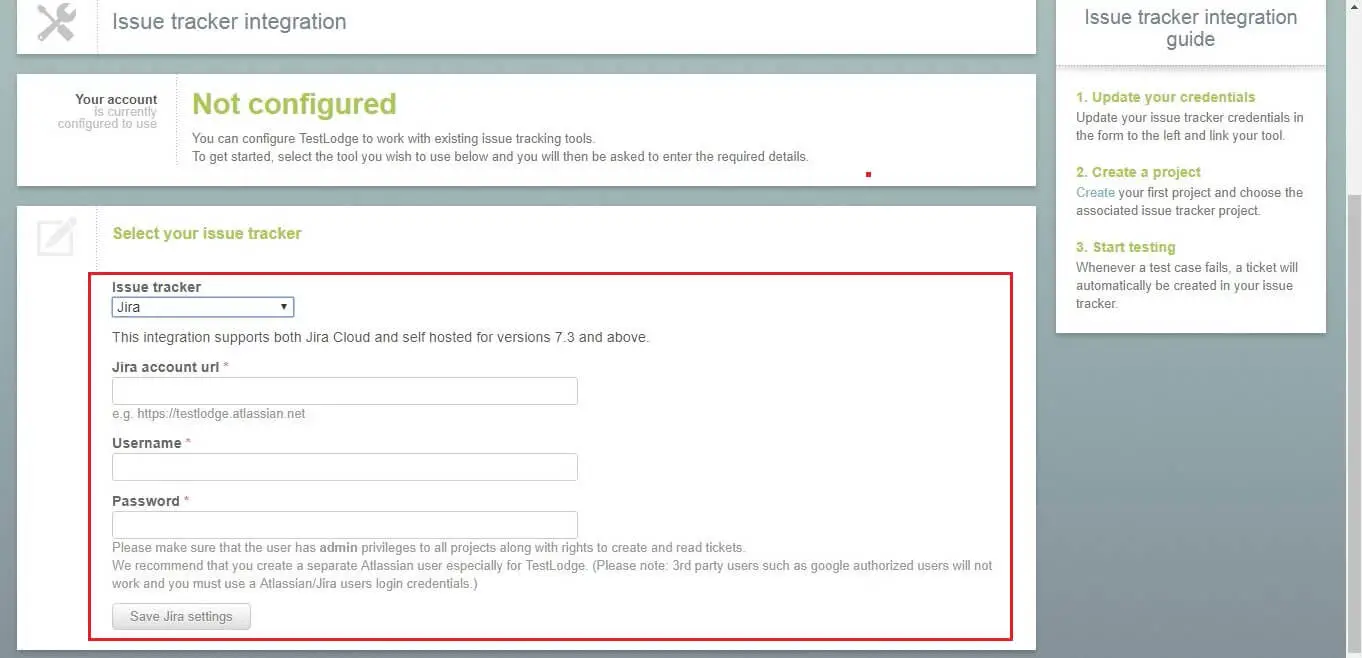
Enter “JIRA account URL” and “User credentials” and click on “Save JIRA Settings” button
Here I have provided my “JIRA account URL” and “User credentials”
If the details you have provided are correct then you could see a message as “Issue tracking settings have been successfully updated”
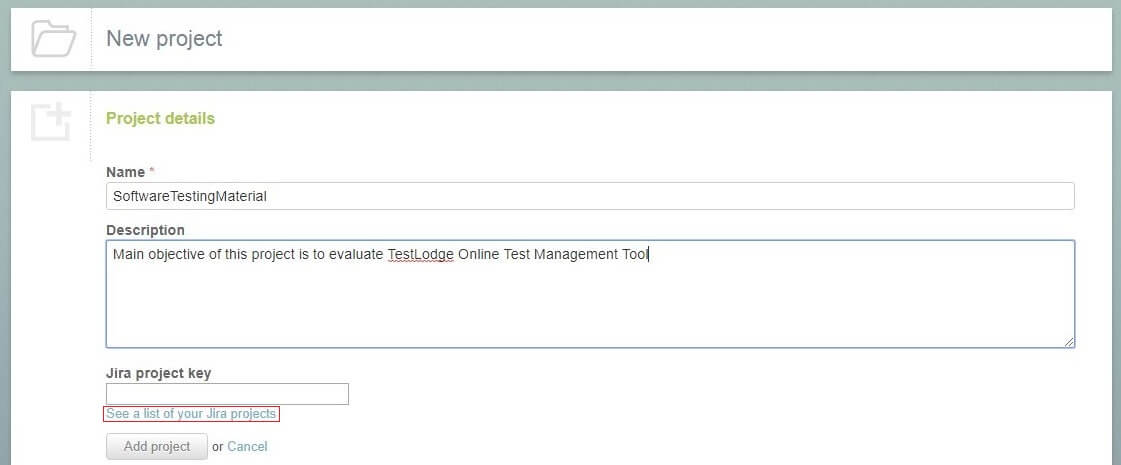
Next steps is to go to “Projects” section to create a new project
In the above image, you could see a link “See a list of your JIRA Projects“. Every JIRA project has a unique key. TestLodge will get complete information of JIRA project based on this unique key.
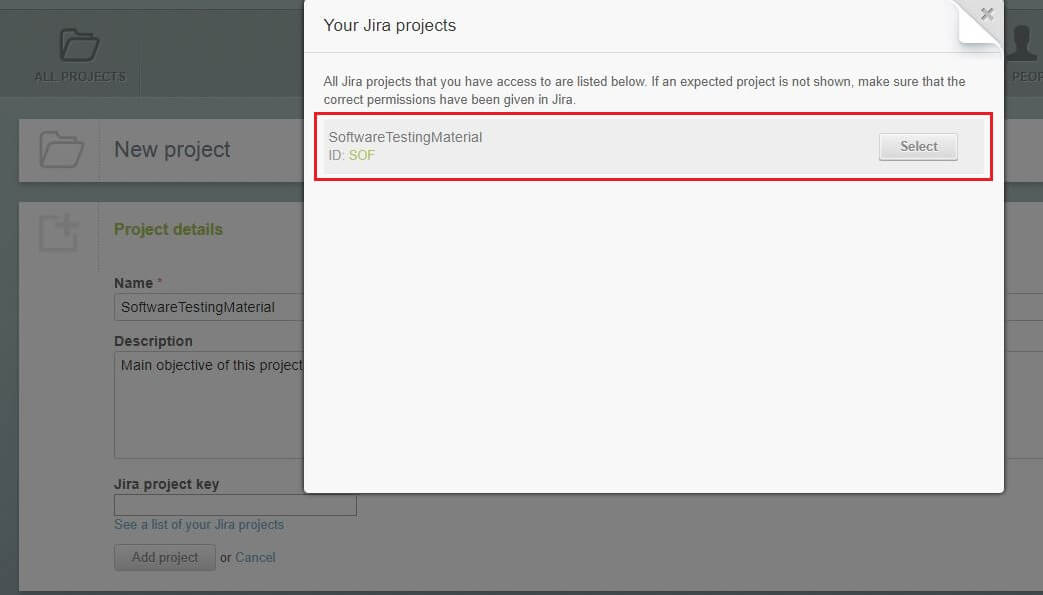
Click on “See a list of your JIRA projects“. It will display all available JIRA projects of yours. In my JIRA account, I have just one project (ID: SOF). So, here we can see just one project as shown below.
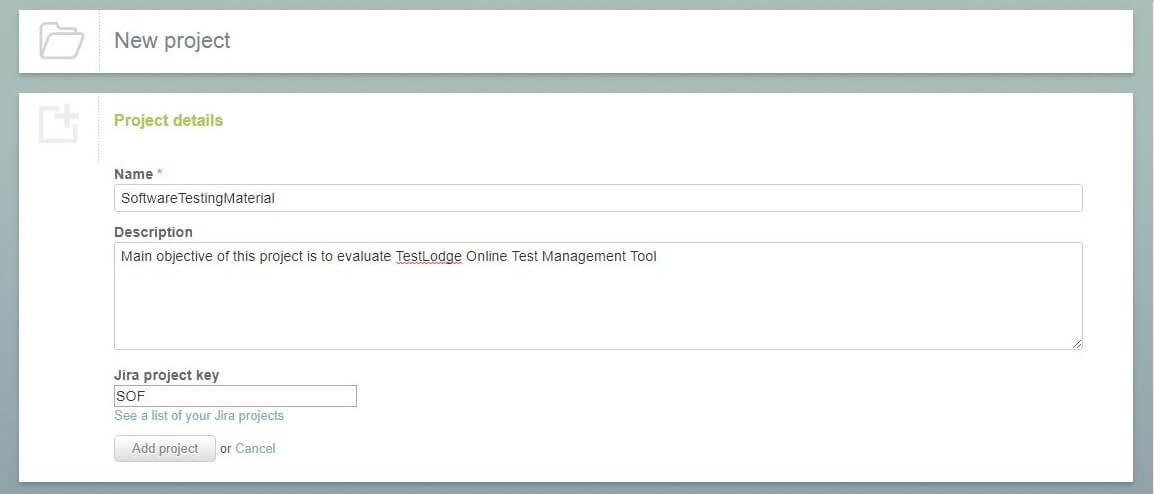
You can see the selected JIRA Project key in the below screenshot. Now click on “Add Project”
You could see a message as “Project was successfully created”
Click on ‘Edit‘ link which is next to “Project overview & activity“under “Overview” section.
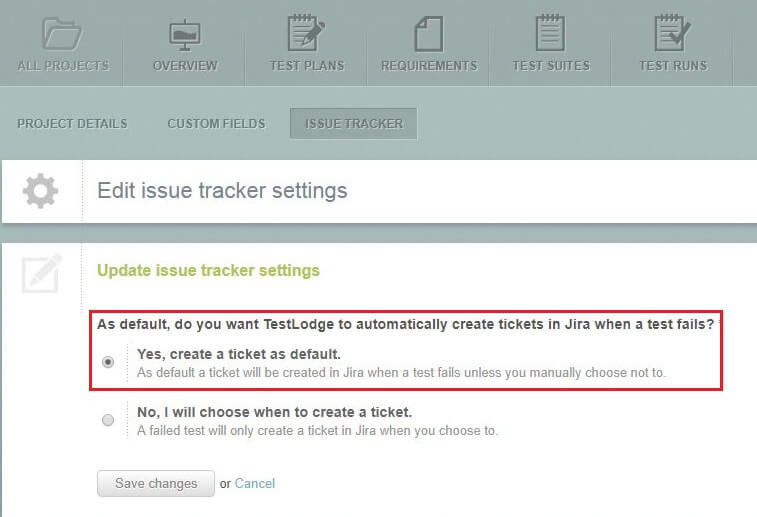
Now, select “Yes, create a ticket as default” option and click on “Save Changes”
Note: It allows TestLodge to create a ticket in JIRA when a test fails unless you manually choose not to.
Once it is done, you will see a message as “Project configuration was successfully updated”
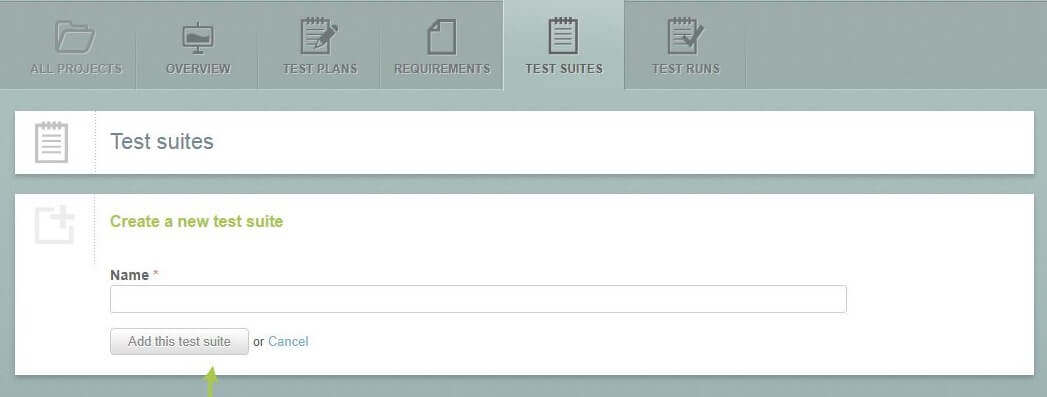
Now, create a new Test Suite in TestLodge.
Pass your preferred Test Suite name and click on “Add this test suite” button
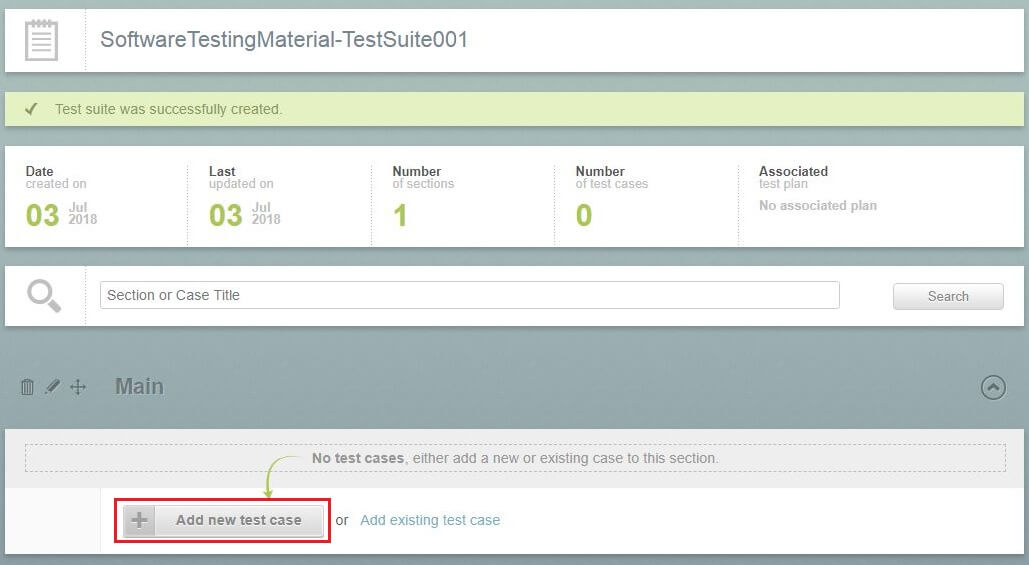
Here, I am creating a Test Suite say “SoftwareTestingMaterial-TestSuite001”
Once it is done, you will see a message as “Test suite was successfully created”
Now, click on “Add new test case” button to add a new Test Case under earlier created Test Suite
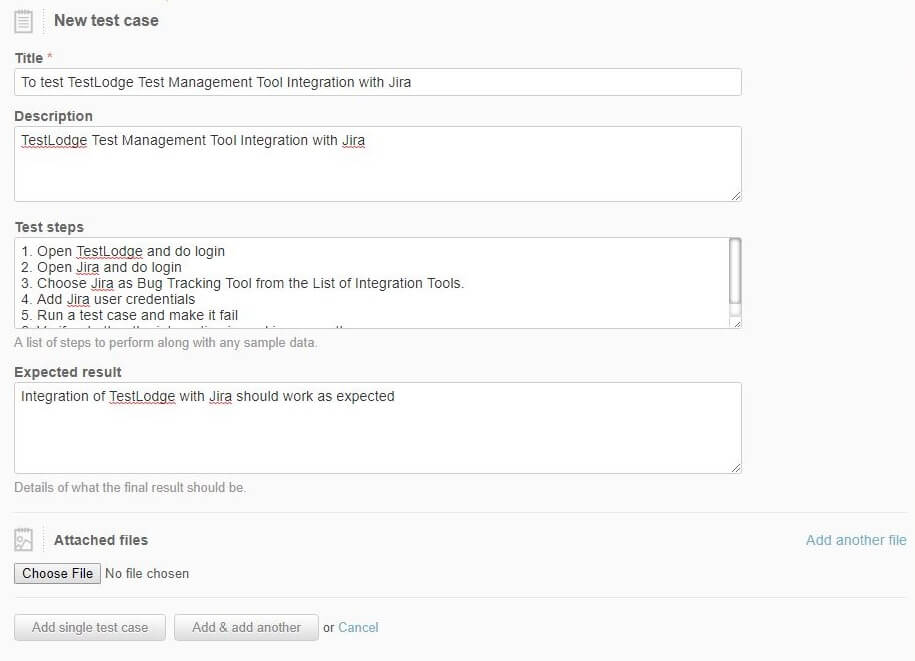
Enter the required data in the “New test case” template as shown in the below screenshot
A message will be shown as “Test suite was successfully created“. If you want to add more test cases, you could use “Add new test case” again.
Here you could see “Number of test cases“, “Date created on” and “Last updated on“.
Click on “Run Test Cases” button and create a new test run
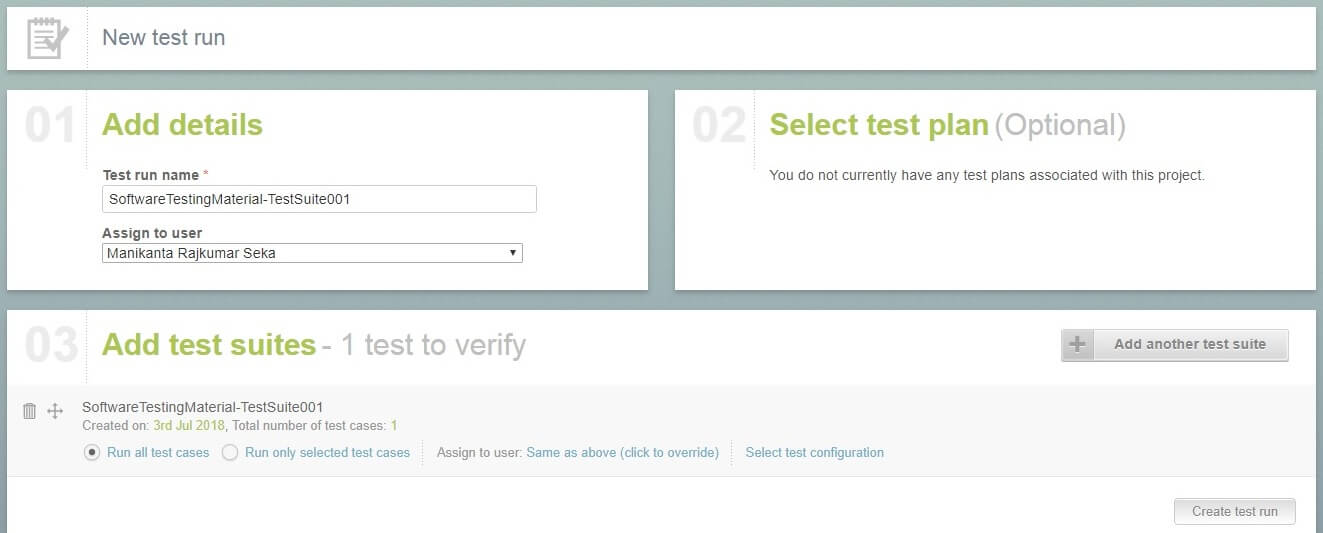
Enter “Test run name” and choose a user from the “Assign to user” drop-down list and click on “Create test run” button
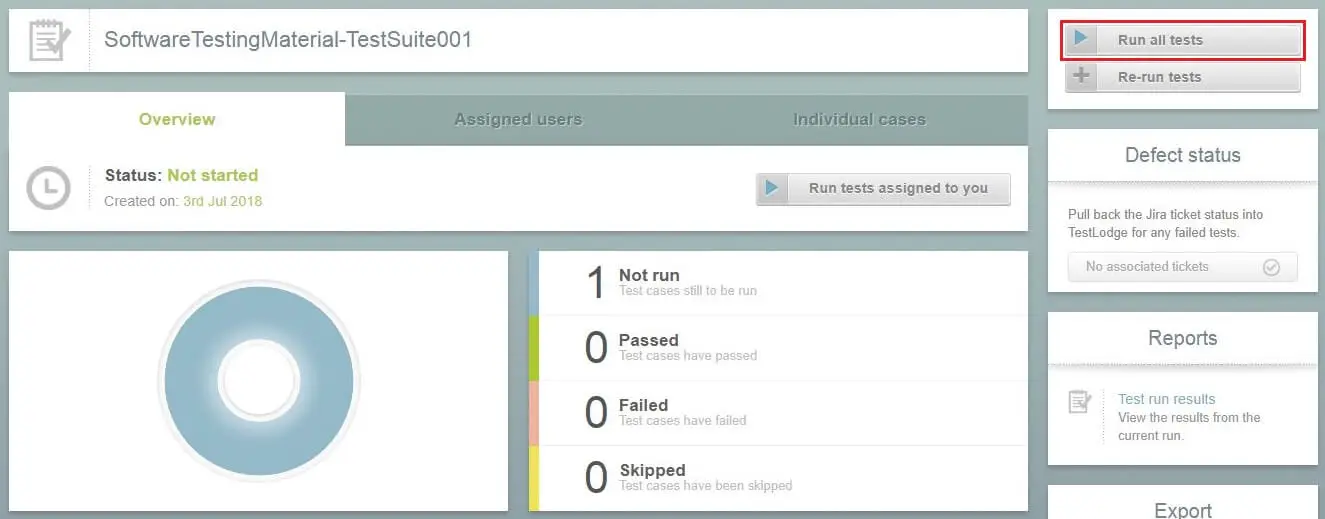
Now click on “Run all tests” button
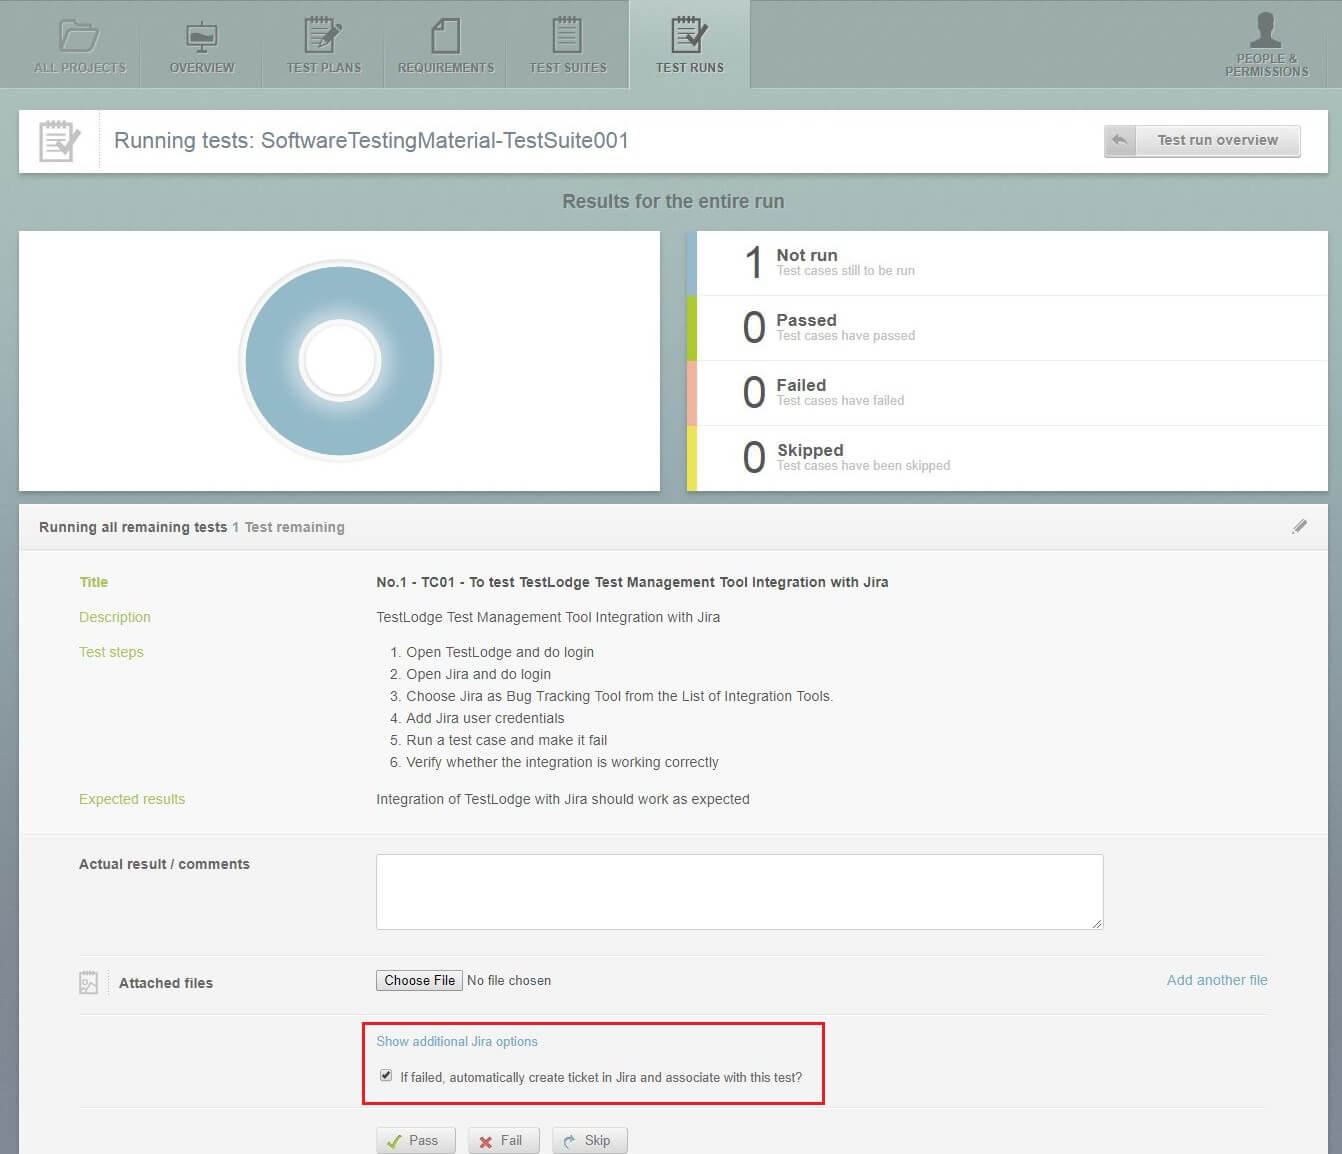
Click on “Fail” button
Note 1: Select “If failed, automatically create ticket in Jira and associate with this test?” option to allow TestLodge to create a bug on JIRA automatically when a test is failed.
Note 2: Click on “Show additional Jira options” link to add more details such as “Assignee name“, “Priority” etc., on JIRA while posting this bug on JIRA
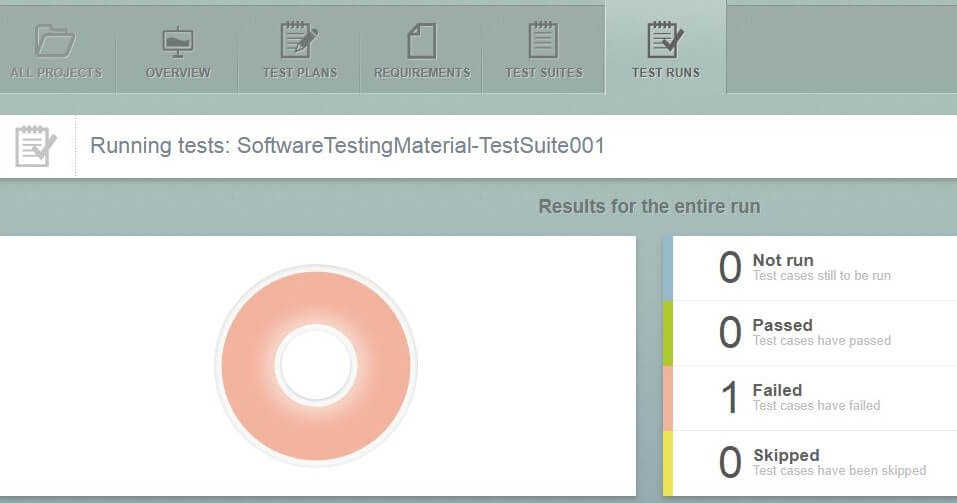
In the below screenshot you can see number of failed test cases are 1.
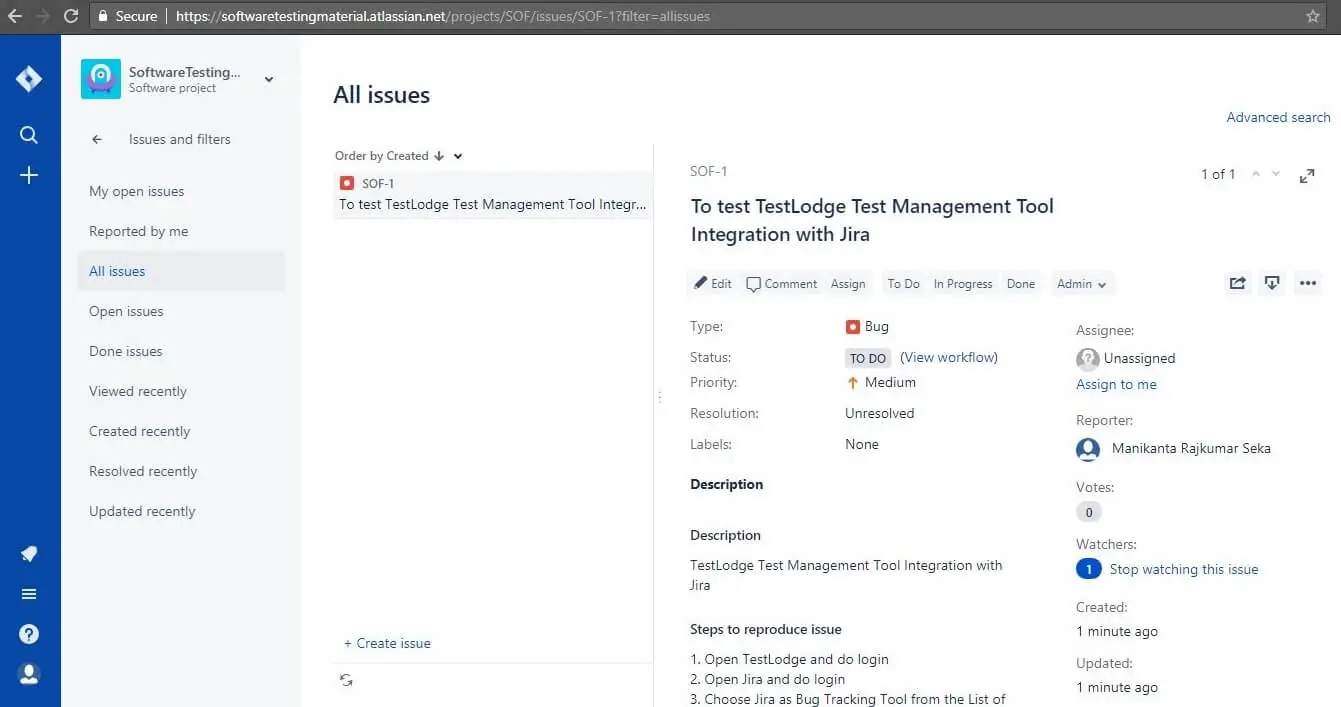
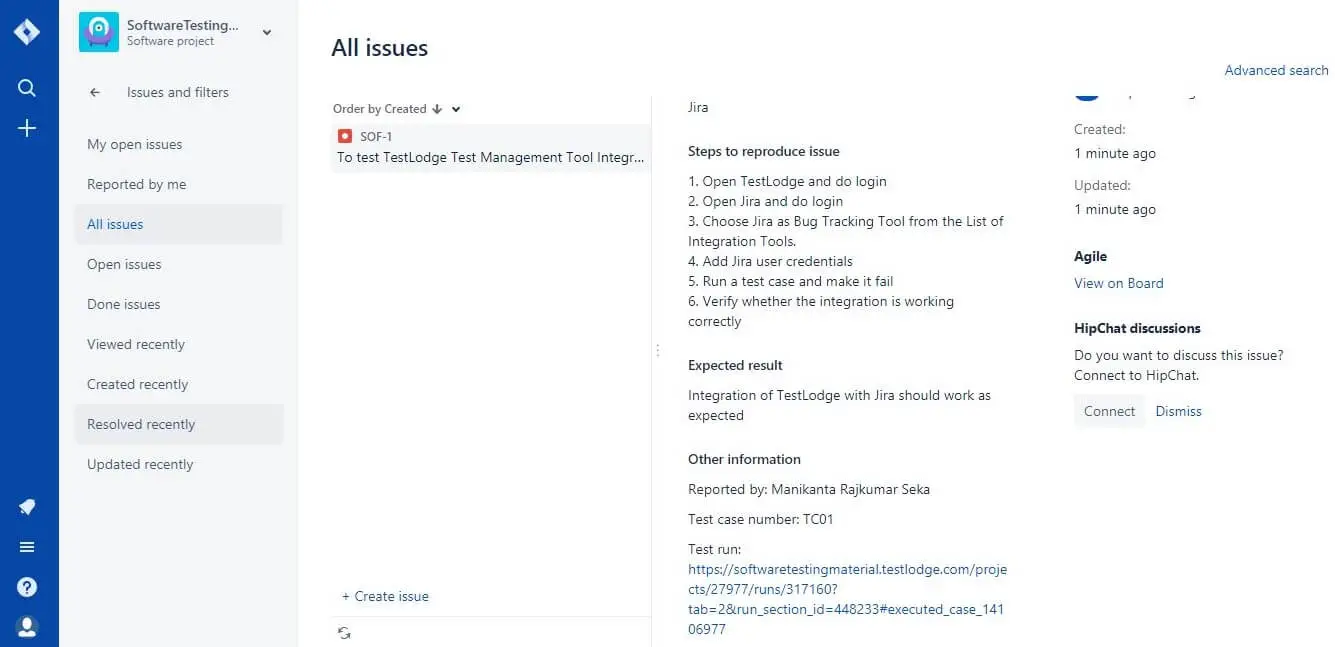
Now, go to JIRA. You could find an issue on JIRA which was created by TestLodge.
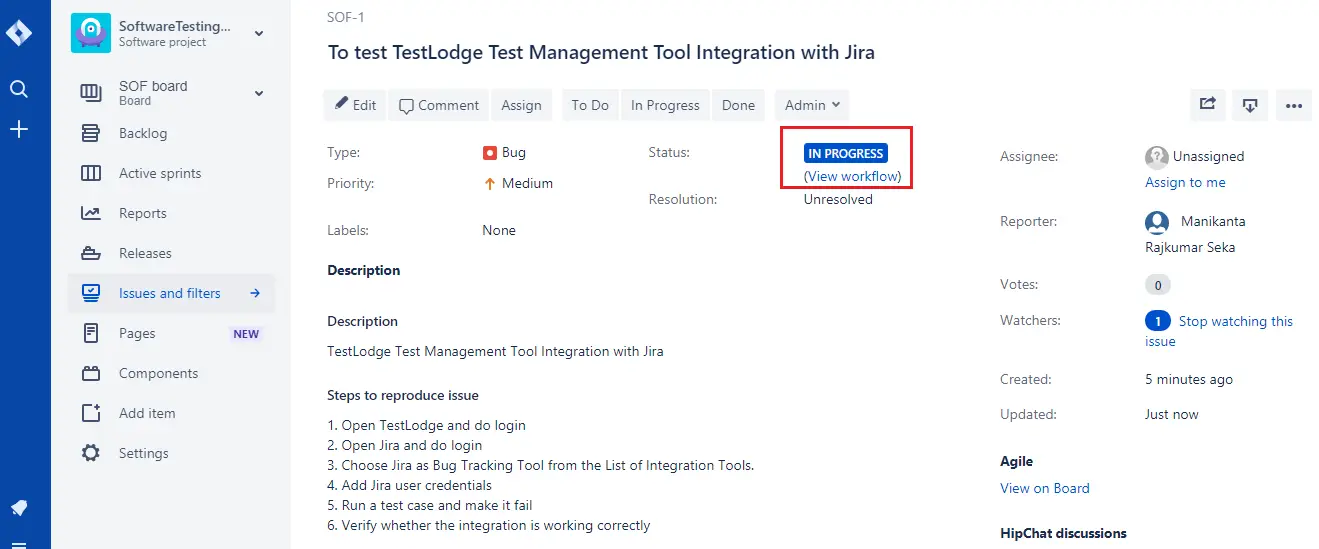
Change the status of bug to “IN PROGRESS” on JIRA
Come back to TestLodge.
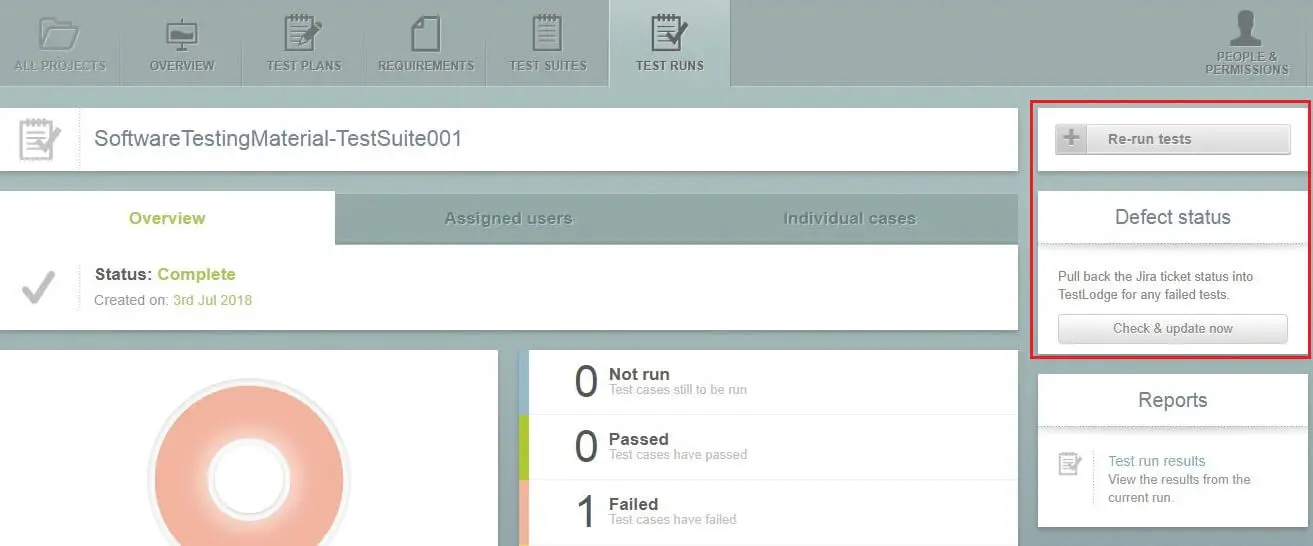
Go to “Test Runs” and click on “Check & update now” button under “Defect status” column
You can see the status as “IN PROGRESS”
Now, click on “Re-run tests” button
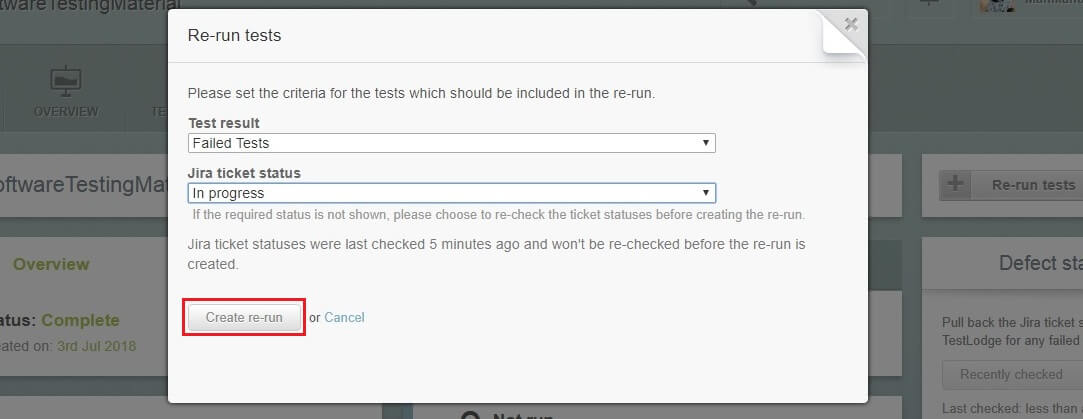
Choose “Failed Tests” from the “Test result” drop-down and choose “In progress” from the “Jira ticket status” drop-down and click on “Create re-run” button
Now, click on “Re-run tests” button
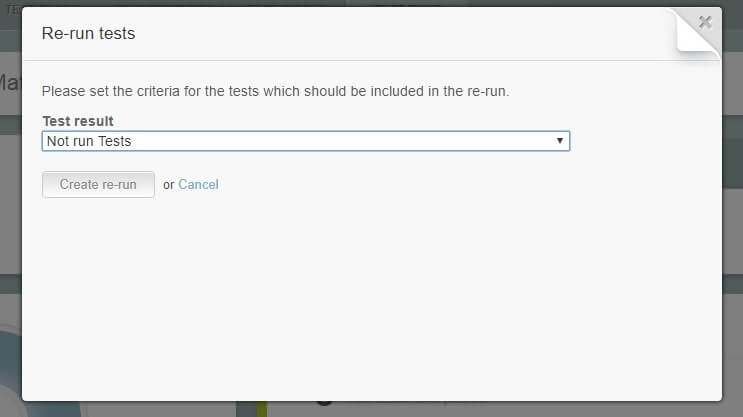
Choose “Not run Tests” option from “Test result” drop-down and click on “Create re-run” button
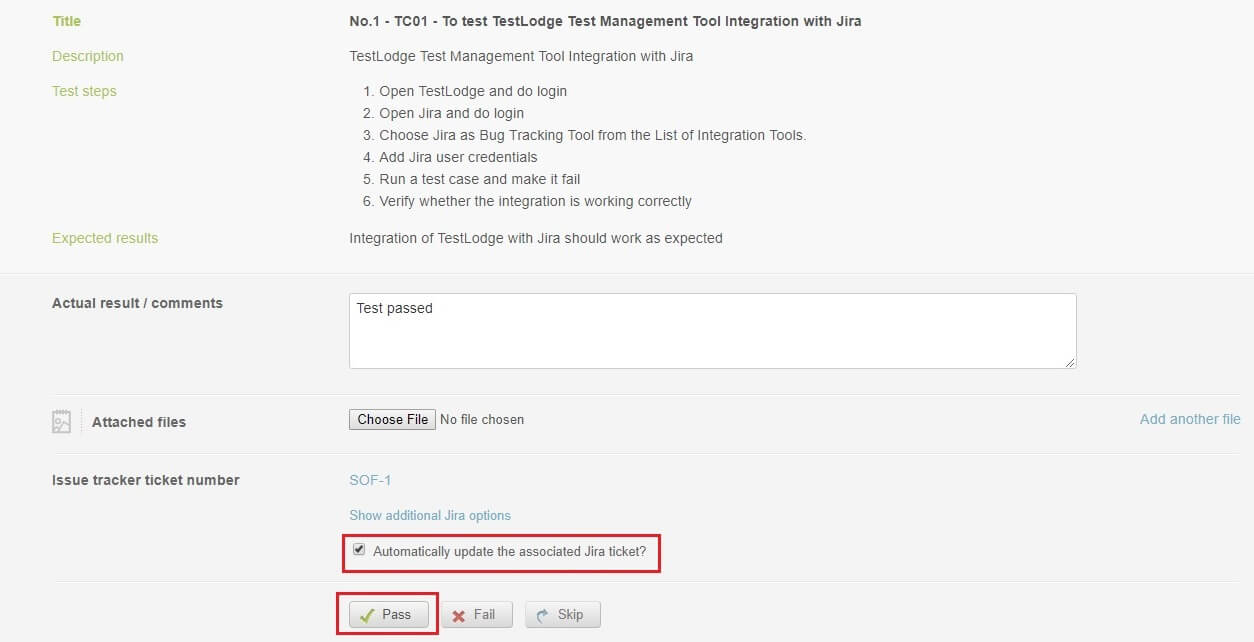
This time, add “Actual result/Comments” say “Test passed” and click on “Pass” button (Assume, test case is passed in this attempt)
Note: If you want TestLodge to update the status of Jira ticket then don’t uncheck “Automatically update the associated Jira ticket?” option
Now you can see number of test cases passed are 1 in the below screenshot.
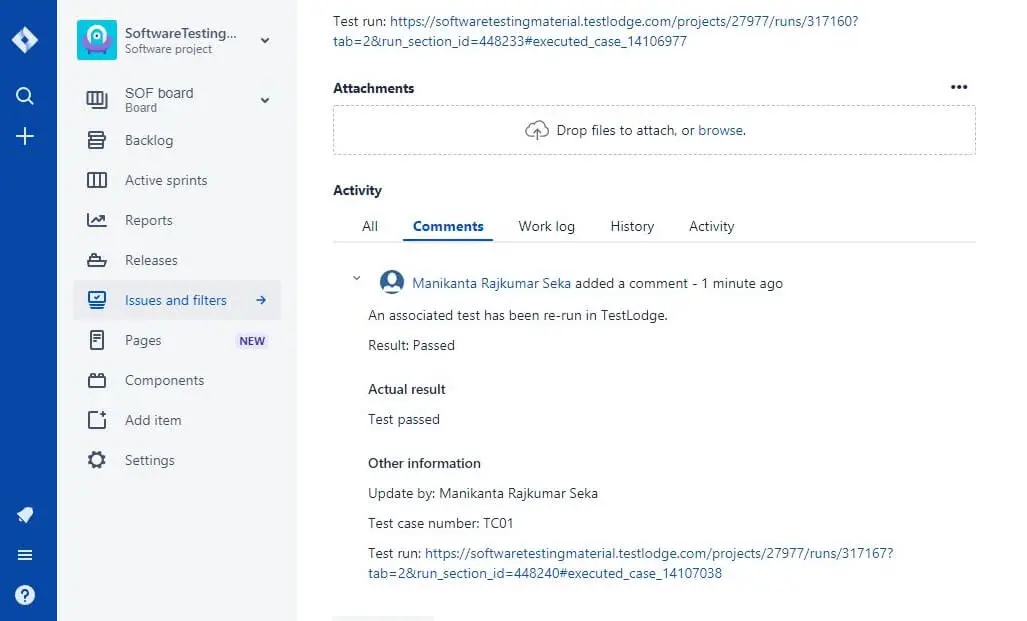
Go to JIRA again to see the updated status of the ticket on JIRA
TestLodge makes it simple to integrate TestLodge with JIRA. Hope you have learnt how to integrate TestLodge with JIRA.
You can signup today for 30 days free trail here
Most of the Product development teams are using JIRA as their “Project Management” Tool and TestLodge as their “Test Management” tool. TestLodge integration with JIRA will save a lot of time in creating and managing the bugs automatically on JIRA.
Must Read: Most Popular Defect Tracking Tools

