Testiny Test Management Tool Review 2025: Features and Walk-Through
Testiny Test Management Tool Review: This review offers a concise exploration of Testiny’s features and functionality, providing a brief walk-through to showcase its strengths and weaknesses.
From intuitive user interfaces to collaborative capabilities, Testiny aims to streamline test management across the software development life cycle.
We will highlight its main features as well as its compatibility with automation and CI, offering a snapshot of how Testiny integrates seamlessly into modern development workflows.
This review serves as a quick guide for QA professionals, developers, and cross-functional teams, providing valuable insights into Testiny’s capabilities.

Features
#1. Test Management
- Test Case Management
- WYSIWYG editor
- Attachments
- History of Changes
- Test Case Templates
- Custom Fields
- Requirements
- Import/Export
- Migration from other tools
- Integrations with Requirements & Defect Trackers
- Test Plans with dynamic queries
- Test Runs
- Defects
- History of Changes
- Immutability
- PDF Reports
- Import & export
- Attachments and comments
#2. Test Automation
- Import results from automated test cases via CLI or API
- REST API for custom integrations
#3. Integrations
Jira (Cloud and Server/Data-Center), GitHub, GitLab, Azure DevOps, Asana, Redmine, Linear, Monday.com, BugZilla, Confluence, Trello, ….
#4. Audit, Compliance, and Security
Audit log, immutability of test results, reporting, Single Sign-On, MFA
Testiny Walk-Through
We’ve started with a fresh account, signing up is fairly easy and no credit card is required – you’re automatically in the free trial with all features enabled.
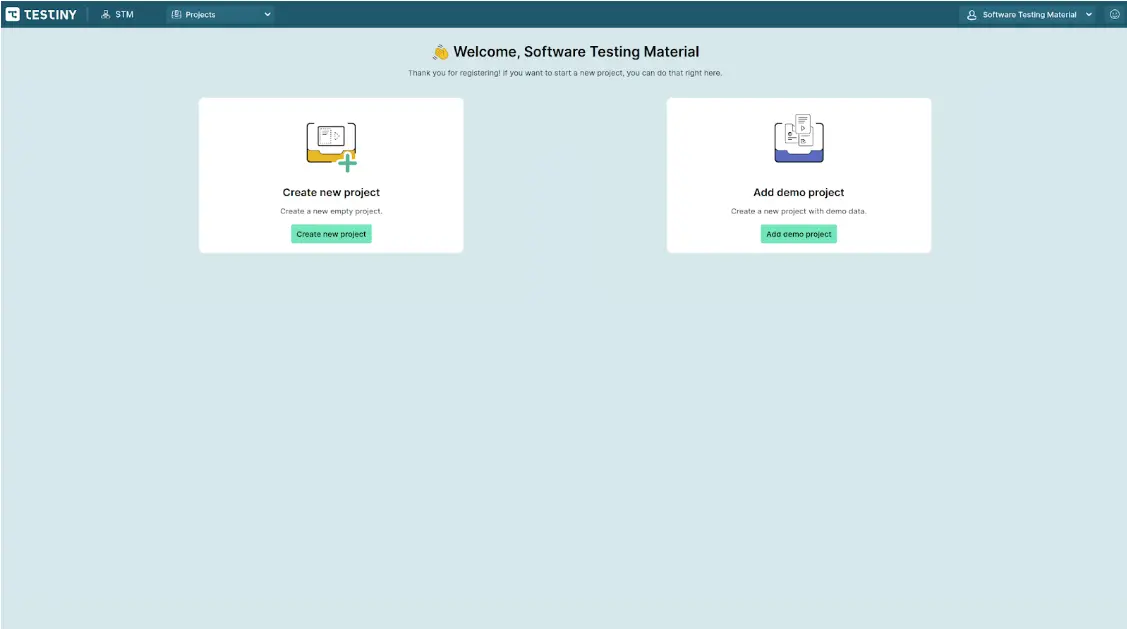
Throughout the whole app, Testiny guides you to your first steps so it’s very intuitive to get started! In the initial screen, you can either create a new, empty project or add a demo project to explore the main features quickly.
After creating a demo project, you’re on the dashboard of the project:
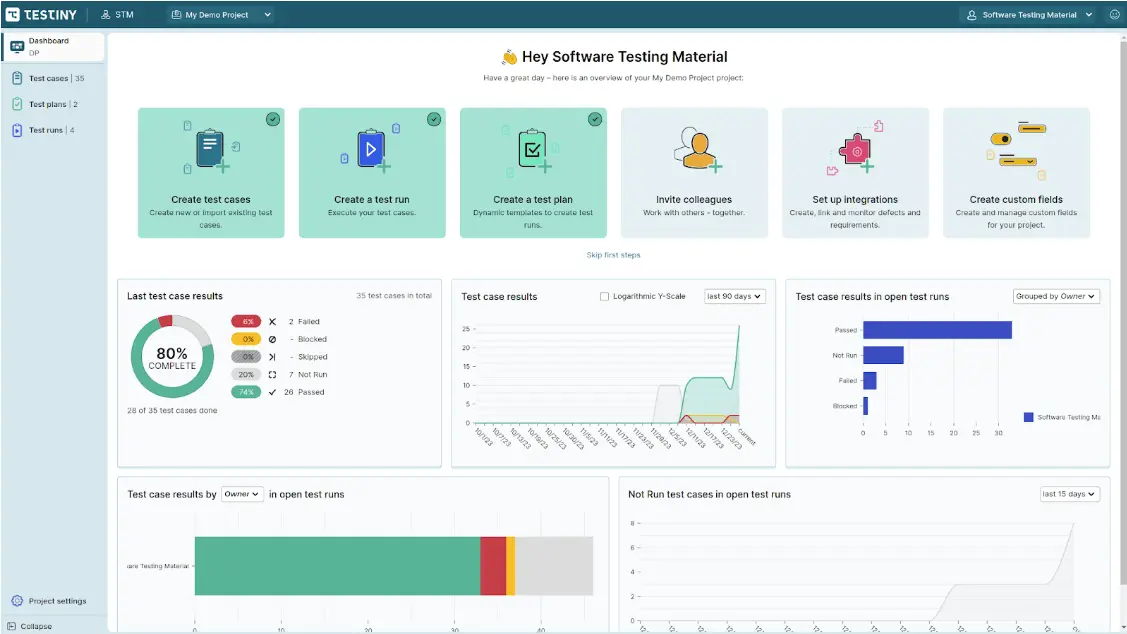
Here, Testiny provides “first steps” for us to quickly get started.
The first three steps are marked as done, as the demo project already is filled with test plans, test cases, and test runs.
You can start by inviting your team members, configure an integration for defects or requirements, or define custom fields for test cases.
Below the steps you can see the latest test results in current test runs and the test case results over time.
Now let’s explore some of the settings.
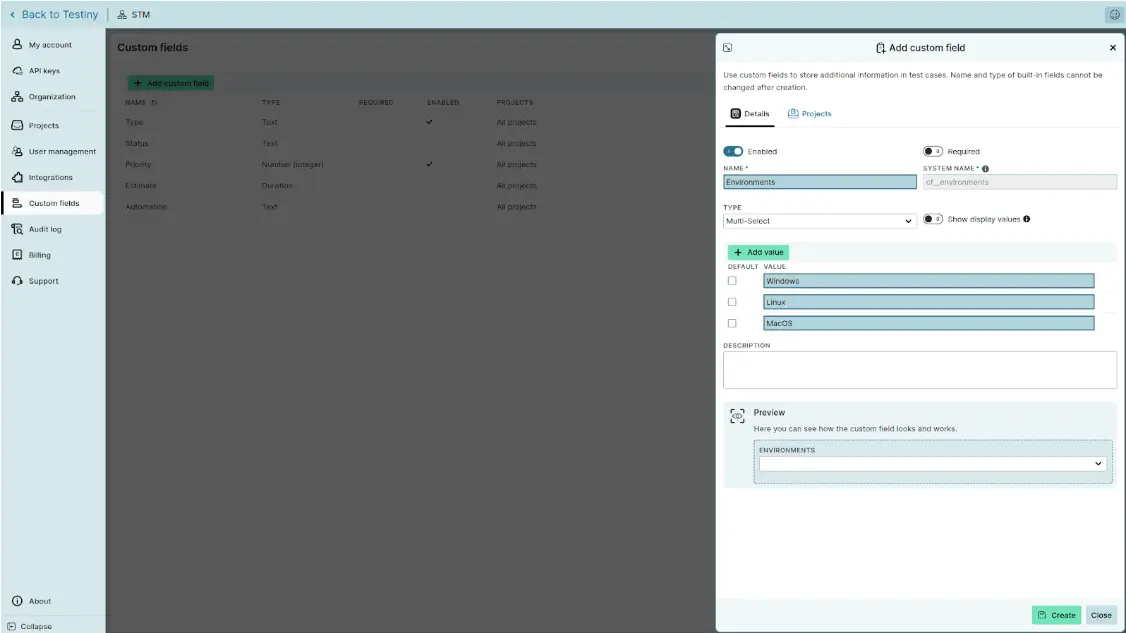
I navigated to “Settings” and “Custom fields”.
Testiny already has some customizable fields in there, for example, “Priority” where we can add our own values or rename them.
We can also create our own custom fields; in the screenshot below I created a new field to define the “Environment” in which the test case can or should be executed.
The type of this custom field is “multi-select”, but I can choose between many different ones like number, URLs, time, etc.
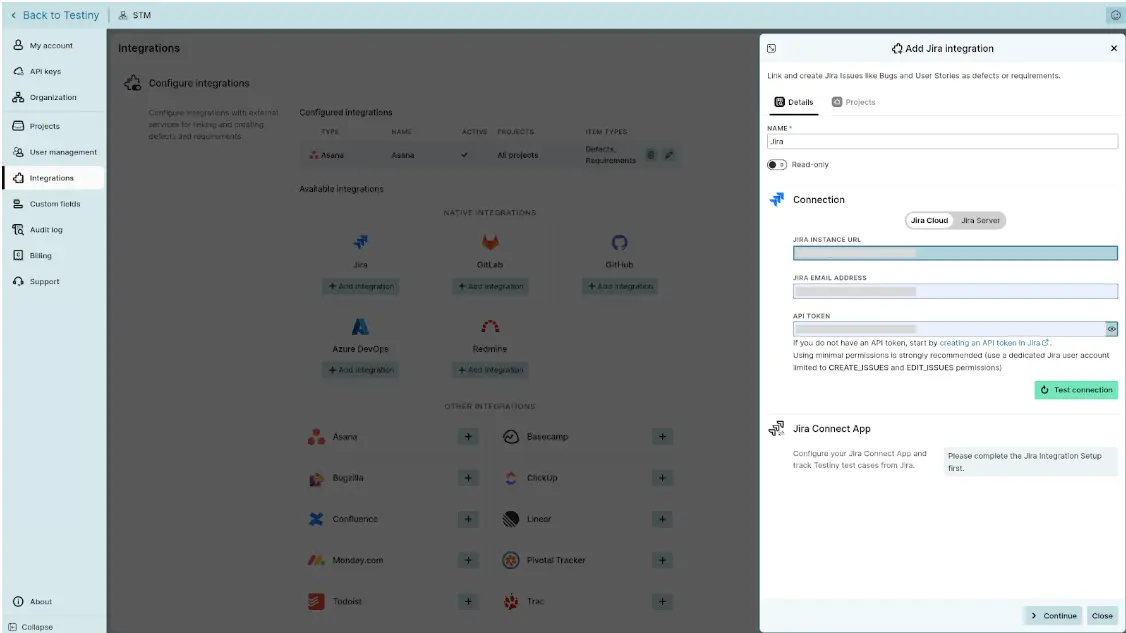
Let’s also explore their integrations.
I navigate to “Integrations” and here they offer a huge list of tools they can integrate with like Jira, Azure Devops, Github, Gitlab, Asana, Trello, etc.
For example, I added an integration to Asana to manage both requirements and defects in all Testiny projects.
In the screenshot below I show you the mask on how to set up an integration with Jira:
In the settings, you can also create and manage API Keys, invite other users and set their permission, manage Billing, check the audit log and set up single sign-on.
There are also some organization-wide and project-wide settings, like how long users are allowed to change a test result.
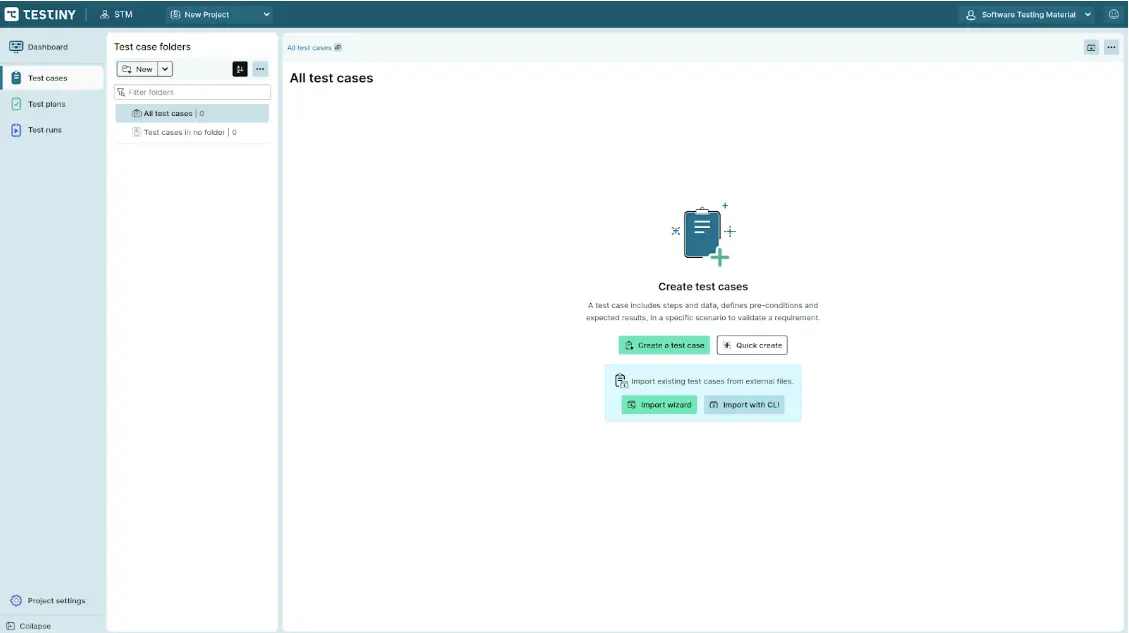
Then, we finally navigate to our test cases:
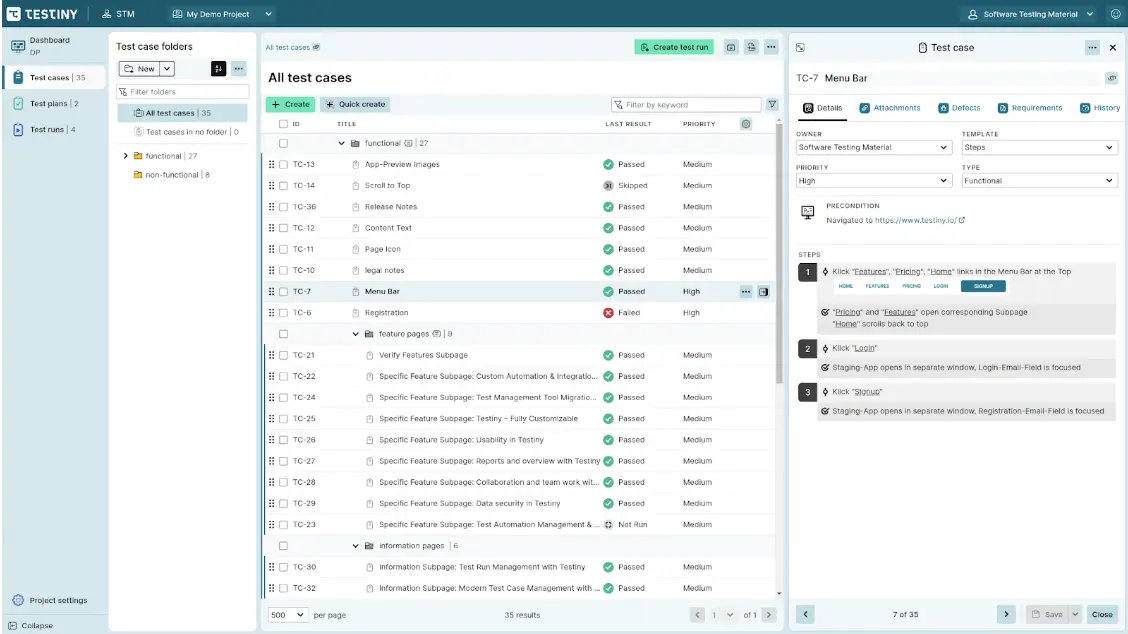
Testiny nicely organizes test cases in folders and you can view all test cases in this hierarchical structure.
I also think it’s very convenient to be able to drag & drop test cases to move them to other folders.
When you click on a test case, its details are in the side panel on the right.
You can see the custom fields here as well as the steps which you can edit.
Writing test cases is a breeze; it’s really easy to create individual steps with their results, and the rich text editor provides everything you need, like bulleted lists, text formatting in bold/italic/…
It even provides nice convenience features like marking text as “copyable” – then you just need to click on it and the text is automatically copied to your clipboard; very helpful for copying emails, etc. 🙂
In the History tab, you’ll see any changes that you or others have done.
It’s great that you can attach files or images to the test case, and you can link the test case to a requirement in the integrated tool.
You can also see all defects that were linked to the test case in test runs.
Let’s continue with checking out their test plans.
I navigated to “Test plans” and created a new plan. In this plan, I can add test cases via a condition or choose a whole folder.
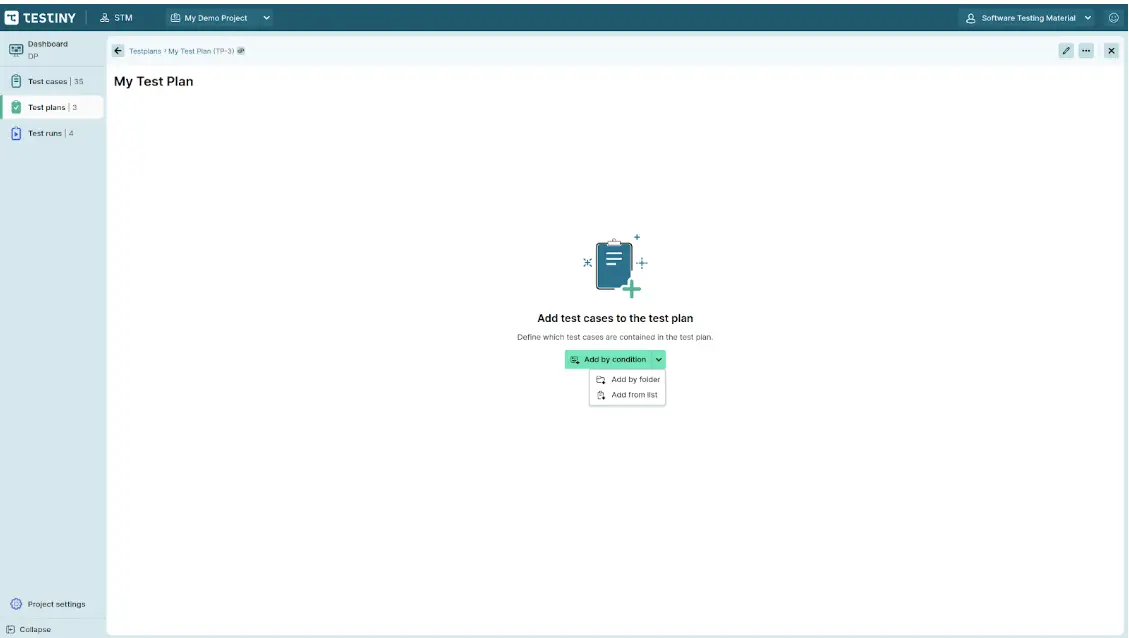
I added two conditions to add test cases to my test plan, which you can see in the screenshot below.
I added a condition to add all test cases with the priority “critical” or “high” to the plan, and another condition to add all test cases with the type “security” or “sanity” to the plan.
This is a pretty amazing feature because if I add a new “security” test case it is automatically in the test plan! So every time we create a new test run from this plan, the selection of test cases is up to date.

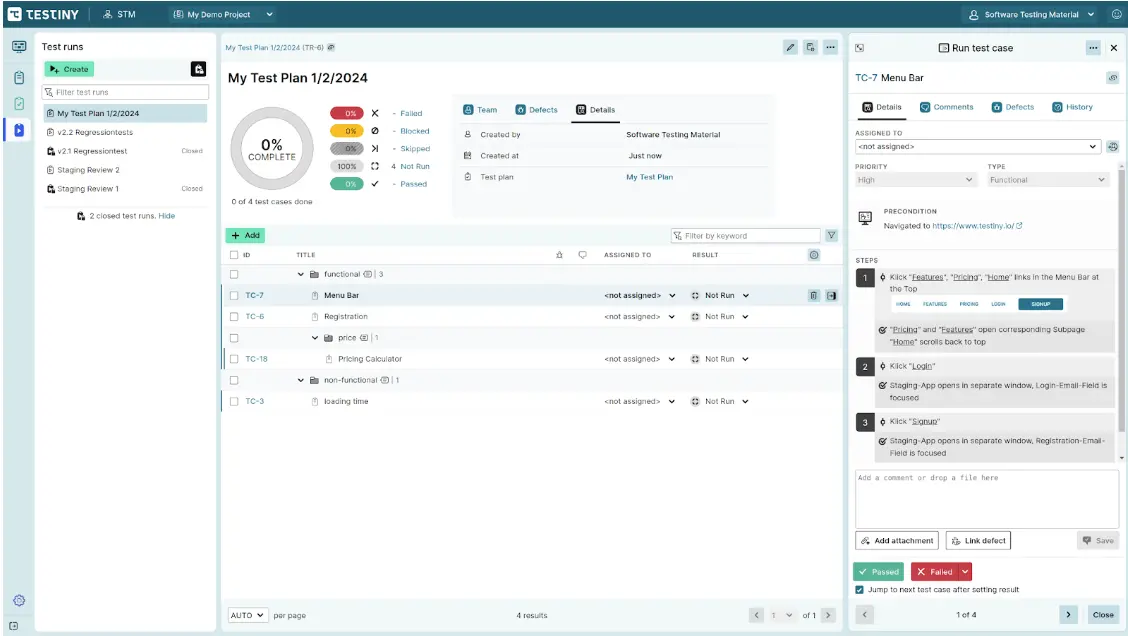
I then clicked “Create new run”; Testiny immediately created a new test run shown in the screenshot below and automatically opened the respective page.
All the test cases from the test plan above are in the run.
We can then assign other team members to the test cases, execute the tests and set a result (Passed, failed, skipped, or blocked), and attach a screenshot of a failed test or comment on it.
We can also directly create a defect in the integrated tool that we set up for defect management.
Finally, let’s see what actions are available in the menu.
We can “close test run” to make it immutable so that no one can change the results anymore, “create report” to create a PDF report or “export test run” as a csv or Excel file.

Importing test cases & migrating from other tools
We now create a new and empty project by clicking the dropdown next to the project name in the toolbar.
In this new project, everything’s empty so we navigate to “test cases”.
Here Testiny shows us all the possibilities to add test cases: either creating them manually (which works very well with their WYSIWYG editor), using the import wizard to use an existing CSV or TestRail XML file, or using their CLI or REST API to import test cases.
You can use the CLI or REST API to also import test results from automated test runs.
We didn’t explore all the settings in detail and also didn’t try out importing automated test results, but stay tuned for the second part of the walk-through!
Pricing Details
Testiny’s pricing is 17$ per user and month, but they offer discounts on their website for annual billing and a volume discount. They also have a viewer license for a lower price. This puts Testiny into the low to mid-range priced test management tools.

Verdict
Testiny impresses me with its cost-effective, low to mid-range pricing, the great usability and learning curve, and its test management features.
Features I’ve missed are reusable steps and better documentation on collecting automated test results.
I loved its support for custom fields, integrations, and adaptable settings, catering to diverse testing needs.
In summary, Testiny is a recommended choice for teams seeking an affordable yet feature-rich test management solution. Its user-friendly interface and powerful capabilities make it a solid option for enhancing overall testing processes.
Go to Testiny and start your free trial today.
Related posts: