Creating test case using script mode
In addition to the Manual view, Katalon Studio allows expert users to programmatically write automation test in the Script view of test cases. Users with Groovy/Java background can easily edit test scripts in this view.
This tutorial walks you through the steps needed to manually write a very basic automation test script using Katalon Studio. After going through this article, you will be able to understand and be able to use import statements and built-in keywords to compose test scripts. It’s recommended that you should have some basic scripting background, preferably using Groovy, to efficiently use the scripting capability.
Given a sample test case with the following steps:
- Open the browser
- Navigate to a website
- Click on certain control
- Validate if a control exists on the page
- Close the browser
Follow these steps to automate the above test scenario in Script view:
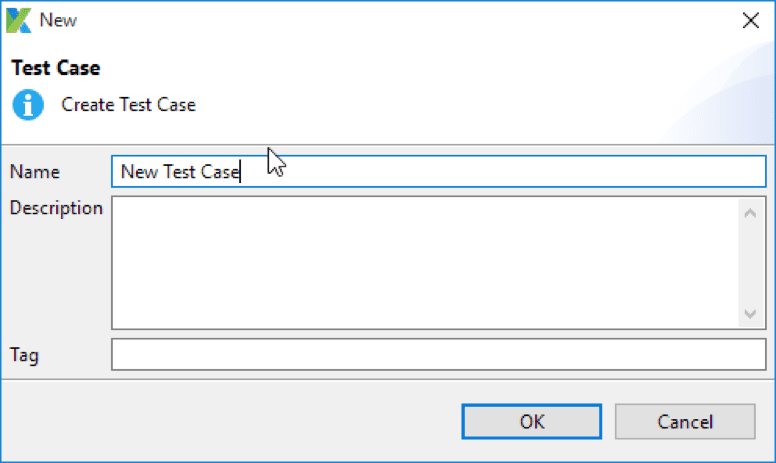
1. Select File > New > Test Case from the main menu to create a test case. Provide the name for the new test case, then click OK.
2. Once a new test case is created, you switch to the Script view. Test steps specified in the Manual view are automatically translated to Groovy script in the Script view.
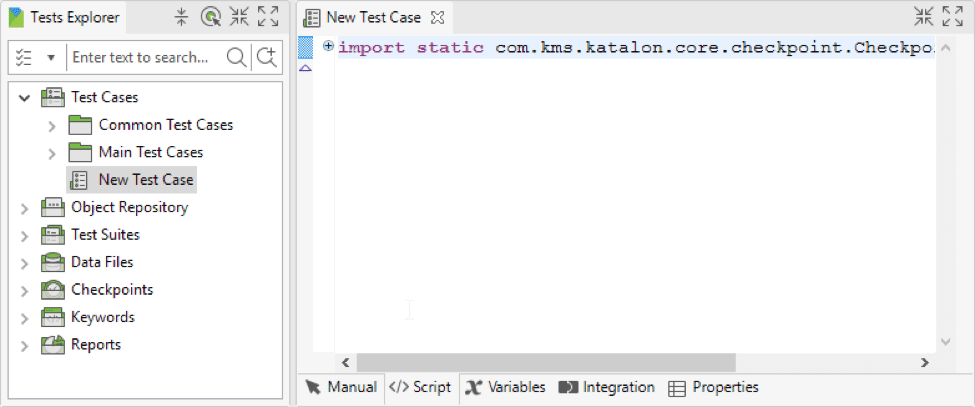
The import statement in a test script allows referencing to classes to be used. Expand the ‘import’ section to see all default imported classes by Katalon Studio. The name after ‘as’ in each import statement is an alias for the class. You can change the alias for each class. These classes are necessary for composing a test script.
Katalon Studio is an automation tool that supports keyword-driven testing. All keywords are grouped into WebUI, Mobile and WebService packages accordingly. Press ‘Ctrl + Space‘ to view these packages and functions from the imported classes.
3. In this scenario, you will create a Web application test script, so you can make use of the Web UI built-in keywords. To use a built-in WebUI keyword, enter the following syntax into the editor.
WebUI.
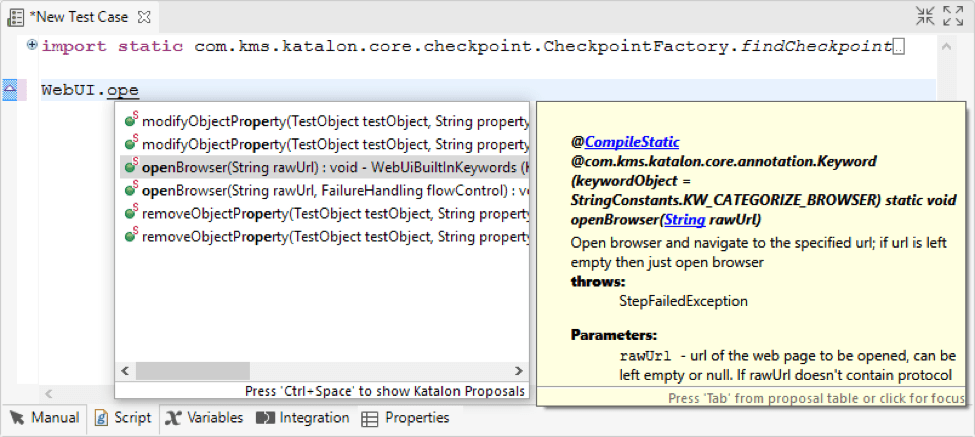
4. After entering the dot character (.), all built-in keywords and their description for WebUI testing appear as below:
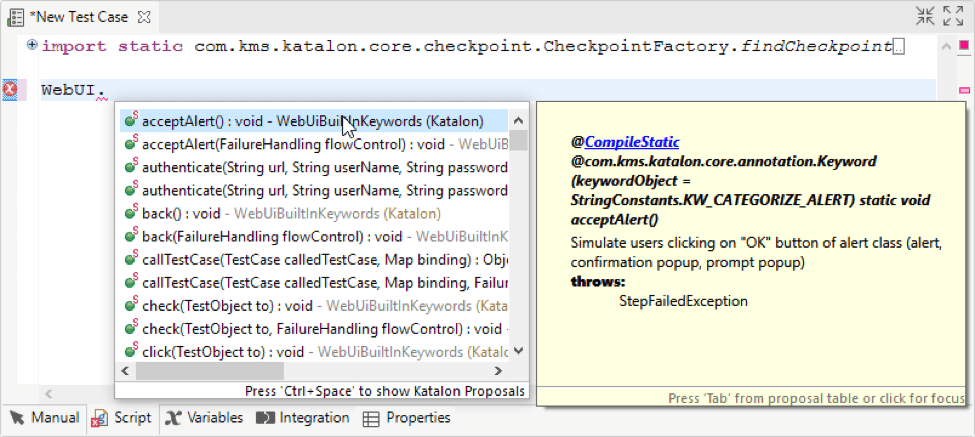
5. Select the Open Browser keyword. This keyword opens a browser and navigates to the specified URL if provided. The detail for a selected keyword is shown in a popup screen.
6. Enter the Navigate To Url keyword. This keyword navigates to a specified URL. For now, enter the URL of Katalon Studio (katalon.com) as the value for the parameter.

7. Enter the Click This keyword represents the click action on a given object. You need to specify an object for this action.

8. Use the following syntax to refer to an object in Object Repository (alternatively, you can drag and drop the object to test case editor to generate the syntax):
findTestObject('{Object ID}')
Where Object ID is the ID of that object in Katalon Studio.
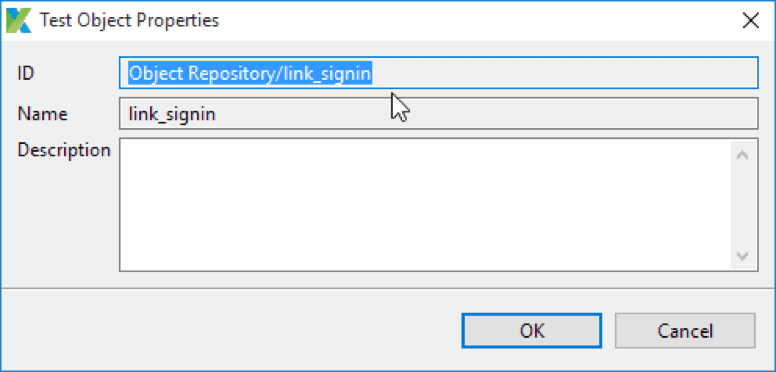
9. You can find object’s ID from its Properties dialog. For example:
10. Enter the Verify Element Present keyword. This keyword validates if a certain object is displayed on the executing browser. Similar to the previous step, you need to specify the object to be used with this keyword.

11. Add the Close Browser keyword and save your test case.

12. The following API docs are useful when working with scripts:
13. Congratulations! You have finished your first automation script in Groovy language. Click on Run in the main toolbar to execute the test case.

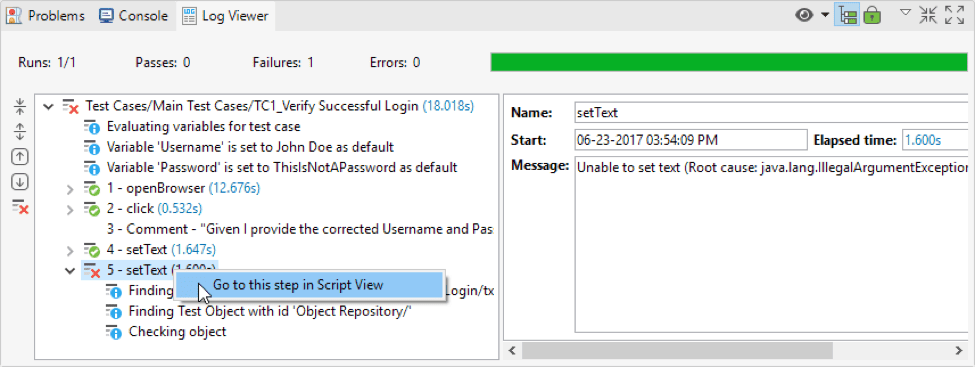
Katalon Studio should be able to execute the script of the test case. Test execution results are shown in Log Viewer as below:
