How to Install Selenium 4
In the previous post, we have seen Selenium 4 new features and in this post, we will see “How To Install Selenium 4“.
We will install Selenium 4 and go through all the new features of Selenium 4 in the next post.
How To Upgrade From Selenium 3 To Selenium 4
Most of us are already using Selenium 3 (Selenium WebDriver) and would like to migrate from Selenium 3 to Selenium 4. Follow the below steps to upgrade from Selenium 3 to Selenium 4.
Using Selenium with Maven:
If you are using Selenium with Maven, you can easily upgrade to Selenium 4 by simply changing the version of Selenium to Selenium 4.
We have downloaded the Maven Dependency for Selenium 4 Java and added the same in pom.xml
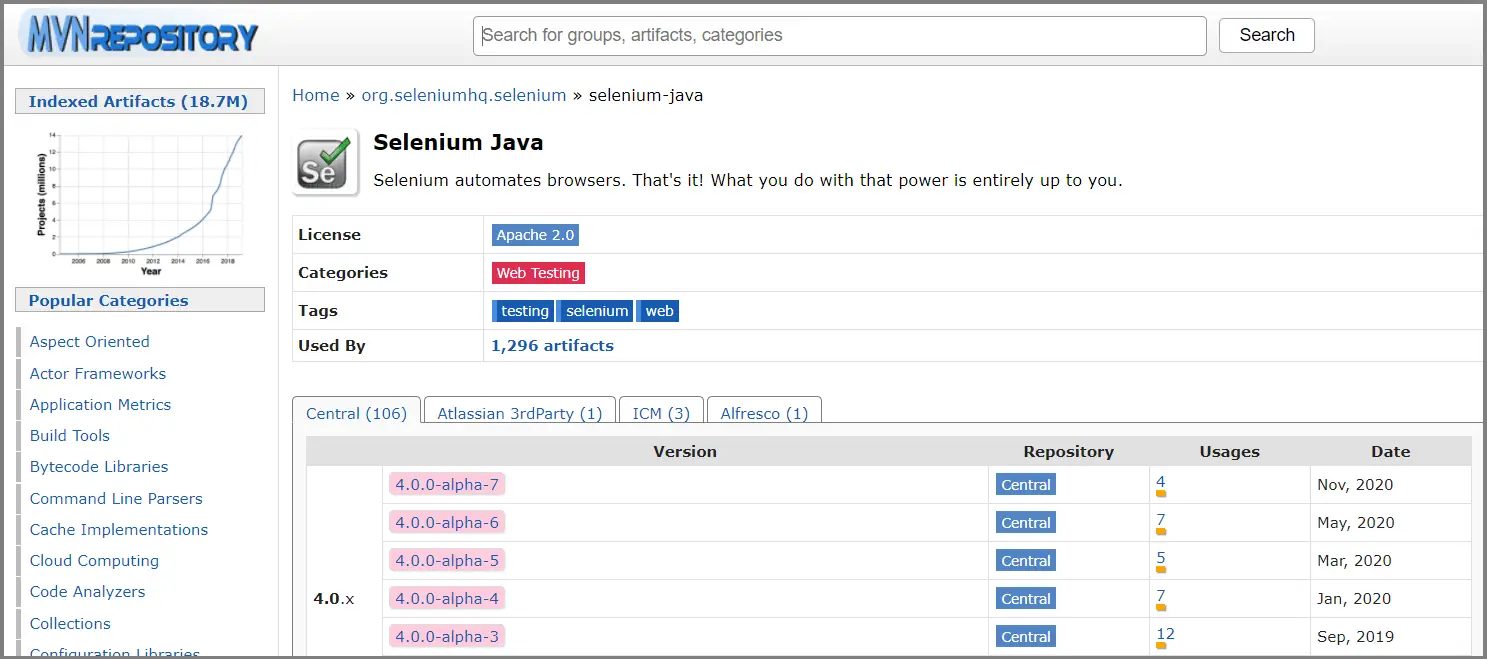
Note: Still stable version is not released. The current version is Selenium 4 (Alpha 7), released on 10th November’20. Until Selenium 4 is officially released, It’s not recommended to upgrade or migrate your existing Selenium Project
<?xml version="1.0" encoding="UTF-8"?>
<project xmlns="http://maven.apache.org/POM/4.0.0"
         xmlns:xsi="http://www.w3.org/2001/XMLSchema-instance"
         xsi:schemaLocation="http://maven.apache.org/POM/4.0.0 http://maven.apache.org/xsd/maven-4.0.0.xsd">
    <modelVersion>4.0.0</modelVersion>

    <groupId>selenium4</groupId>
    <artifactId>selenium4</artifactId>
    <version>1.0-SNAPSHOT</version>
    <build>
        <plugins>
            <plugin>
                <groupId>org.apache.maven.plugins</groupId>
                <artifactId>maven-compiler-plugin</artifactId>
                <configuration>
                    <source>8</source>
                    <target>8</target>
                </configuration>
            </plugin>
        </plugins>
    </build>

    <dependencies>
        <!-- https://mvnrepository.com/artifact/org.seleniumhq.selenium/selenium-java -->
        <dependency>
            <groupId>org.seleniumhq.selenium</groupId>
            <artifactId>selenium-java</artifactId>
            <version>4.0.0-alpha-7</version>
        </dependency>
        <dependency>
            <groupId>commons-io</groupId>
            <artifactId>commons-io</artifactId>
            <version>2.6</version>
        </dependency>

    </dependencies>

</project>
How To Install Fresh Instance of Selenium 4
Follow the below steps to complete the installation.
Step 1: How To Install JAVA
Step 2: How To Install Eclipse
Step 3: How To Install Selenium 4
Step 1: How To Install Java
Check the below video to see “How To Install Java”
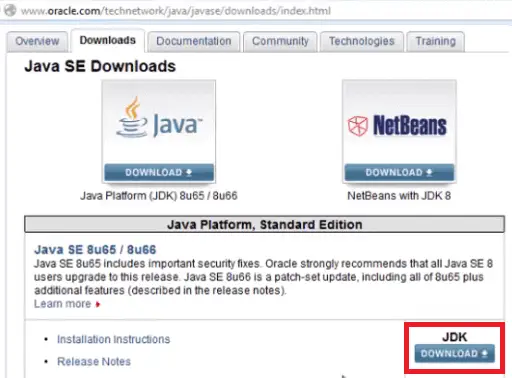
Go to the below-mentioned link and download the latest version of JAVA or click here
http://www.oracle.com/technetwork/java/javase/downloads/index.html
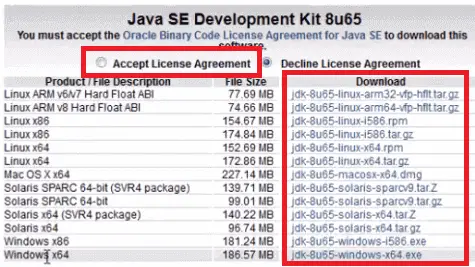
Accept the license agreement and choose the right ‘JDK’ file to download based on your system requirement.
Once downloaded. Go ahead and verify the Java version. To do this, open the command prompt and type “java -version” and hit enter
Step 2: How To Install Eclipse
Go to the following link to download eclipse
http://www.eclipse.org/downloads/
Download the appropriate file based on your system requirement
Download ‘Eclipse IDE for Java Developers’
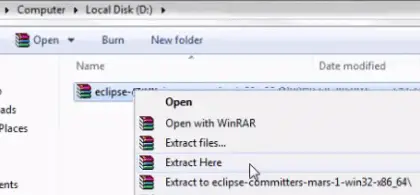
Extract the eclipse file which you have downloaded
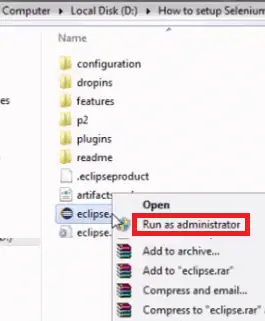
Right-click on ‘eclipse.exe’ and run it as ‘Run as administrator’
Choose a specified path to create ‘workspace’ by using the ‘Browse’ button.
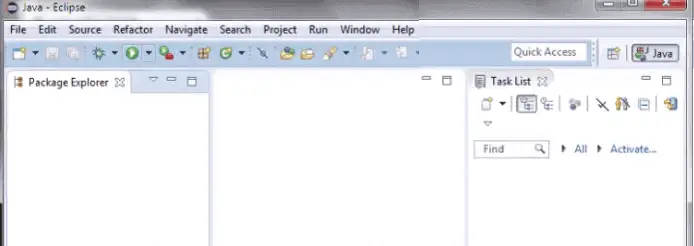
You could create Java Projects, Packages, and Classes in Java Eclipse.
Step 3: How To Install Selenium 4
Selenium Java binding can be set up in 2 ways using build tools or manually.
Install Selenium using Maven (build tool):
Even though there are many build tools available in the market to manage the build and dependencies, the most widely used one is Maven.
Install and Setup Maven
Check this post on how to install and setup maven
Download Selenium using Maven
We can add dependencies in pom.xml to download Selenium 4 using maven.
Add the below code into a new Java class under the ‘src’ directory in your project.
package STM;

import org.openqa.selenium.By;
import org.openqa.selenium.Keys;
import org.openqa.selenium.WebElement;
import org.openqa.selenium.chrome.ChromeDriver;

class SearchTest{

    final static String PROJECT_PATH = System.getProperty("user.dir");

    public static void main(String[] args) {

        System.setProperty("webdriver.chrome.driver", PROJECT_PATH+ "/chromedriver");
        ChromeDriver driver = new ChromeDriver();
        driver.get("https://www.google.com");
        WebElement searchTxtBox = driver.findElement(By.name("q"));
        searchTxtBox.sendKeys("Selenium 4 SoftwareTestingMaterial" + Keys.ENTER);

        driver.quit();

    }
}
Install Selenium manually:
To install Selenium 4 manually first we have to download Selenium 4 Java bindings from the official Selenium page.
Add Selenium to your favorite IDE. Here we are using Eclipse IDE.
Go to the Project – right click and select Properties – Build path – Configure Build Path
In the Java Build path screen – Click on Add External Jars – Select all the jars files and click on Open
Click on the “Apply” and then “OK” button within the dialogue box.
Finally, we have completed the configuration part of Selenium Libraries in our project.
package STM;

import org.openqa.selenium.By;
import org.openqa.selenium.Keys;
import org.openqa.selenium.WebElement;
import org.openqa.selenium.chrome.ChromeDriver;

class SearchTest{

    final static String PROJECT_PATH = System.getProperty("user.dir");

    public static void main(String[] args) {

        System.setProperty("webdriver.chrome.driver", PROJECT_PATH+ "/chromedriver");
        ChromeDriver driver = new ChromeDriver();
        driver.get("https://www.google.com");
        WebElement searchTxtBox = driver.findElement(By.name("q"));
        searchTxtBox.sendKeys("Selenium 4 SoftwareTestingMaterial" + Keys.ENTER);

        driver.quit();

    }
}
Finally, we have installed Selenium 4.
Selenium 4 comes with many new selenium features like Selenium Grid Optimization, Relative Locators, Multiple Tabs & Windows, Browsers Support, Selenium IDE, Chrome DevTools, etc.,
In this post, we have seen how to upgrade from Selenium 3 to Selenium 4 for Java language bindings.
How is your experience with Selenium 4, please share your experience in the comment section below.

