How To Install Maven In Eclipse IDE | Selenium Tutorial
Before going through how to install Maven in Eclipse IDE. Let’s look into in the prerequisites which we need to install Maven in Eclipse IDE.
We need to have the following
i. Selenium IDE
ii. Active Internet Connection
Download and Install Maven In Eclipse IDE
Follow the below steps to complete the installation.
Step 1: Open Eclipse IDE
Step 2: Download and Install Maven
Let’s get started.
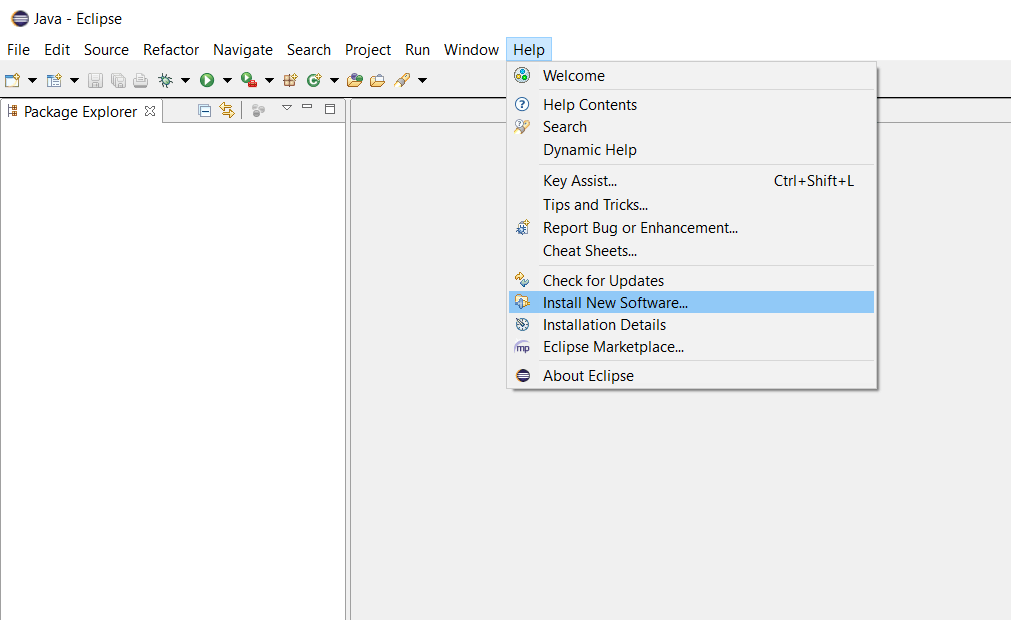
Launch the Eclipse IDE. Go to ‘Help‘ and click on ‘Install New Software‘
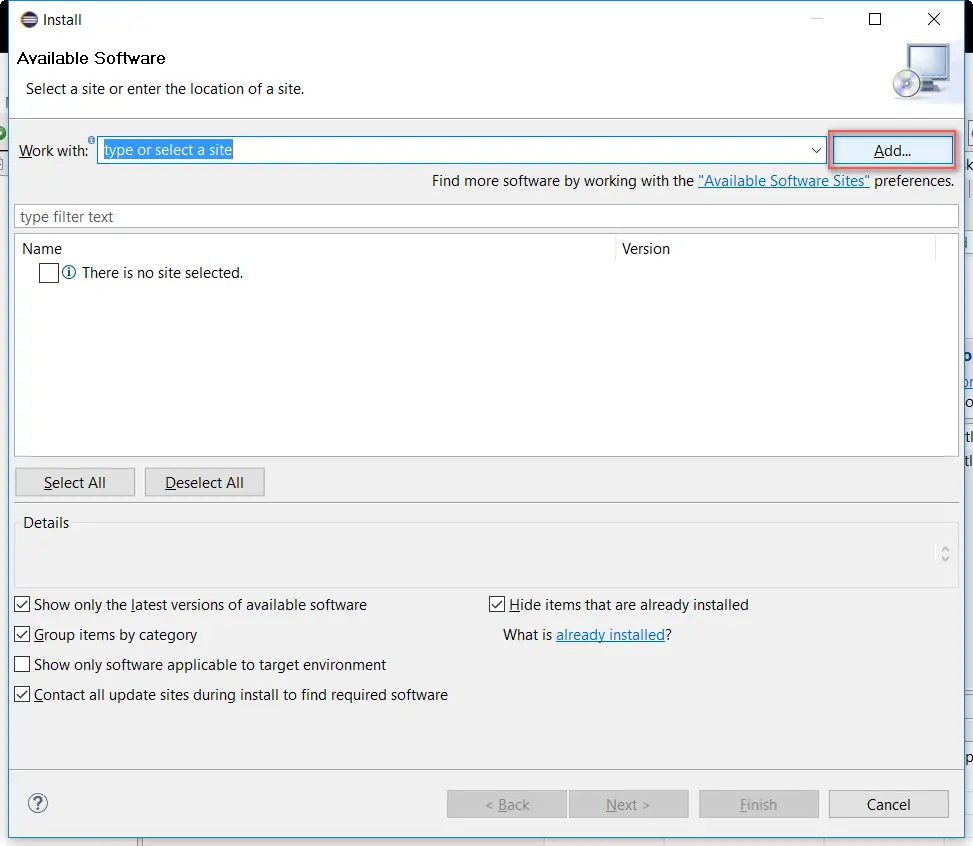
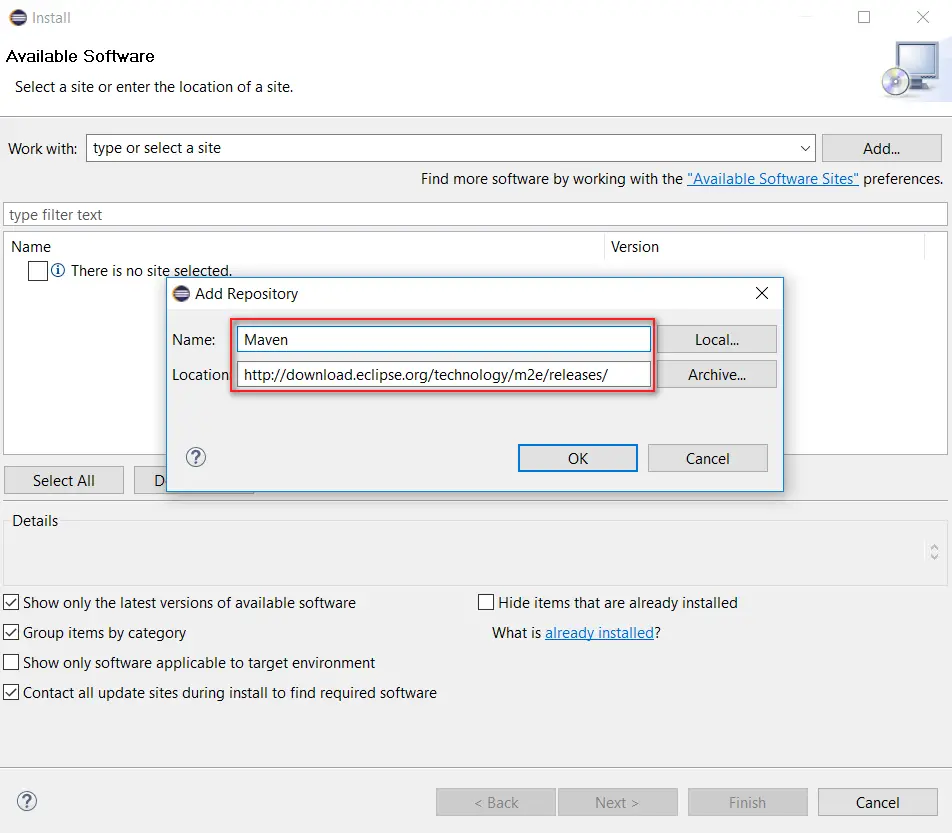
Click on ‘Add‘ button
Enter the ‘Name‘ as per your wish. Here I am adding as ‘Maven’. Add location as “http://download.eclipse.org/technology/m2e/releases/” and click on ‘OK‘ button
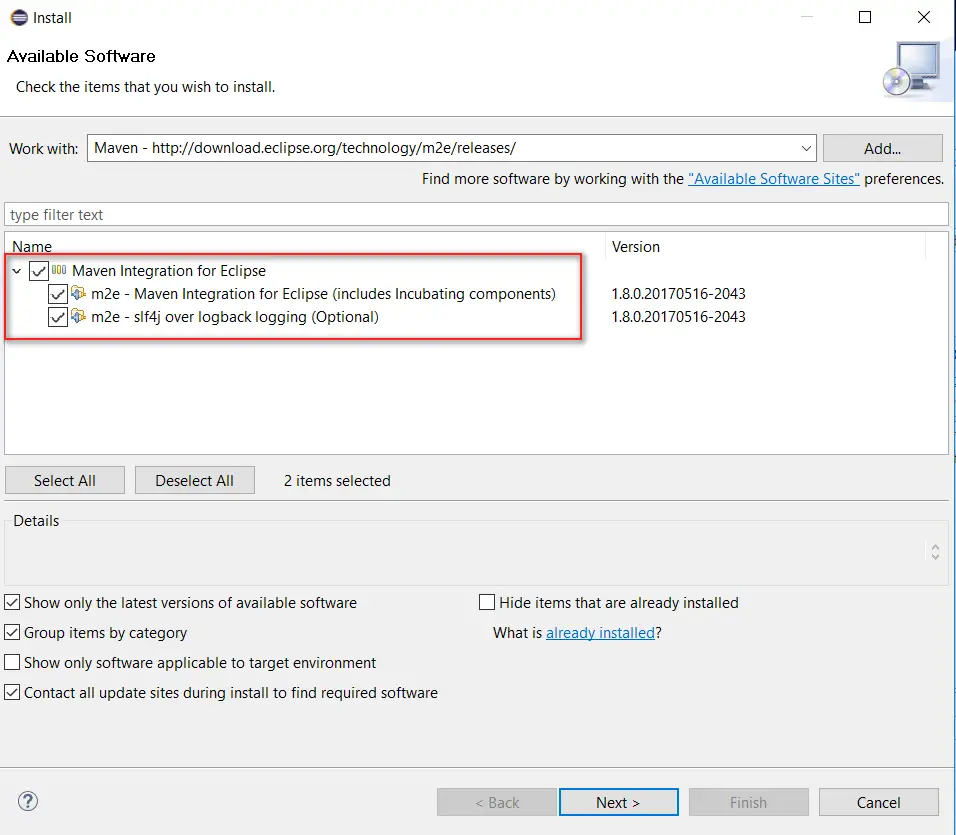
In the Available Software list, you could see Maven option. Select “Maven” and click on ‘Next‘ button
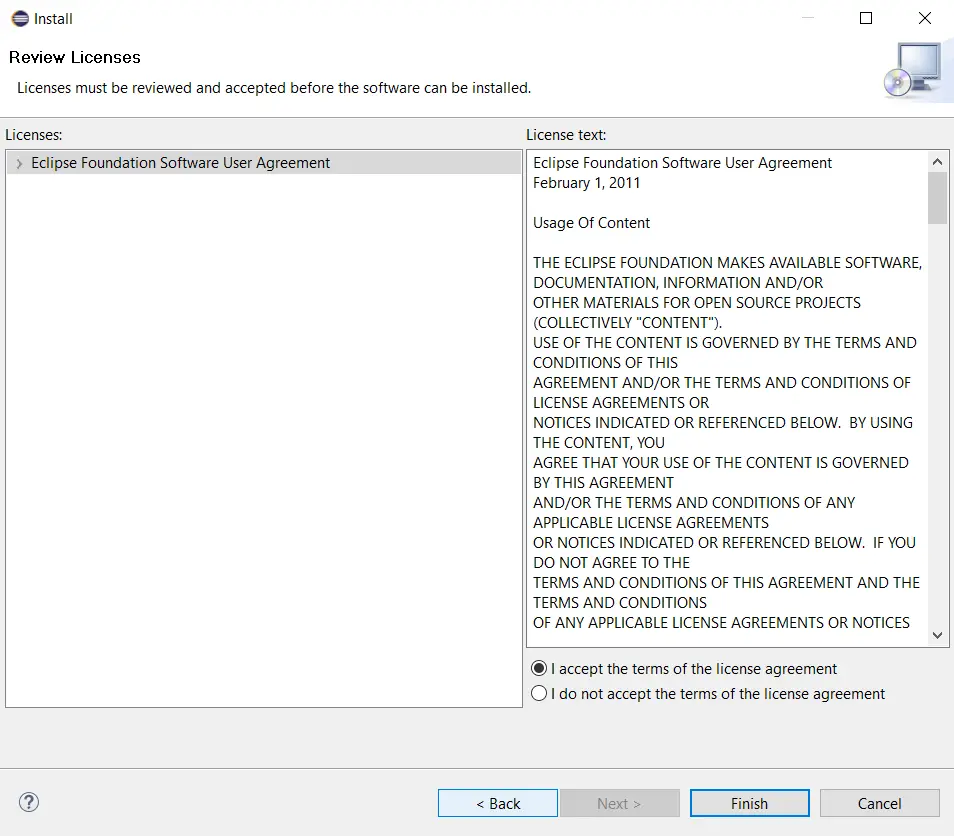
Click ‘I accept the terms of the license agreement‘ then click Finish.
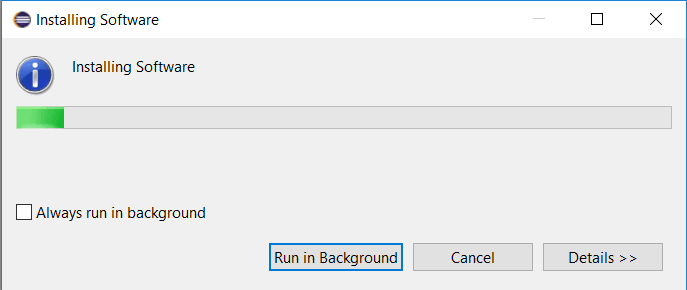
Installation is in progress. Click on ‘Yes‘
Now you need to restart Eclipse for the changes to take effect. Click on ‘Yes‘ 
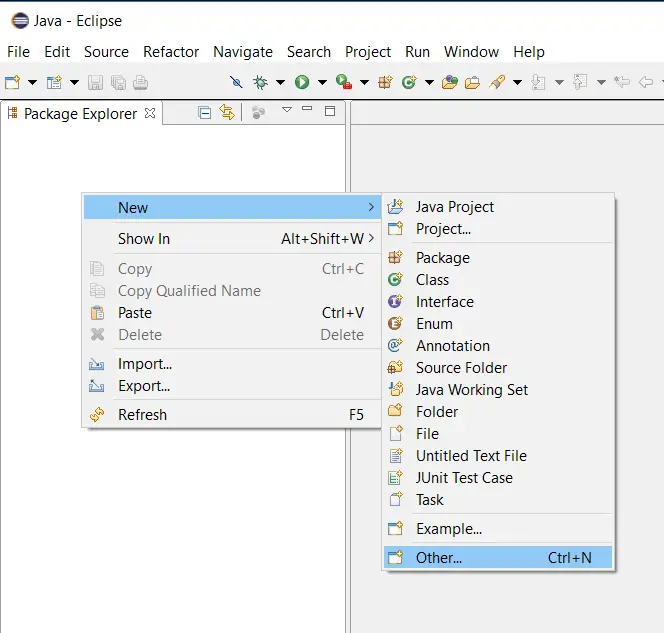
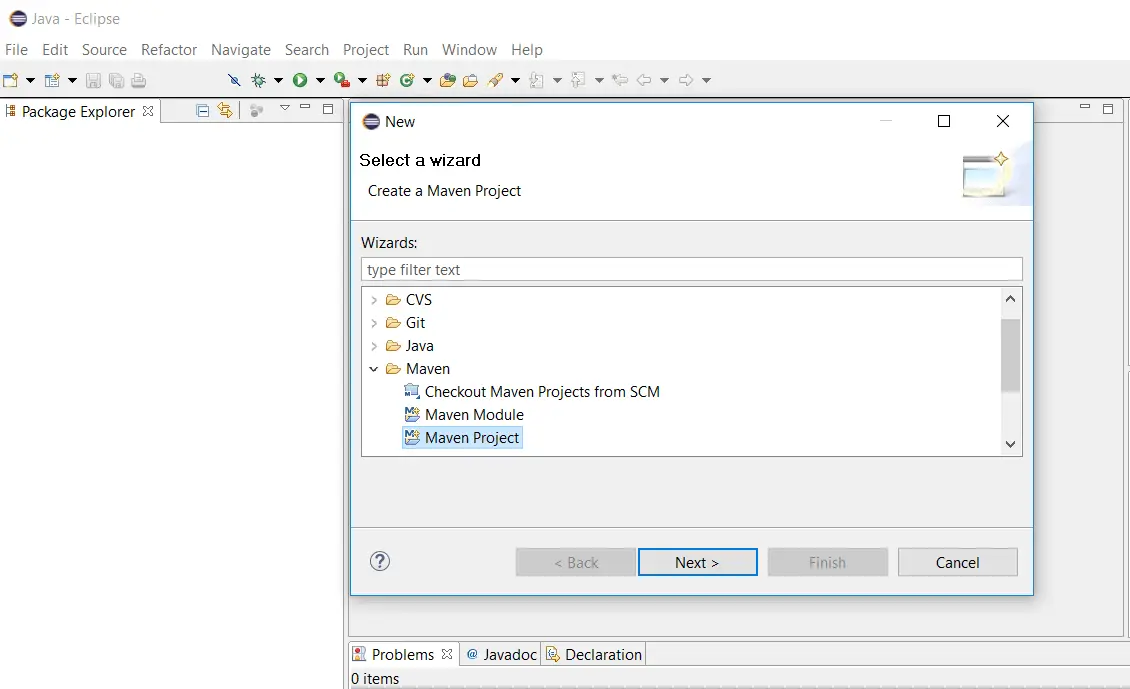
After the restart, Right click on your project to verify if Maven was successfully installed or not. If it is successfully installed, you could see Maven as shown below. To do that Right Click on Project Explorer and Navigate through New – Other – Maven – Maven Project
This is all about Install Maven in Eclipse IDE. Now lets move on to creating a Maven Project. In the next post, we see how to create a maven project.




Grate!!! it is so easy with this tutorial. Thank you very match Rajkumar !!!
Thanks for the kind words Stas. Keep visiting.