Data-Driven Testing in Postman
In the previous articles on Postman Tutorial, we have covered “JSON Schema Validation in Postman“
In this “Data-Driven Testing in Postman” article, I will be demonstrating how you can implement this concept and get a tight grip over this.
Data-driven testing is when we have one test that we run multiple times with different data variables. It’s useful for things like, if we have a certain range of characters that we’re supporting in our names, to make sure that all those characters are supported in different tests.
Let the body of API be:

{
    "email": "{{email}}",
    "password": "{{password}}"
}
Add tests in Tests tab:
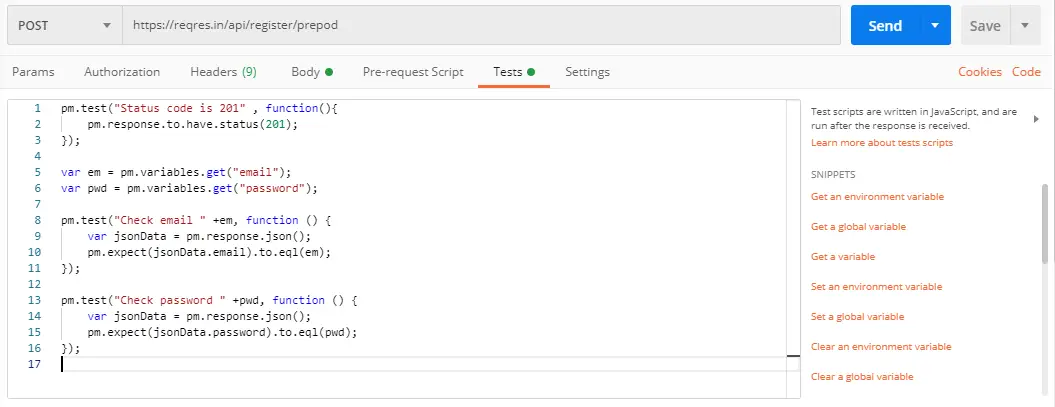
{
pm.test("Status code is 201" , function(){
    pm.response.to.have.status(201);
});

var em = pm.variables.get("email");
var pwd = pm.variables.get("password");

pm.test("Check email " +em, function () {
    var jsonData = pm.response.json();
    pm.expect(jsonData.email).to.eql(em);
});

pm.test("Check password " +pwd, function () {
    var jsonData = pm.response.json();
    pm.expect(jsonData.password).to.eql(pwd);
});
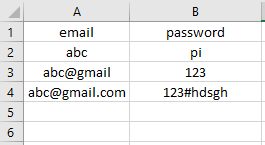
Using CSV file:
1. Create a CSV file.
2. Add email, password in columns of CSV file
3. Add possible test cases of email and password.
4. Create a collection named Data-driven test
5. To get variable from CSV file, run this collection on Runner, click Run button
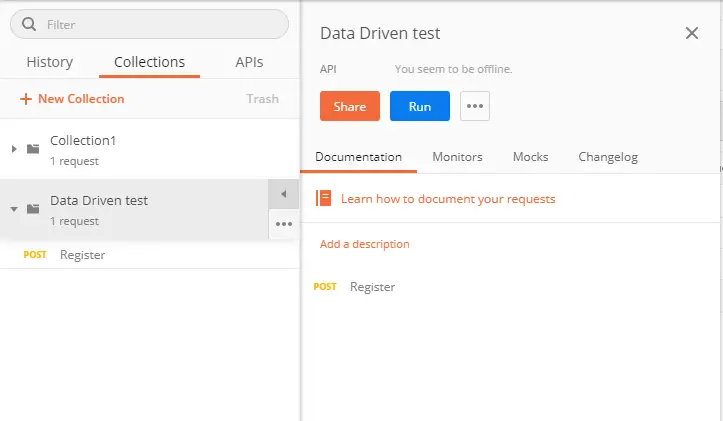
6. Collection Runner window will appear.
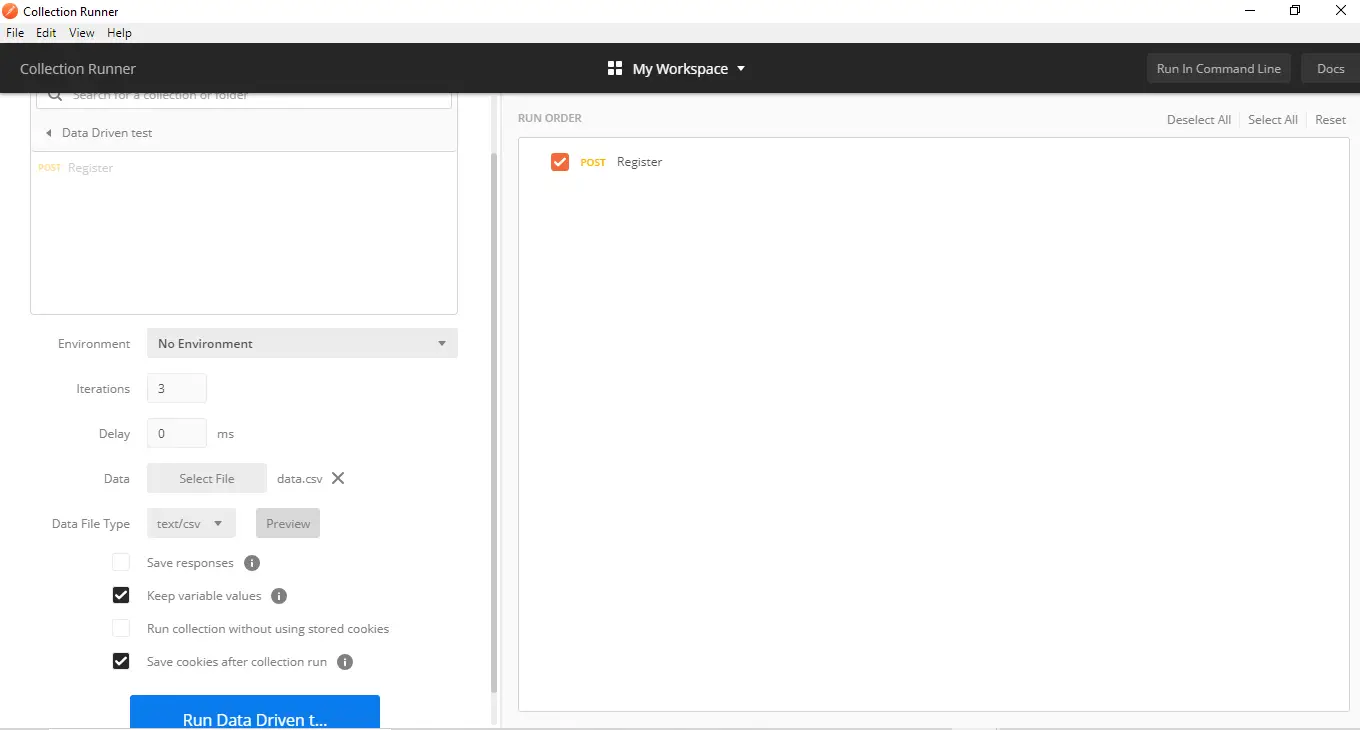
7. Iterations are the no. of data rows in CSV file
8. Add CSV file in the Data option. Preview button will display the preview of CSV file
9. Click on Run button in blue color
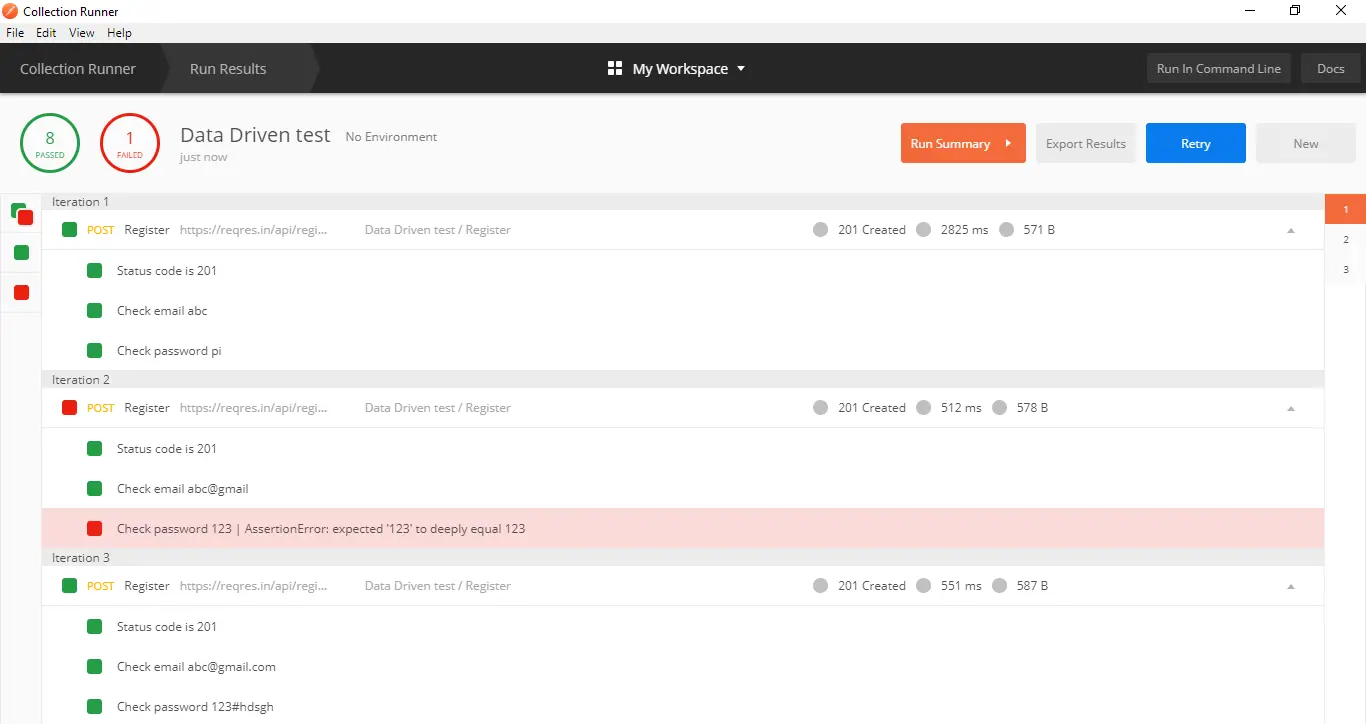
10. Result window will be displayed
Using JSON file:
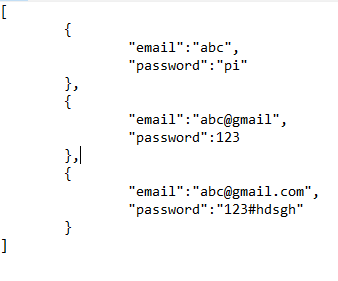
1. Create a JSON file.
2. Add email, password in JSON file separated by a comma
3. Add possible test cases of email and password.
4. Create a collection named Data-driven test.
5. To get variable from JSON file, run this collection on Runner, click Run button
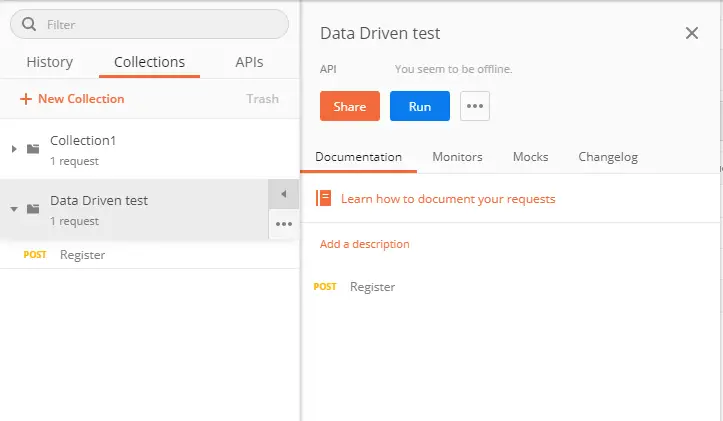
6. Collection Runner window will appear.
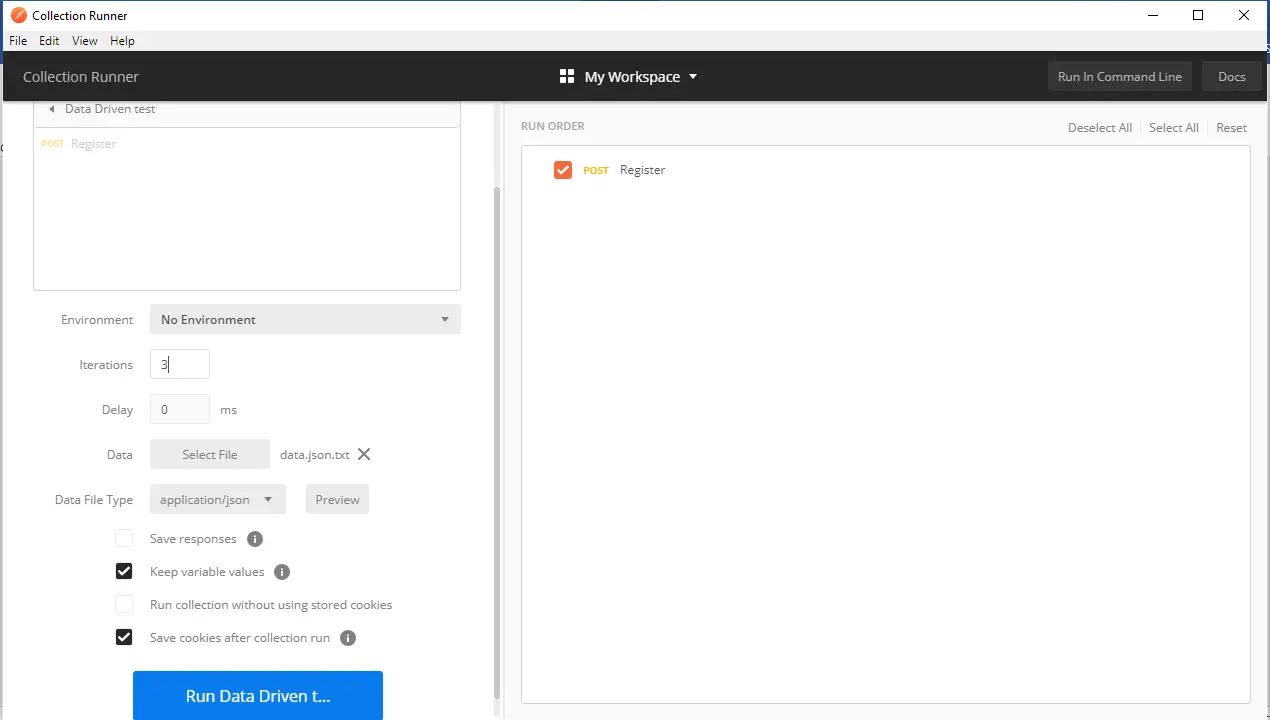
7. Iterations are the no. of data rows in JSON file.
8. Add JSON file in the Data option. The preview button will display the preview of JSON file.
9. Click on the Run button in blue color.
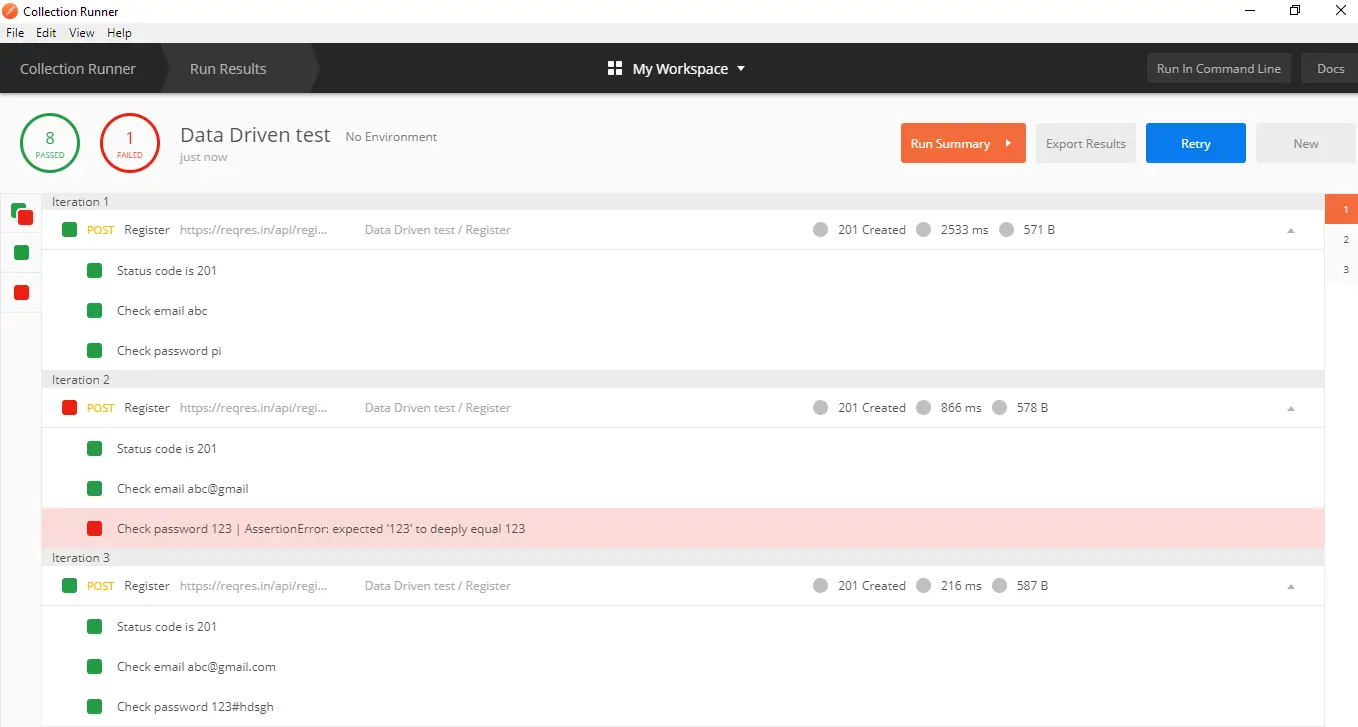
10. The Result window will be displayed.
Next steps:
Learn “Monitor Collections in Postman” in the next tutorial.
Related posts:


