TestProject Open SDK for Java

TestProject Java SDK Introduction
TestProject is a free automation tool that promises to give painless automation experience. It has the feature of record and plays associated with a developer SDK. It also has the capability to build and utilize addons as per need. It is based on automation tools like Appium and Selenium.
Having said that, TestProject removes the complication of maintaining and downloading multiple browser drivers required for testing an application in various platforms and browsers. This is overcome by having an executable file that can run in the majority of browsers and devices.
TestProject has good community support where we can discuss and find answers to our queries. Some of the features of TestProject are listed below:
Simple to start automation
The record and playback features of TestProject enable you to start automation even with minimum coding knowledge. They’ve recently also added AI-powered self-healing capabilities to their recorder, making test creation seamless, even for the most complex applications (such as Salesforce).
Supports teamwork
The sharing of test cases and scripts among team members is uncomplicated and effortless in TestProject.
Flexibility
TestProject automatically provides a library of resources. These addons can be improvised and also new ones can be created to simplify our work.
Supports multiple browsers and platforms
TestProject can test in any platform like Linux, Windows or Mac, and even Docker. It supports the testing of mobile apps in both ios and android. Also, it supports the majority of browsers like Chrome, Firefox, and so on.
Stable technology
TestProject is based on Appium and Selenium which are efficient and proven technology in the field of automation.
No need to purchase a license
TestProject with all its features is 100% free to use and requires no commercial license.
Apart from the above features, TestProject has some unique characteristics as listed below:
- TestProject gives the option to expand the framework by utilizing the addons shared by other users on the platform.
- TestProject is the first SaaS automation framework created for the agile team structure. Also, it comes absolutely free.
- TestProject encourages team collaboration with respect to building and sharing a robust automation framework.
- Out-of-the-box automatic test reports and dashboards in HTML/PDF format (including screenshots).
TestProject does not require strong technical and coding know-how to start with as it has excellent built-in recording capabilities. But for those who love to code – you can also find their Selenium and Appium powered developer SDK for Java, Python, and C#. In this tutorial, we will focus on the Java OpenSDK.
Installation steps
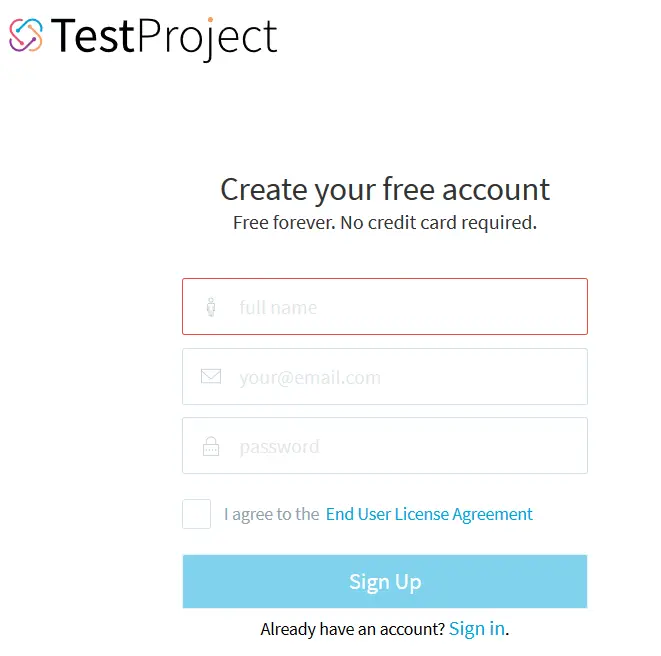
For the installation of the TestProject in our system, we have to first create an account. Please note, the account creation is easy and comes free of cost. We need to create the account using this link

Click on the Free Sign Up button. Now we have to provide details like name, mailing address, password, and agree to the terms and conditions and finally again click on the Sign-Up button.
Once the account is created with TestProject, we need to perform some more steps to complete the installation process. We need to login to the TestProject site and navigate to the Agents tab which resides on the top of the screen and then select the operating system on which we want to complete the installation.
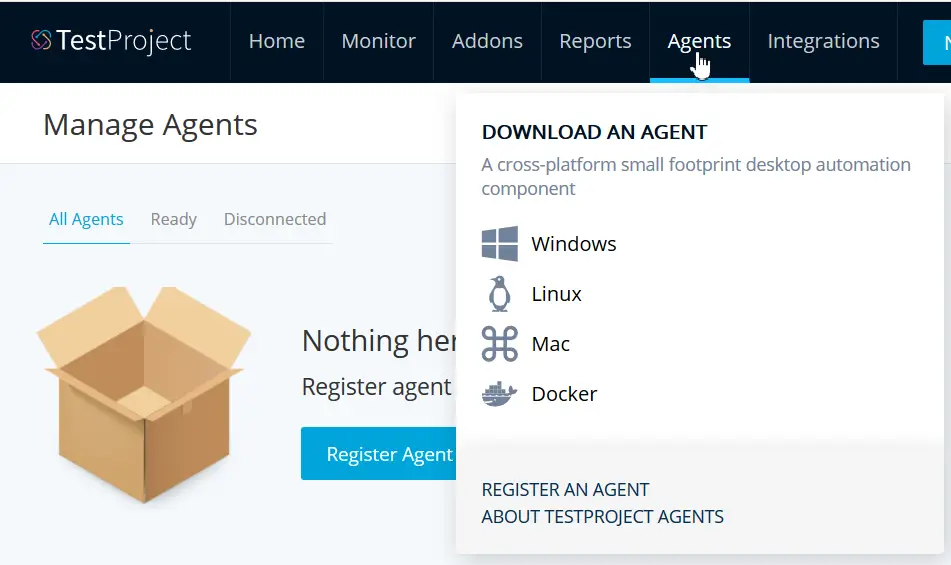
Next, we need to download the agent executable file. Once the download is done, we can do the installation of the TestProject agent in our machine. Then we have to make sure the TestProject agent is up and running on our machine.
Start the TestProject Agent
On a Windows platform, the simple method to execute the TestProject agent is to search for TestProject in the Windows search bar. Once the Agent gets displayed, we need to click on it. This will trigger the agent to start and the status will be displayed on right-clicking the icon in the System tray.

TestProject Agent Registration
Once we have checked that the agent is running without issues, we need to navigate to the TestProject home page and click on the Agents menu and then select the REGISTER AN AGENT link.

A pop-up window will appear, where we need to give the agent an alias. We need to populate a relevant name since in the future we may need to share the agent among the team members. Finally, we need to click on the Register button. This will register our agent with the TestProject application and we are all set, to begin with, TestProject.
To get started, we must have the Java Development Kit (JDK) version 11 installed in our system and fetch the development kit from SDK/ integration page.
Installation in a Maven Project
For a project, built-in Maven, the pom.xml should contain the below code:
<dependency>
<groupId> io.testproject </groupId>
<artifactId> java-sdk </artifactId>
<version> 0.63.4-RELEASE </version>
<classifier> sources </classifier>
</dependency>
Installation in a Gradle Project
For a project, built-in Gradle, the build.gradle should contain the below code:
implementation 'io.testproject:java-sdk:0.63.4-RELEASE'
How to create TestProject-powered Selenium Test
TestProject driver implementation is similar to a Selenium driver. Mostly they differ in the import statements. Let us know how to set up a TestProject version of ChromeDriver.
Please note we need to build a development token for running the below test. Also, the developer token needs to use the SDK by either configuring it as an environment variable or keeping it in the driver constructor.
To get the Developer taken, navigate to the following link:
https://app.testproject.io/#/integrations/sdk
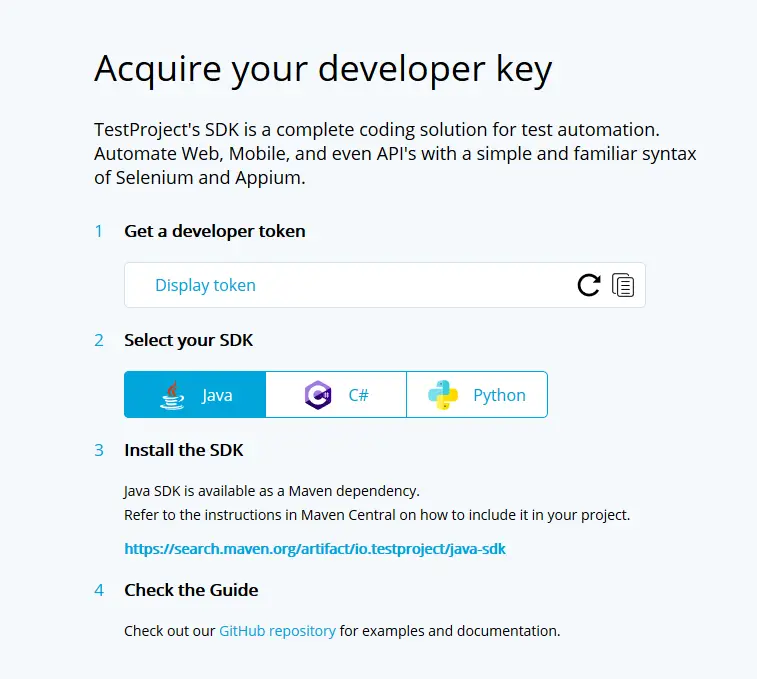
Select the SDK [Java/ C# or Python] and then click on the Display token link inside the Get a developer token field.
import io.testproject.sdk.drivers.web.ChromeDriver;
import org.openqa.selenium.By;
import org.openqa.selenium.chrome.ChromeOptions;
public final class TestProj {
    public static void main(String[] args) throws Exception {
      ChromeDriver driver = new ChromeDriver ("YOUR_DEV_TOKEN", new ChromeOptions());
        driver.navigate ().to ("https://www.softwaretestingmaterial.com");
        //identify an element and input text to that field
        driver.findElement (By.cssSelector ("#form-field-name")).sendKeys ("P");
        // verify the email edit box is displayed
        //Thread.sleep(20000);
        boolean r = driver.findElement(By.id("form-field-email")).isDisplayed ();
        // checking the test case passed condition
        if (r) {
            System.out.println ("Test Case has passed");
        } else {
            System.out.println ("Test Case has failed");
        }
        driver.quit ();
    }
}
TestProject SDK overrules the common Selenium/ Appium drivers with enhanced features. Let us see the package structure with all the drivers that are supported by TestProject SDK.
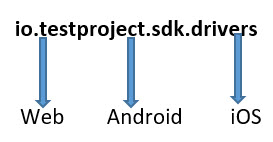
TestProject SDK drivers support web, android, and ios platforms. For the web, the list of drivers that are available in the TestProject are listed below:
- EdgeDriver
- ChromeDriver
- InternetExplorerDriver
- SafariDriver
- FirefoxDriver
- RemoteWebDriver
For the android, the driver that is available in the TestProject is:
- AndroidDriver
For the ios, the driver that is available in the TestProject is:
- IOSDriver
Test Reports walkthrough
The reports are available on the TestProject homepage and it resides on the top of the screen with the Reports menu. They can be downloaded and emailed with other stakeholders in the team and higher management. The report generation is an important feature as it helps to conclude on the quality of the application and also for debugging.

The reports that are run individually in TestProject are described below:

Image source: https://docs.testproject.io/reports/individual-run-reports
The report contains all the details including the date, time, duration of test execution, executed by and percentage of test cases passed, failed, skipped, suspended, error.
You can also export this report as a PDF.
Test Reports Generation Automatically
The test reports are generated by default as a test terminates or the driver session is no longer active. These default characteristics can be overruled by disabling the reports feature in TestProject.
To identify that a test has come to an end, the call stack is traversed to find the annotated methods. As the test execution for the annotated method begins and prior detected finishes, the test end is terminated.
All unit testing frameworks are numbered by having an independent test in the report for all the annotated methods.
The developer token needs to use the SDK by either configuring it as an environment variable or keeping it in the driver constructor.
Code Implementation in JUnit that shall produce three tests in the reports.
public class JUnitTest {
    private ChromeDriver driver;
    @BeforeEach
    void beforeTestScenario(TestInfo testInfo) throws Exception {
        driver = new ChromeDriver(new ChromeOptions());
        driver.report().step("Before Test Scenario: " + testInfo.getDisplayName());
    }
    @Test
    @DisplayName(value = "SoftwareTestingMaterial")
    void testApplication() {
        driver.navigate().to("https://www.softwaretestingmaterial.com/");
    }
    @AfterEach
    void afterTestScenario(TestInfo testInfo) {
        driver.report().step("After Test Scenario: " + testInfo.getDisplayName());
        driver.quit();
    }
}
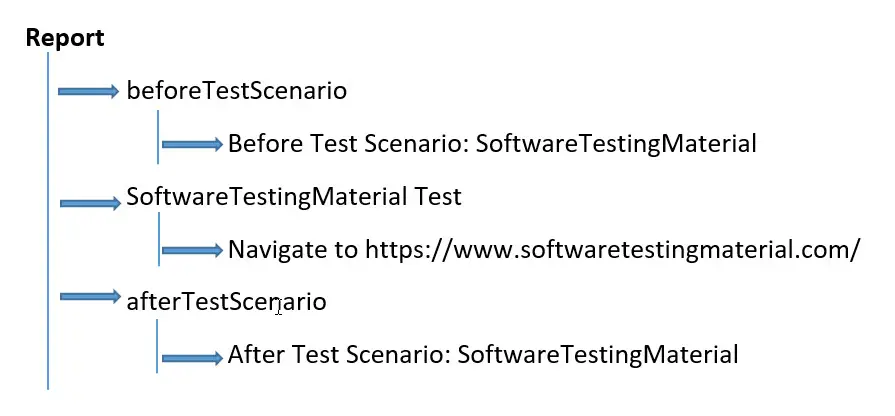
Above shows the by default report generation from the JUnit code.
Test Reports Generation Manually
To generate test reports manually, we need to use driver.report ().tests () method and its overloaded methods. Also, it is mandatory to disable automatic reporting when we want to generate a manual report to avoid a clash. We have to add the below code for the manual report.
ChromeDriver driver = new ChromeDriver (new ChromeOptions ());
driver.report ().test ("Test").submit ();
A ClosableTestReport object is returned from the driver.report ().test () method. A direct call to the submit () method is required for sending the report.
Let us see an example where a closable object is used in a scenario where an exception is thrown due to the element not being available in DOM [absence of a web element with id lnk in DOM]. The test case fails but before that closable object gets closed and the test result gets reported.
ChromeDriver d = new ChromeDriver (new ChromeOptions ());
try (ClosableTestReport r = d.report ().test("Test")) {
d.findElement (By.cssSelector ("#lnk")).click ();
}
Test Steps
The test steps are reported by default when driver commands are run. This feature can be disabled, or in addition, manual reports can be generated. For example,
ChromeDriver driver = new ChromeDriver (new ChromeOptions ());
driver.report ().step ("Payment successfully executed");
Reports disable
In case the report has not been disabled during the driver creation, it can be enabled or disabled in the later stages as per need. Having said that, if it is clearly disabled at the time of driver initiation, it is not possible to enable it later.
To disable all reporting, the below code has to be added. We have to pass a true value to the disableReports () method.
ChromeDriver drv = new ChromeDriver (new ChromeOptions ());
drv.report ().disableReports (true);
To disable the test with automatic reporting, the below code has to be added. Every test step will be in one report. This will not happen only if a manual test report is being generated with driver.report ().tests (). We have to pass a true value to the disableTestAutoReports () method.
ChromeDriver drv = new ChromeDriver (new ChromeOptions ());
drv.report ().disableTestAutoReports (true);
To disable driver commands reporting, the below code has to be added. There will be no steps available in the report. This will not happen only if a manual test report is being generated with driver.report ().step (). We have to pass a true value to the disableCommandReports () method.
ChromeDriver drv = new ChromeDriver (new ChromeOptions ());
drv.report ().disableCommandReports (true);
While reporting driver commands, SDK does redaction of the delicate data which is passed over a secured element. This is mainly seen either with the element which has a type attribute set to password in the HTML or with XCUITest on iOS platform on an element with type XCUIElementTypeSecureTextField.
The values delivered to these elements are represented by three asterisks (***). This feature can be disabled by adding the below code. We have to pass a true value to the disableRedaction () method.
ChromeDriver drv = new ChromeDriver (new ChromeOptions ());
drv.report ().disableRedaction (true);
How to create TestProject-powered Appium Tests
Let us create a simple Appium automated test case for Android. First of all, we have to get all the Android driver capabilities needed for the device under test and application under test. These capabilities initiate the Android driver which will call multiple Appium actions on mobile applications.
To work on various activities, Appium should be able to identify the elements with any of the locators’ available like id, class, CSS selector, and so on [By.id/ By.cssSelector].
The developer token needs to use the SDK by either configuring it as an environment variable or keeping it in the driver constructor.
Code Implementation with Appium in TestProject.
import io.appium.java_client.MobileElement;
import io.appium.java_client.remote.MobileCapabilityType;
import io.appium.java_client.remote.MobilePlatform;
import io.testproject.sdk.drivers.android.AndroidDriver;
import org.openqa.selenium.By;
import org.openqa.selenium.remote.DesiredCapabilities;
import java.util.concurrent.TimeUnit;

public final class AppiumTest {

    public static final int TIMEOUT = 5;

    public static void main(final String[] args) throws Exception {

        DesiredCapabilities capabilities = new DesiredCapabilities();
        capabilities.setCapability(MobileCapabilityType.PLATFORM_NAME, MobilePlatform.ANDROID);
        capabilities.setCapability(MobileCapabilityType.UDID, "YOUR_DEVICE_UDID");
        capabilities.setCapability(MobileCapabilityType.APP, "https://github.com/testproject-io/android-demo-app/raw/master/APK/testproject-demo-app.apk");

        AndroidDriver<MobileElement> driver = new AndroidDriver<>(capabilities);
        driver.manage().timeouts().implicitlyWait(TIMEOUT, TimeUnit.SECONDS);

        // Reset App
        driver.resetApp();

        // Login using provided credentials
        driver.findElement(By.id("name")).sendKeys("John Smith");
        driver.findElement(By.id("password")).sendKeys("12345");
        driver.findElement(By.id("login")).click();

        driver.quit();
    }
}
Conclusion
In this article, we have discussed at length on TestProject, its features, and what makes it so significant. We have seen its detailed installation steps and how to configure it in our local system.
We have created basic tests with Selenium and Appium in TestProject. Also, we have explored TestProject reports and how to do different configurations to disable reporting.
TestProject Java SDK can help you boost up your existing Selenium and Appium based tests. It is also available in Python and C#. It supports cross-platform (Linux, Windows or Mac, and even Docker).
With TestProject SDK you can save not just time but also get benefits like a beautiful dashboard which helps you to deep dive into each test step and automatic test reports in both HTML and PDF formats which helps you to view error messages, screenshots, failed steps, etc.,
Best of all it is 100% free of charge.
Why wait? Roll your sleeves up and start exploring the TestProject.
Share your experience with TestProject Java SDK in the comments below.
Related Posts:


