Browser Automation with Nightwatch and Selenium
What is Selenium?
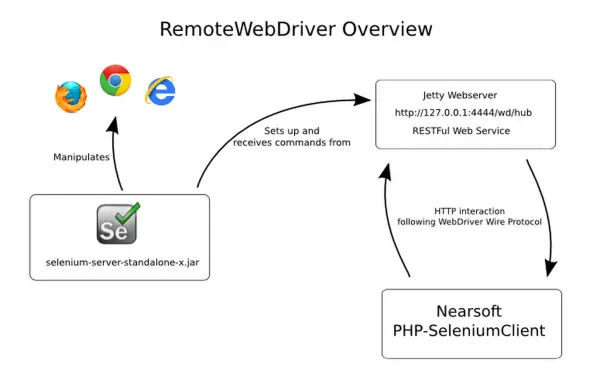
Selenium is an open source tool which used for automating web applications and websites tests. Selenium includes client and server components.
Selenium Client includes:
- The WebDriverAPI, which used to develop test scripts to interact with page and application elements.
- The RemoteWebDriverclass, which communicates with a remote Selenium server.
Selenium Server includes:
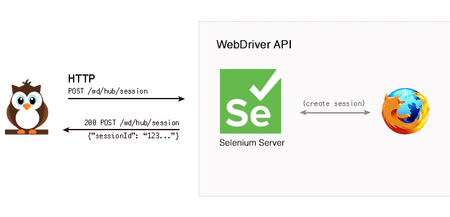
- A server component, to receive requests from Selenium Client ‘s RemoteWebDriver
- The WebDriverAPI, to run tests against web browsers on a server machine.
- Selenium Grid, implemented by Selenium Server in command-line options for grid features, including a central hub and nodes for various environments and desired browser capabilities.
With Selenium you can:
- Write your test scripts in any of these programming languages: Java, JavaScript, C#, .Net, Python, PHP, Ruby, Perl.
- Launch tests in any of these OS: Windows, Linux or MacOS.
- Launch tests in any browser: Google Chrome, Microsoft Edge, Mozilla Firefox, Opera, Internet Explorer 7+, Safari etc.
- Integrate tests with tools like JUnit or TestNG for managing test cases and generating reports.
What is Nightwatch JS?
Nightwatch JS is an automated testing framework for web applications and websites, written in Node.js and using the W3C WebDriver API. This is a complete End-to-End testing framework that aims to simplify the process of setting up continuous integration and creating automatic tests.
According to the official site main advantages of Nightwatch.JS is:
- Clear syntax – simple but powerful syntax which enables you to write tests very quickly, using only Javascript (Node.js) and CSS or XPath
- Built-in test runner – built-in command-line test runner which can run the tests either sequentially or in parallel, together, by group, tags or single. Grunt support is built-in.
- Selenium server – controls the Selenium standalone server automatically in a separate child process; can be disabled if Selenium runs on another host.
- Cloud services support – works with cloud testing providers, such as SauceLabs and BrowserStack.
- CSS & XPath support – either CSS or XPath selectors can be used to locate and verify elements on the page or execute commands.
- Continous integration support – JUnit XML reporting is built-in so you can integrate your tests in your build process with systems such as TeamCity, Jenkins, Hudson etc.
- Easy to extend – flexible command and assertion framework which makes it easy to extend to implement your application-specific commands and assertions.
Installation
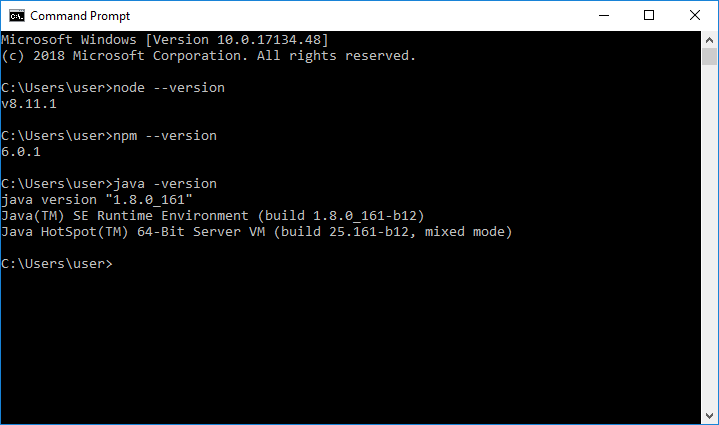
To install Nightwatch, you need npm. If you don`t have Node.js yet, need to get it. Installation instructions can be found on the Node.js project page.
Also, you would need JDK, to check that Java is available in environment path, run simply command:
java –version.
You can download Java from the official site.
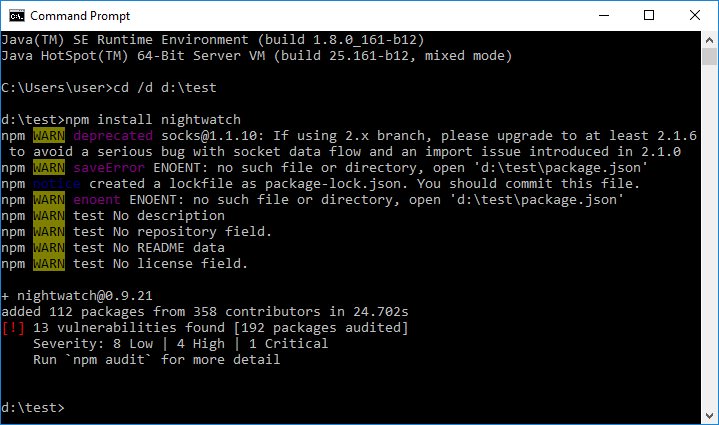
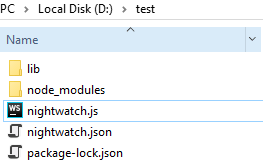
The first step is to create an empty folder and navigate to it. To install Nightwatch in this folder, need run command:
npm install Nightwatch
Next, need to add to your project Selenium server and drivers for browsers, for example in the new lib folder. Nowadays in versions 0.9.x there are problems with starting Selenium server versions 3.10+ which developers promise to fix in Nightwatch version 1.0.6. So you need to find Selenium server 3.9.1 and download it.
For all browsers in which you want to run tests, you need to download drivers which match browsers versions. There are some of them: ChromeDriver, GeckoDriver for Firefox, MicrosoftWebDriver for Edge
Configuration
For Windows, you need to create nightwatch.js in the root folder and write in this file path to runner.js, file which required for start nightwatch process, by default you need to add to this file
require('./node_modules/nightwatch/bin/runner');
For macOS and Linux this is not required.
Next, you need to create configuration file nightwatch.json. It should be placed in the project’s root folder because it specifies various configuration settings like test environments, test file paths, and selenium specific settings. This is what the configuration file looks like:
{
    "src_folders": ["tests"],
    "output_folder": "reports",
    "custom_commands_path": "",
    "custom_assertions_path": "",
    "page_objects_path": "",
    "globals_path": "",

    "selenium": {
        "start_process": true,
        "server_path": "./lib/selenium-server-standalone-3.9.1.jar",
        "log_path": "./reports",
        "host": "127.0.0.1",
        "port": 4445,
        "cli_args": {
            "webdriver.chrome.driver": "./lib/drivers/chromedriver.exe",
            "webdriver.gecko.driver": "./lib/drivers/geckodriver.exe",
            "webdriver.edge.driver": "./lib/drivers/MicrosoftWebDriver.exe"
        }
    },

    "test_settings": {
        "default": {
            "launch_url": "http://localhost",
            "selenium_port": 4445,
            "selenium_host": "localhost",
            "silent": true,
            "screenshots": {
                "enabled": true,
                "path": "./reports/screenshots"
            },
            "desiredCapabilities": {
                "browserName": "chrome",
                "marionette": true,
                "javascriptEnabled": true,
                "acceptSslCerts": true
            }
        },
"chrome": {
            "desiredCapabilities": {
                "browserName": "chrome"
            }
        },

        "firefox": {
            "desiredCapabilities": {
                "browserName": "firefox"
            }
        },

        "edge": {
            "desiredCapabilities": {
                "browserName": "MicrosoftEdge"
            }
        }
    }
}
Here is a brief description of the parameters of the nightwatch.json file:
- src_folders: An array of folders (excluding subfolders) where the tests are located.
- output_folder: The location where the JUnit XML report files (XML reports, selenium log and screenshots) will be saved.
- page_objects_path: Location(s) where page object files will be loaded from
- globals_path: Location of an external globals module which will be loaded and made available to the test as a property globals on the main client instance. Globals can also be defined/overwritten inside a test_settings environment.
- Selenium: An object containing Selenium Server related configuration options. For us, it’s important to set the start_process parameter to true because in this case, Selenium Server will start automatically. Also for the server_path and webdriver paths required to set proper folder specified.
- test_settings: This object contains all the test related options. The important part of the default settings is the desiredCapabilities object where we specify chrome as the default browser so Nightwatch will run tests with this browser by default.
Testing
Now you can run your tests. Let`s try with a simple example:
module.exports = {
    'Bing search test' : function (client) {
        client
            .url('http://www.bing.com')
            .waitForElementVisible('body', 1000)
            .assert.title('Bing')
            .waitForElementVisible('#sb_form_q', 1000)
            .setValue('#sb_form_q', 'nightwatch.js')
            .submitForm('#sb_form_q')
            .pause(1000)
            .assert.containsText('#b_results > li:nth-child(1) > h2', 'Nightwatch.js | Node.js powered End-to-End testing …')
            .click('#b_results > li:nth-child(1) > h2')
            .assert.title('Nightwatch.js | Node.js powered End-to-End testing framework')
            .end();
    }
};
This test:
- Navigate to Bing page
- Assert that you in the properly page
- Enter “nightwatch.js” to the search field and click the search button
- Assert that first search result is Nightwatch page and navigate to this page
- Assert that page load properly
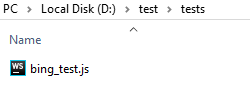
You may save this test to the tests folder
To run this test, you need to enter a command from root folder:
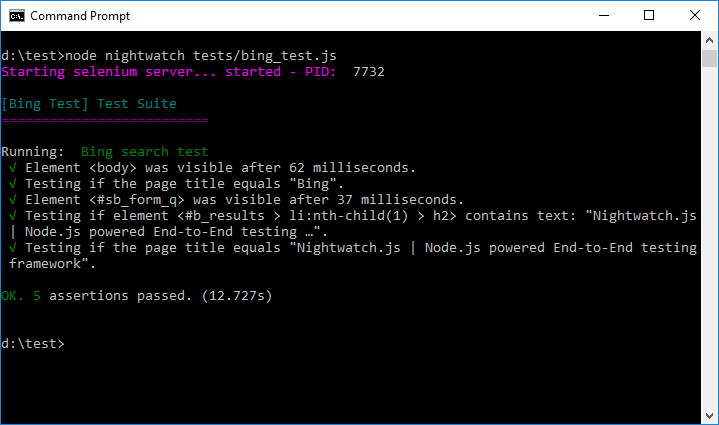
node nightwatch tests/bing_test.js
If you made all steps properly, you would see that Google Chrome browser start and test run. In the console you will see such result:
To run the test in other browser or with other capabilities, you need to add in the end of the command–e capability_name, for example:
node nightwatch tests/first_test.js -e edge
To run all test located in the folder you need enter the only path to this folder, without tests names, for example:
node nightwatch tests/bing_tests/
Conclusions
By using this tutorial, you have learned how to install and configure NightwatchJS and run tests written using this framework.
Now you can learn Nightwatch API and write your tests. If you need to develop more complex automation tests, you can contact the software testing company Testmatick.

