Selenium Python Tutorial For Beginners
Earlier we have learned Selenium using Java and in this post, we will learn Selenium Python.
Most of the companies looking for automation testers who have knowledge in Selenium WebDriver using Python.
In this Selenium Python tutorial, you will learn the following
I hope at the end of this tutorial, you will be able to write and execute Selenium test scripts using Python Programming language in different web browsers.
Most newcomers to automation testing ask me this question “Why choose Python over Java in Selenium”. Selenium with Java is popular in the market but to say in favor of Python Webdriver over Java are.
1. Learning Python is easy compared to Java.
2. Python codes are shorter compared to Java.
3. Python is more productive compared to Java because codes can be written in fewer lines.
How To Install Python:
Let’s see the installation of Python.
The following steps need to be followed for the configuring Python and Selenium in our machine:
Step 1: The python.exe file has to be obtained from the official site:
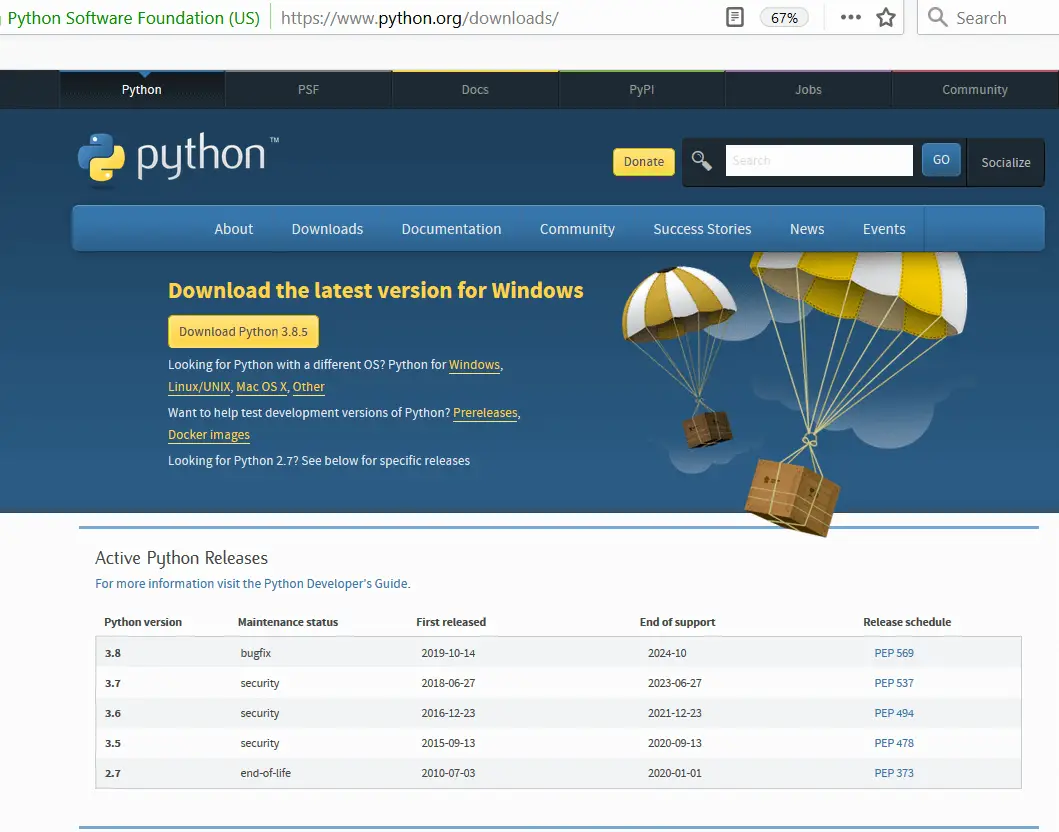
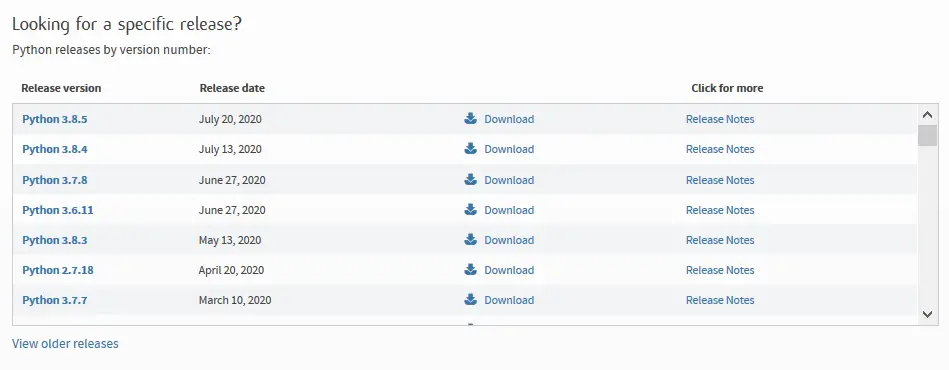
Then click on the Download Python button. The python executable file gets downloaded with its latest version. If we are looking for a specific python version, then that will also be available on their official website.
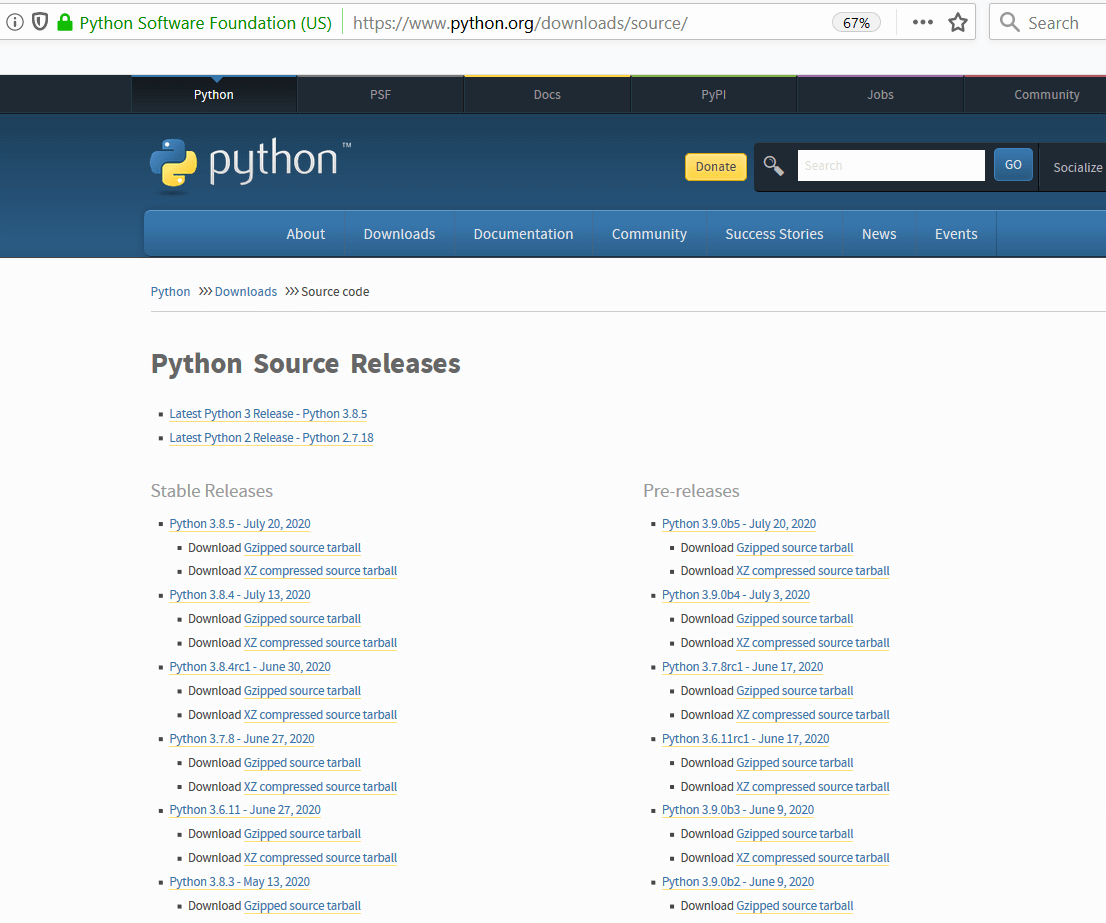
If we are on other operating systems like Linux / UNIX, MAC, and so on, we should click on that specific link and the corresponding page should be navigated. For example for Linux / UNIX user, we are redirected to that specific page:
Step 2: Once the .exe file gets downloaded, we need to proceed with the next steps until the installation is completed. Then we can move to the location where the python got installed and check it.
Generally the path:
C:\Users\<<Userlogged>>\AppData\Local\Programs\Python\<<Python-version>>
Step 3: For the Windows users only, we have to set the path of System Environmental variables. Here we have to add the location of the Python folder [path where it got installed in our local system]. Also, there will be a Scripts folder inside the main Python folder. We have to set that path as well in System Environmental variables.
Step 4: To verify that Python has been successfully installed, we need to run the command: python –version
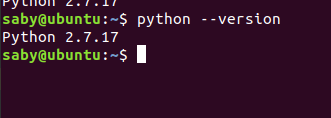
In case, the proper installation has not happened, error messages shall be displayed.
Step 5: Next we have to install Selenium bindings in our system. This will be achieved with the help of PIP Python has a package manager which helps to install and configure the required packages which are not included in the Python library.
Step 6: We will visit the site: https://pypi.org/project/selenium/ for getting all the necessary resources for setting up Selenium with Python in our system.
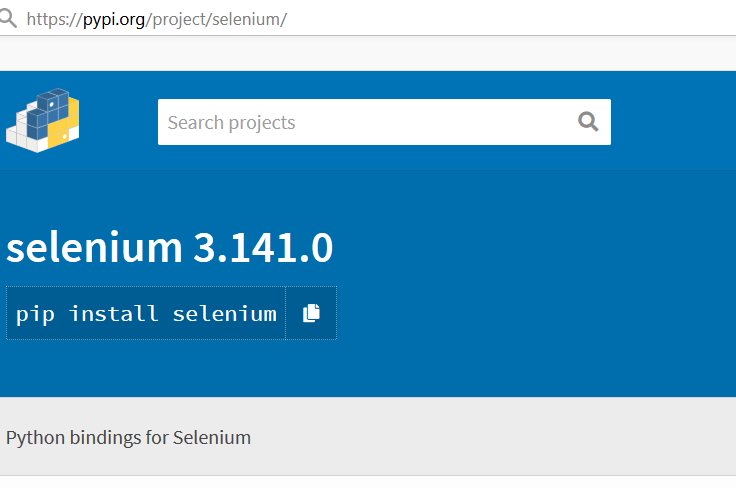
Step 7: As suggested by the official web site of Python, we need to run the command pip install selenium from the command prompt. We can now find a selenium folder created inside the Python folder. [Python ->Lib ->site-packages].
Step 8: If we want to upgrade the present version of the package, we need to run the command pip install -U selenium from the command prompt. To confirm if Selenium has installed successfully, we need to run the command pip show Selenium. If there are multiple versions of Python in our system, we need to run the command pip3 show Selenium. This will display all the information like version, location and so on.

Step 9: Finally we shall download the PyCharm editor [developed by JetBrain] in our system to code for our automation. The link to download from is :
There are both licensed [Professional] and free [Community] versions of PyCharm available. For our testing purpose, the Community version is sufficient.
Step 10: After installation of PyCharm, we need to create a new project from File -> New Project -> <<Provide the name of project>>. Then click on the Create While creating the project we shall select Virtualenv for the New Environment Using field. Also, we have to select a Basic interpreter. Here we should select the latest Python interpreter available in our system.
Next, we have to create a new Python package by selecting the Project that we created and finally a Python file inside the package.
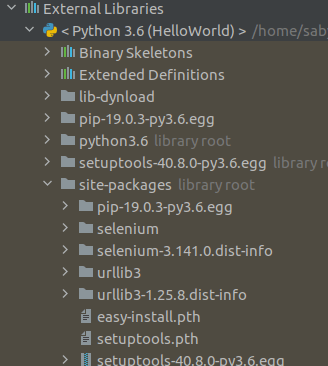
To verify if the Selenium packages are available in our project, let’s open the External Libraries folder. Then if we move to the site-packages folder, we shall find selenium libraries are added. The other Python libraries shall also be present there.
How to run tests in various browsers in Selenium Python?
Selenium allows a wide range of browsers like Chrome, Firefox, Internet Explorer, and Safari, and so on for automation testing. For testing any application, we need to open a browser explicitly as Selenium does not have the ability to continue working on the already opened browser.
For running tests in the Chrome browser, we need to download the chromdriver.exe file from https://www.selenium.dev/ and save it on a location. In Python, we have to import the WebDriver library to our code with help from selenium import webdriver statement to launch the Chrome browser.
Then we have to create a driver instance. It shall contain the webdriver.Chrome () where we have to specify the location of the chromedriver.exe file. This is done by setting up the executable_path property to the Chrome class constructor.
Code Implementation to launch the Chrome browser.
from selenium import webdriver

# setting the property for chromedriver.exe

driver = webdriver.Chrome (executable_path="C:\\chromedriver.exe")

# get method for launching the application

driver.get("https://www.softwaretestingmaterial.com/")
For running tests in the Firefox browser, we need to download the geckodriver.exe file from https://www.selenium.dev/ and save it on a location. In Python, we have to import the WebDriver library to our code with help from selenium import webdriver statement to launch the Firefox browser.
Then we have to create a driver instance. It shall contain the webdriver.Firefox () where we have to specify the location of the geckodriver.exe file. This is done by setting up the executable_path property to the Firefox class constructor.
Code Implementation to launch the Firefox browser.
from selenium import webdriver

# setting the property for geckodriver.exe

driver = webdriver.Firefox (executable_path="C:\\geckodriver.exe")

# get method for launching the application

driver.get("https://www.softwaretestingmaterial.com/")
For running tests in the Internet Explorer browser, we need to download the IEDriverServer.exe file from https://www.selenium.dev/ and save it on a location. In Python, we have to import the WebDriver library to our code with help from selenium import webdriver statement to launch the Internet Explorer browser.
Then we have to create a driver instance. It shall contain the webdriver.Ie() where we have to specify the location of the IEDriverServer.exe file. This is done by setting up the executable_path property to the Ie class constructor.
Code Implementation to launch the Internet Explorer browser.
from selenium import webdriver

# setting the property for IEDriverServer.exe

driver = webdriver.Ie (executable_path="C:\\IEDriverServer.exe")

# get method for launching the application

driver.get("https://www.softwaretestingmaterial.com/")
Basic WebDriver commands in Selenium Python
Let us discuss some of the common web driver commands used in Selenium Python.
get() – This command is used for launching an application. This command will execute until the page load is complete. Then the program flow moves to the next step of test execution.
from selenium import webdriver

# setting the property for chromedriver.exe

driver = webdriver.Chrome (executable_path="C:\\chromedriver.exe")

# get method for launching the application

driver.get("https://www.softwaretestingmaterial.com/")
current_url() – This command is used to fetch the URL of the application which is currently opened in the browser.
from selenium import webdriver

# setting the property for chromedriver.exe

driver = webdriver.Chrome (executable_path="C:\\chromedriver.exe")

# get method for launching the application

driver.get("https://www.softwaretestingmaterial.com/")

# get current address of the application

print ("Page Url is : " + driver.current_url)
title () – This command is used to fetch the title of the application which is currently opened in the browser.
from selenium import webdriver

# setting the property for chromedriver.exe

driver = webdriver.Chrome (executable_path="C:\\chromedriver.exe")

# get method for launching the application

driver.get("https://www.softwaretestingmaterial.com/")

# get current address of the application

print ("Page Url is : " + driver.current_url)

# get current title of the application

print ("Page title is : " + driver.title)
back() – This method is used to navigate back to the previously visited page and works only if we moved from one page to another page.
from selenium import webdriver
# setting the property for chromedriver.exe
driver = webdriver.Chrome (executable_path="C:\\chromedriver.exe")
# get method for launching the application
driver.get ("https://www.softwaretestingmaterial.com/")
# get current address of the application
print("First Page Url is : " + driver.current_url)
driver.get ("https://www.softwaretestingmaterial.com/")
# get current address of the application
print ("Second Page Url is : " + driver.current_url)
# move back to the other page
driver.back ()
# get current address of the application
print ("Page Url after back : " + driver.current_url)
forward () – This method is used to navigate forward from a previously visited page and works only if back() is used prior to its used.
from selenium import webdriver
# setting the property for chromedriver.exe
driver = webdriver.Chrome (executable_path="C:\\chromedriver.exe")
# get method for launching the application
driver.get ("https://www.softwaretestingmaterial.com/")
# get current address of the application
print ("First Page Url is : " + driver.current_url)
driver.get ("https://www.softwaretestingmaterial.com/")
# get current address of the application
print ("Second Page Url is : " + driver.current_url)
# move back to the other page
driver.back ()
# get current address of the application
print ("Page Url after back : " + driver.current_url)
# move forward
driver.forward ()
# get current address of the application
print ("Page Url after forward : " + driver.current_url)
refresh () – This method is used to reload the existing page and refreshes it.
from selenium import webdriver
# setting the property for chromedriver.exe
driver = webdriver.Chrome (executable_path="C:\\chromedriver.exe")
# get method for launching the application
driver.get ("https://www.softwaretestingmaterial.com/")
# get current address of the application
print ("Page Url is : " + driver.current_url)
# refresh the page
driver.refresh ()
# get current address of the application
print ("Page Url after refresh is : " + driver.current_url)
maximize_window () – This method is used to maximize the window of an existing page. Some applications open in a maximized window by default, applying maximize_window () method on them shall not have any impact on them
from selenium import webdriver
# setting the property for chromedriver.exe
driver = webdriver.Chrome (executable_path="C:\\chromedriver.exe")
# get method for launching the application
driver.get ("https://www.softwaretestingmaterial.com/")
# maximize the window of browser
driver.maximize_window ()
minimize_window () – This method is used to minimize the window of the existing page. Some applications open in minimized windows by default, applying minimize_window () method on them shall not have any impact on them.
from selenium import webdriver
# setting the property for chromedriver.exe
driver = webdriver.Chrome (executable_path="C:\\chromedriver.exe")
# get method for launching the application
driver.get ("https://www.softwaretestingmaterial.com/")
# minimize the window of browser
driver.minimize_window ()
close () – This method is used to close the window in focus. Suppose there are two open windows, the second window is active currently, close () method if applied shall close only the second window where Selenium has the control.
from selenium import webdriver
# setting the property for chromedriver.exe
driver = webdriver.Chrome (executable_path="C:\\chromedriver.exe")
# get method for launching the application
driver.get ("https://www.softwaretestingmaterial.com/")
# close the browser
driver.close ()
quit () – This method is used to close all the windows opened. Suppose there are two opened windows, the second window is active currently, quit () method if applied shall close all the driver sessions.
from selenium import webdriver
# setting the property for chromedriver.exe
driver = webdriver.Chrome (executable_path="C:\\chromedriver.exe")
# get method for launching the application
driver.get ("https://www.softwaretestingmaterial.com/")
# quit the browser
driver.quit ()
Advanced Selenium WebDriver Python Tutorial
We have also covered advanced topics of Selenium with Python. We will update the following topics along with advanced topics in the coming days. Bookmark this post to learn more.
- Locators in Selenium Python
- Handling checkbox, static dropdowns and other UI elements in Selenium Python
- Javascript Executor in Selenium Python
- Synchronization in Selenium Python
- Webelement commands in Selenium Python
- How To Handle Child Window, Frames, Alerts in Selenium Python
- How To Handle Mouse and Keyboard Interactions in Selenium Python
- Assertions in Selenium Python
- Exceptions in Selenium Python
- How To Handle Web Tables in Selenium Python
- How to Switch Between IFrames Using Selenium Python
- Handling cookies in Selenium Python
- Working with excel in Selenium Python
You can also check the official selenium python documentation here.
Related Posts:
- Selenium Interview Questions
- Python Interview Questions
- Java Interview Questions
- Framework Interview Questions
- How To Explain Framework In The Interview


