How to Download and Install Apache ANT | Software Testing Material
Step By Step Process – Install Apache Ant :
Install Apache Ant – Apache ANT is a Java library and command-line tool that help building software.
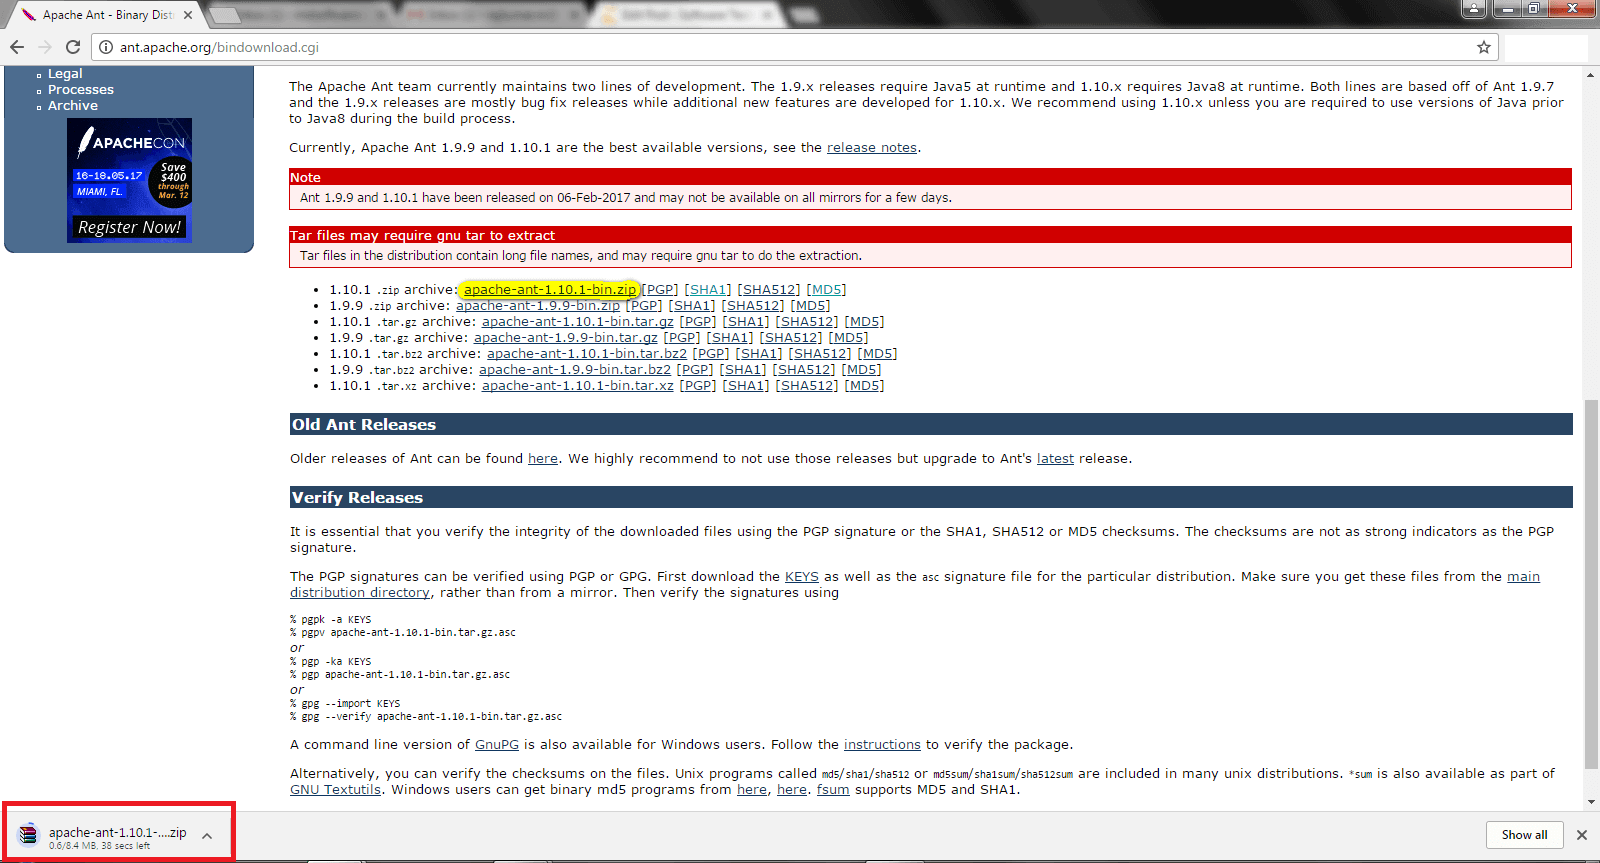
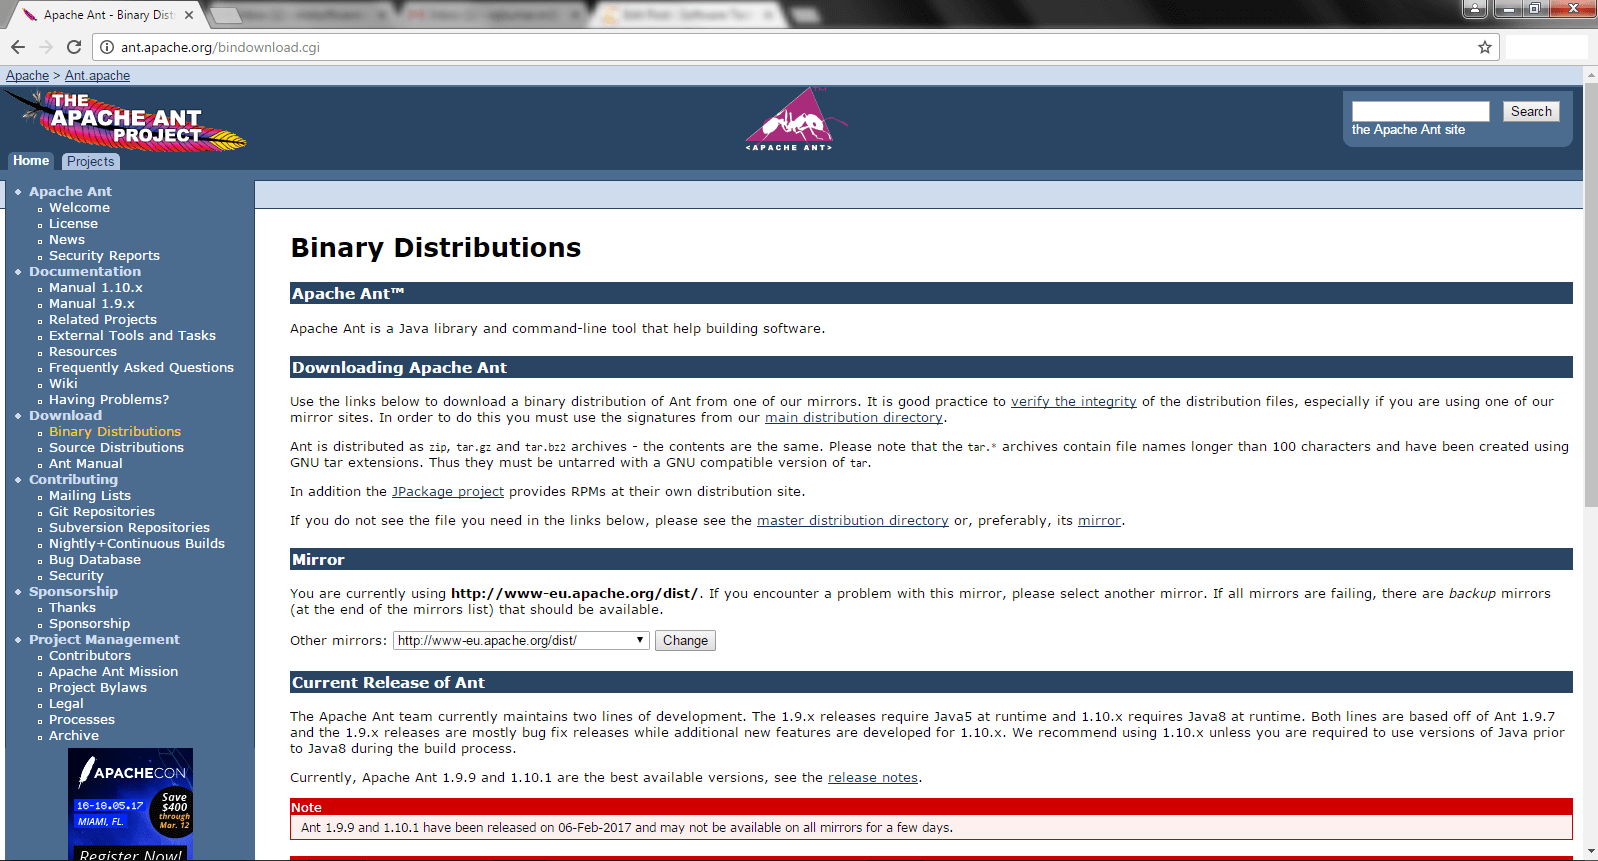
Step 1: Go to this URL – http://ant.apache.org/bindownload.cgi
Step 2: Download zip file named like apache-ant-1.10.1-bin.zip
Step 3: Extract the zip file into a directory structure of your choice.

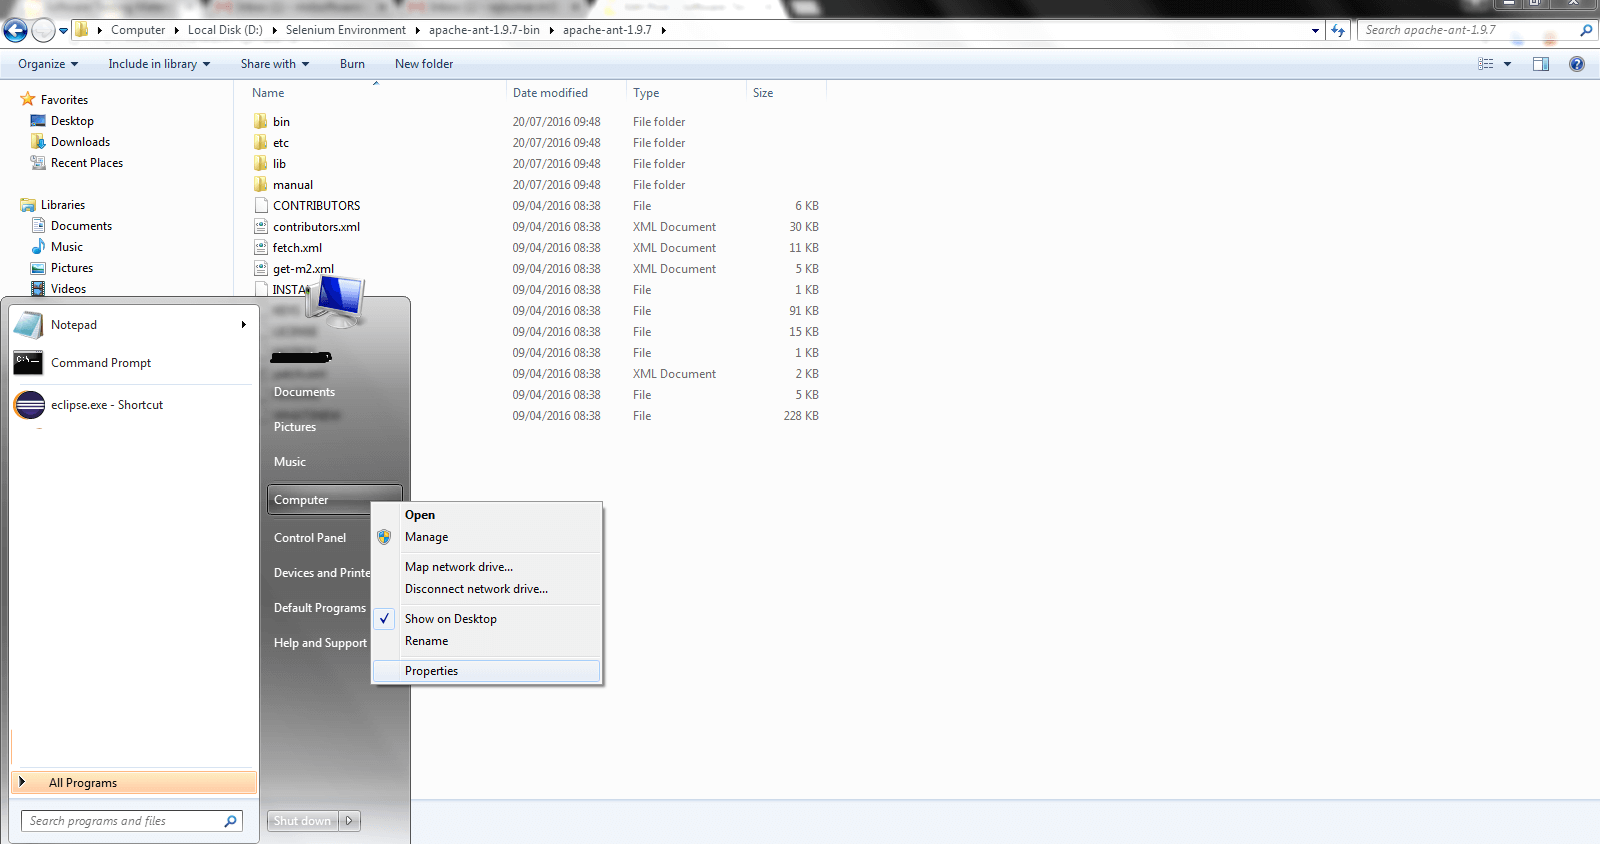
Step 4: Go to Computer – Properties – Advanced system settings
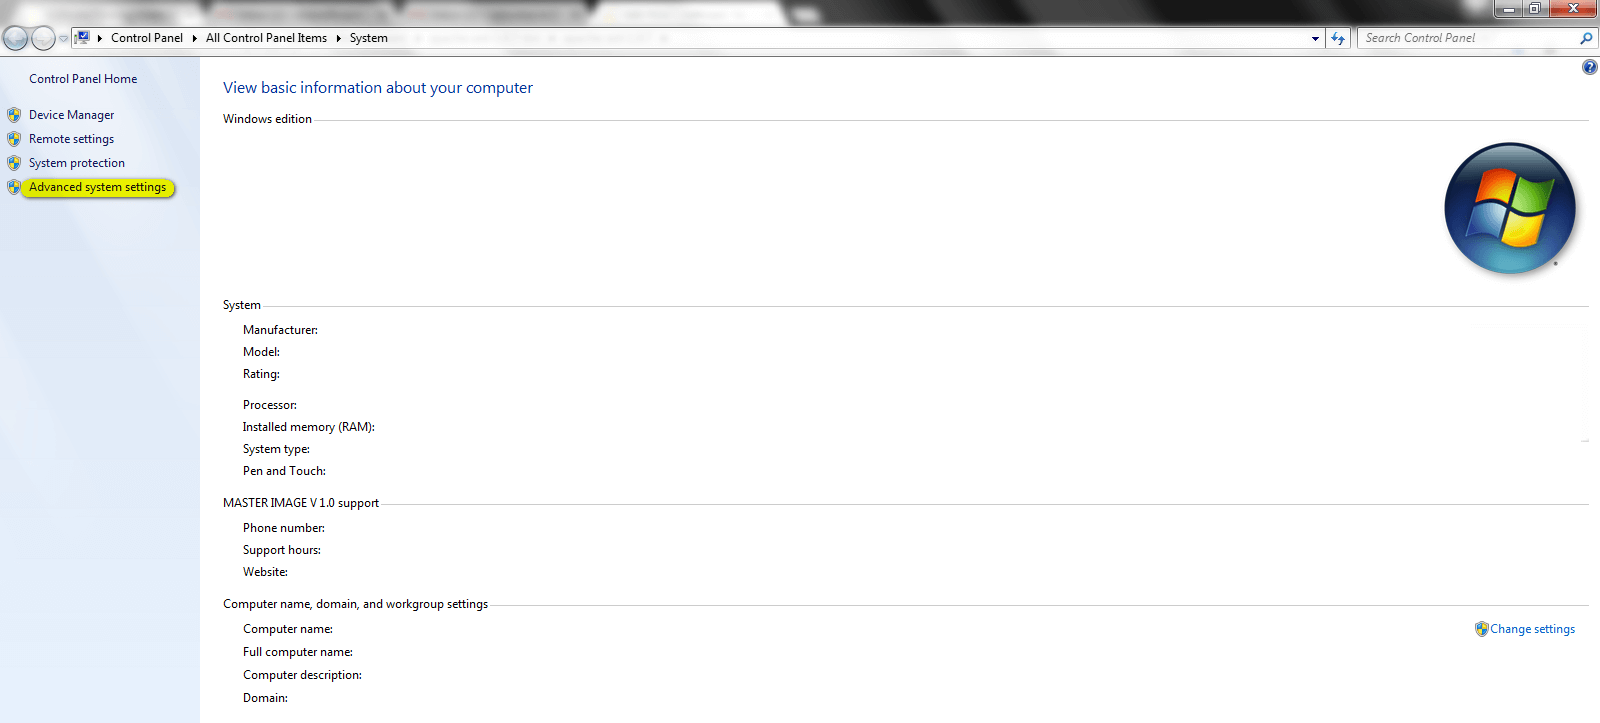
Step 5: A new window opens. Click on Environment Variables
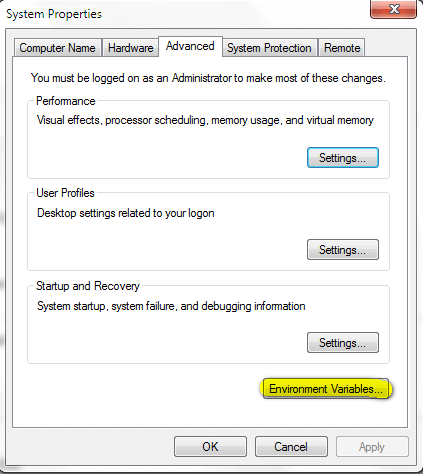
Step 6: Make sure JAVA_HOME is configured as Windows environment variable.
If it’s not set, Click ‘New…’ button and set variable name as ‘JAVA_HOME’ and variable value as the root path to JDK.
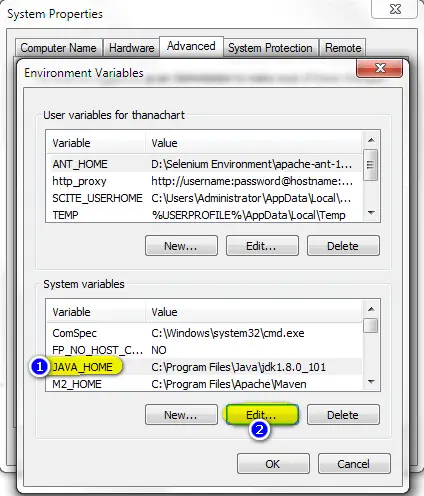
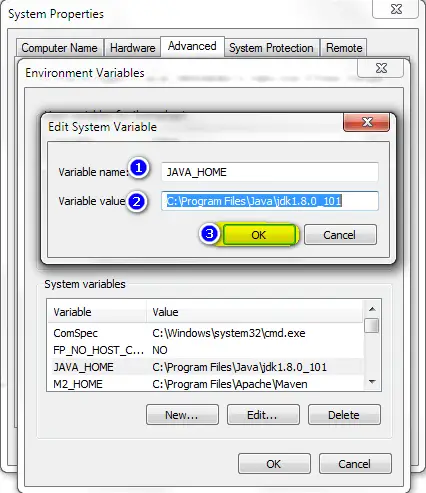
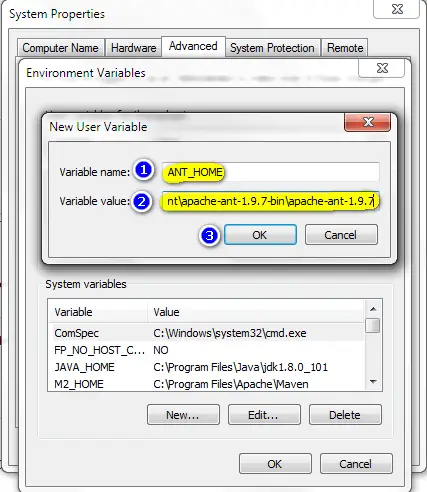
Step 7: Click ‘New…’ button and set variable name as ‘ANT_HOME’ and variable value as the root path to unzipped folder and click OK.
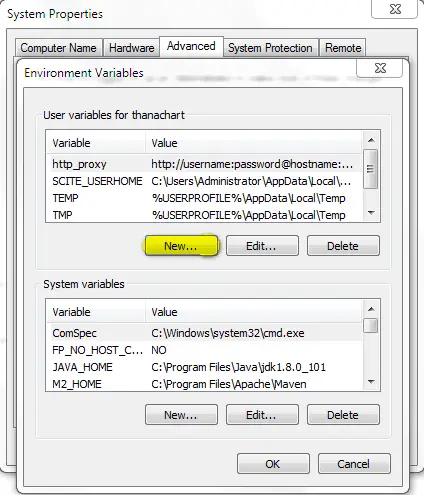
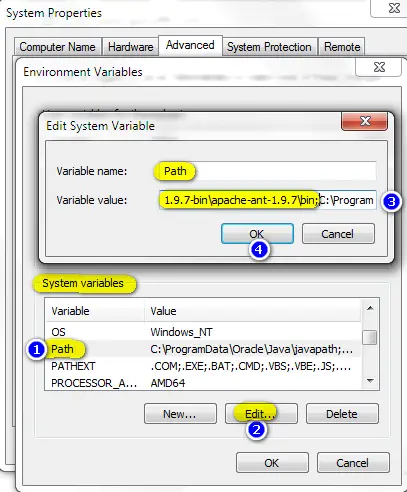
Step 8: Select ‘Path’ variable from the list and click ‘Edit’ and append ANT Path till bin folder
Step 9: Restart system one time and you are ready to use Ant build tool now.
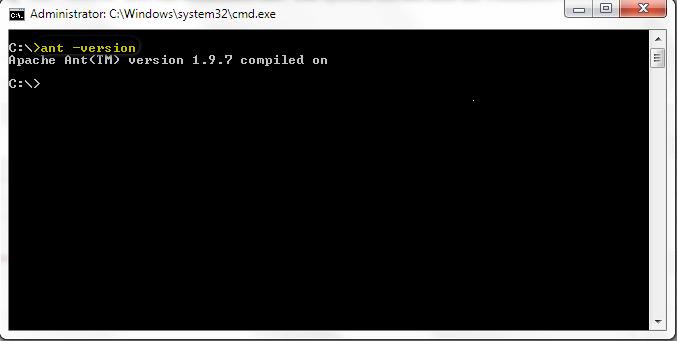
Step 10: To check the version of your Ant using command line: Open Command Prompt and type ‘ant -version‘ as shown below.
The system should find the command ant and show the version number of your installed ant.
If you are not regular reader of my blog then I highly recommend you to signup for the free email newsletter using the below link.

